Introduction
Welcome to the ConsignO Cloud User Guide
The purpose of this guide is to present the different features of our electronic signature platform.
In the left-hand column, you will find a list of the platform’s features as well as the colours of the plans that include each feature.
Click on the feature to begin.
Enjoy!

Basic features - All plans
Creating a signature project
Follow the steps below to create a signature project.
From the dashboard, click on New project.
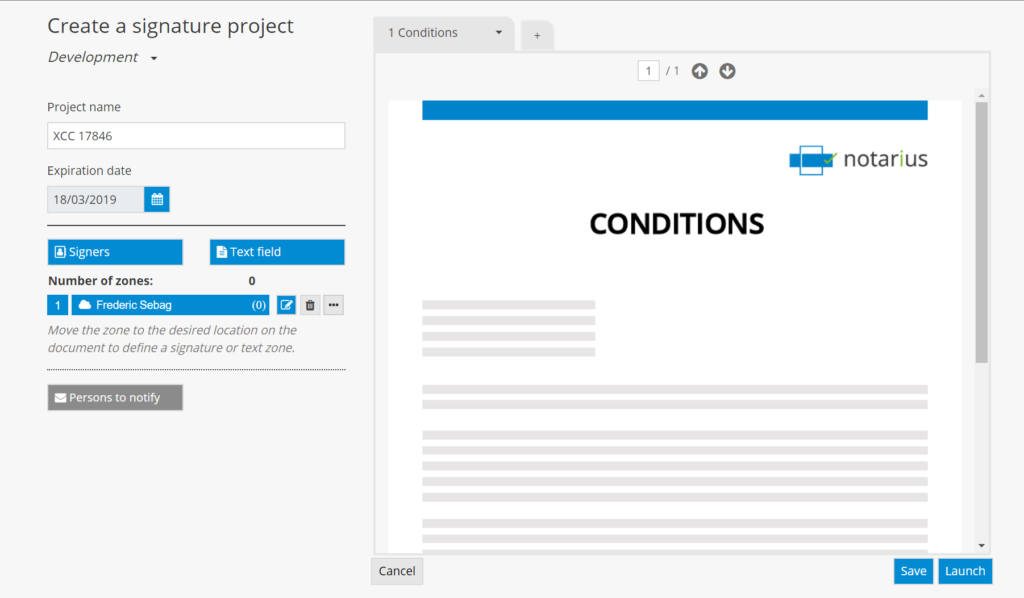
A page will open where you can create a signature project: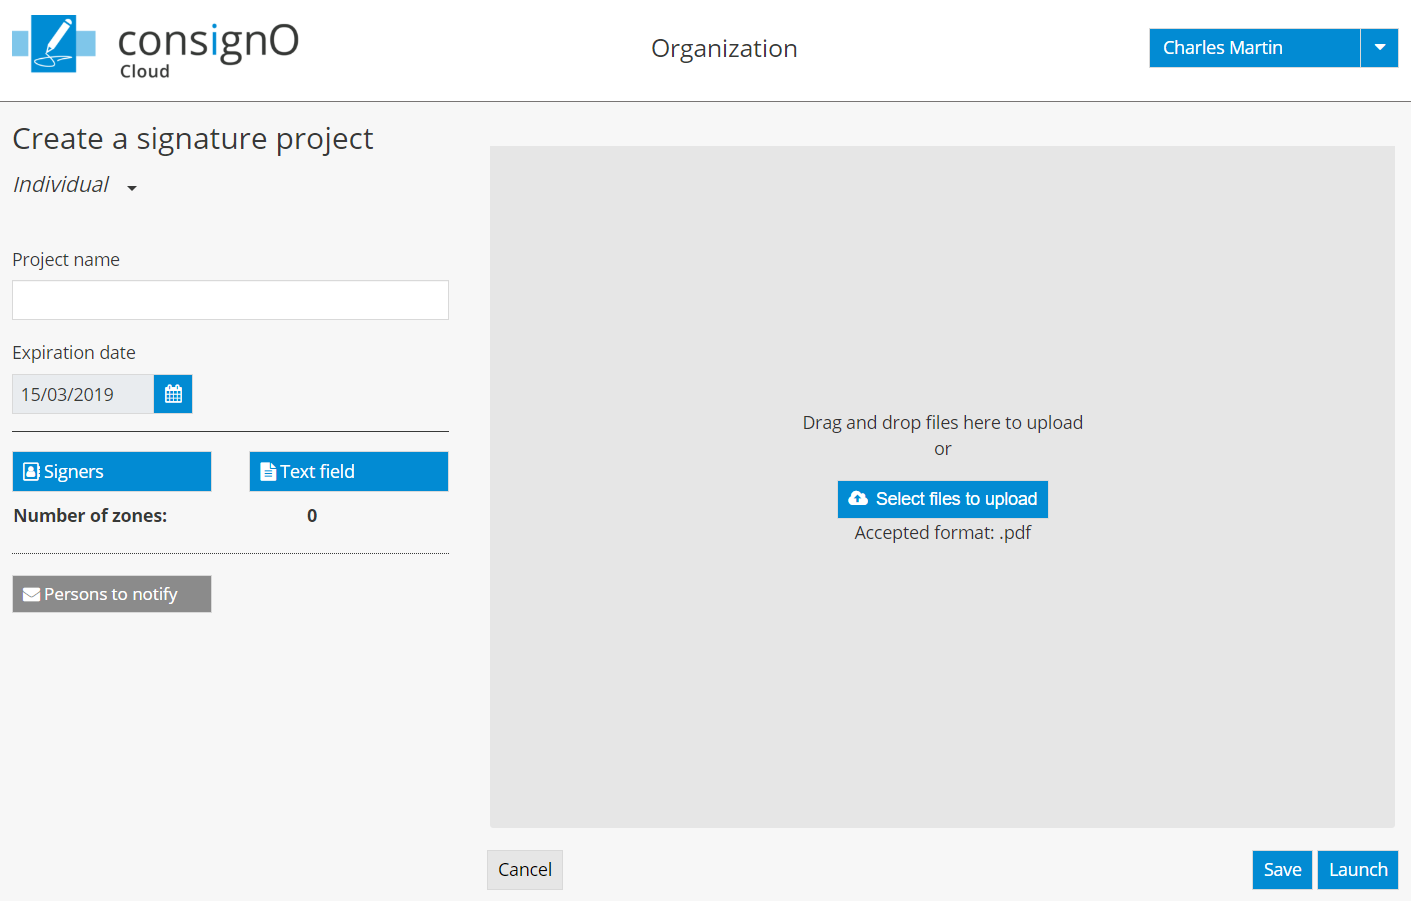
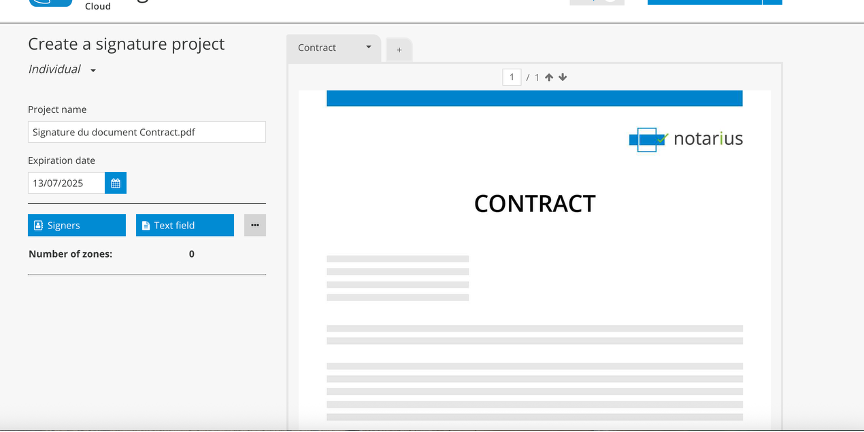
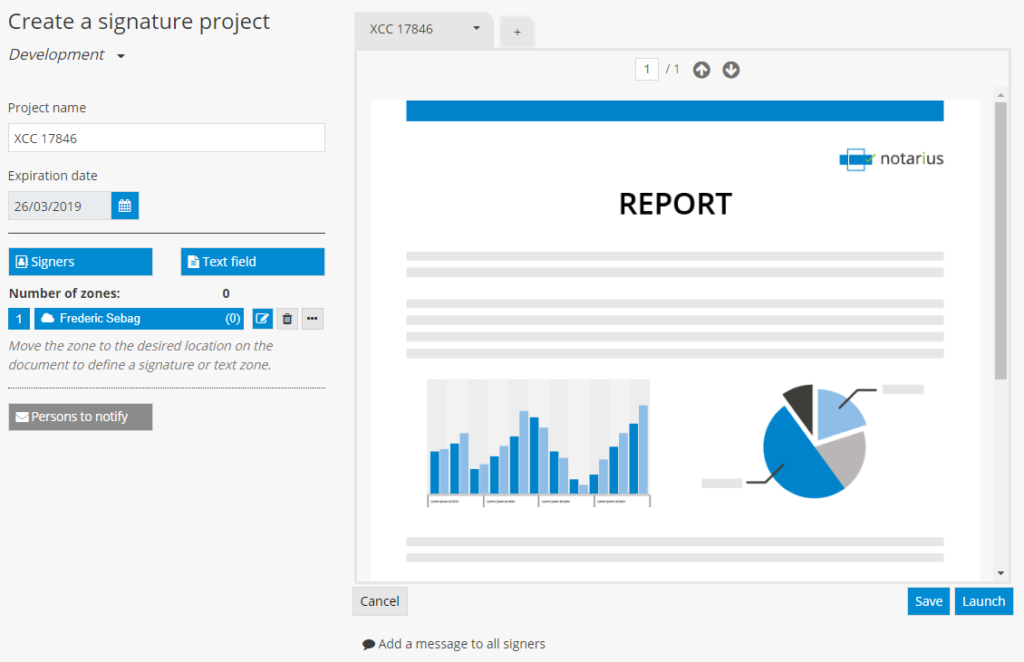
1- Configure the signature project
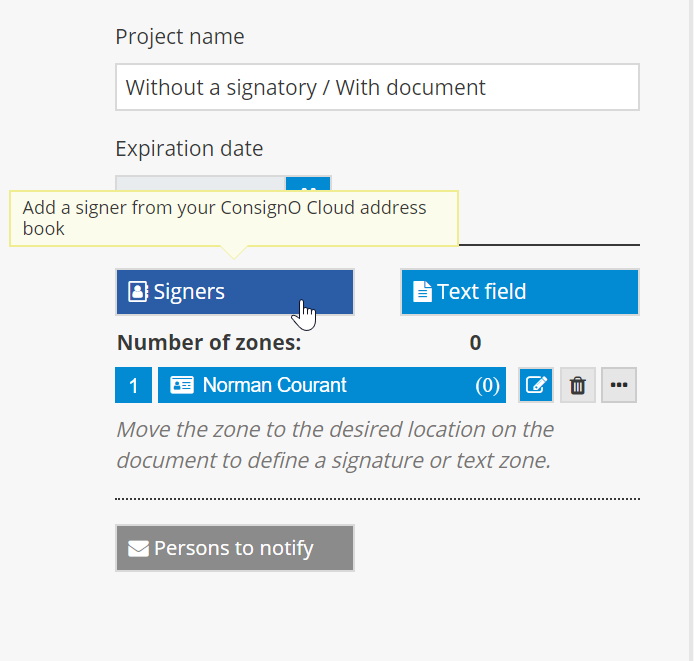
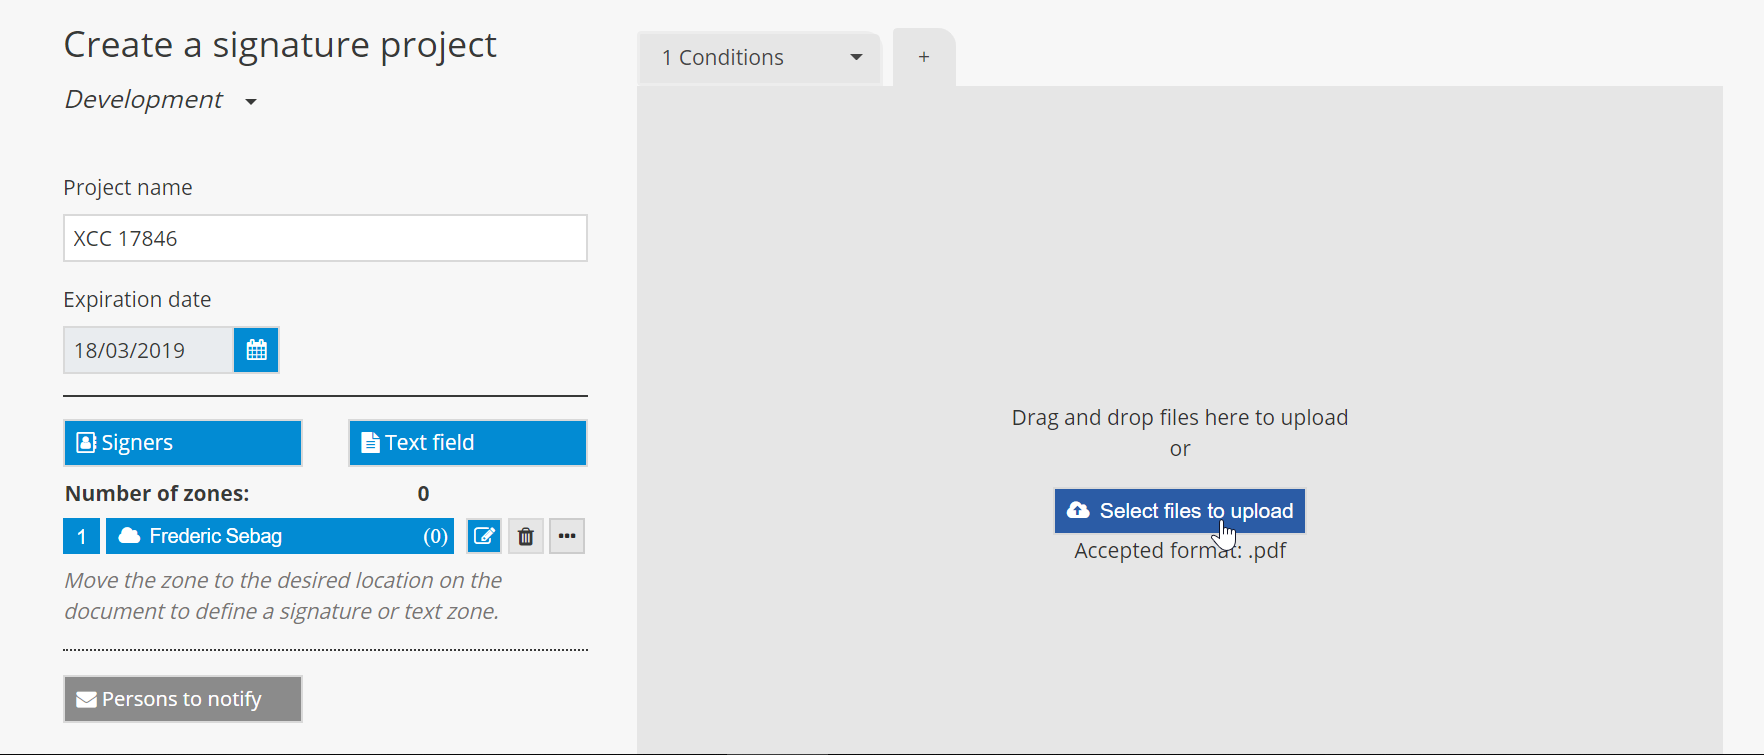
Give a name to your signature project by completing the field Project name. This is the name that will be sent to your signers and displayed in the dashboard.
![]() The name of the signature project does not have to be unique.
The name of the signature project does not have to be unique.
Assign an expiration date to the signature project.
![]() The expiration date is the deadline that is sent to the signers of the signature project. Once the expiration date has passed, the signature project can no longer be signed. However, the project manager can modify the expiration date of an expired project. Signers who missed their turn to sign will then be re-invited to sign. The default expiration date is set to 30 days following the project creation date.
The expiration date is the deadline that is sent to the signers of the signature project. Once the expiration date has passed, the signature project can no longer be signed. However, the project manager can modify the expiration date of an expired project. Signers who missed their turn to sign will then be re-invited to sign. The default expiration date is set to 30 days following the project creation date.
2- Upload the document to be signed
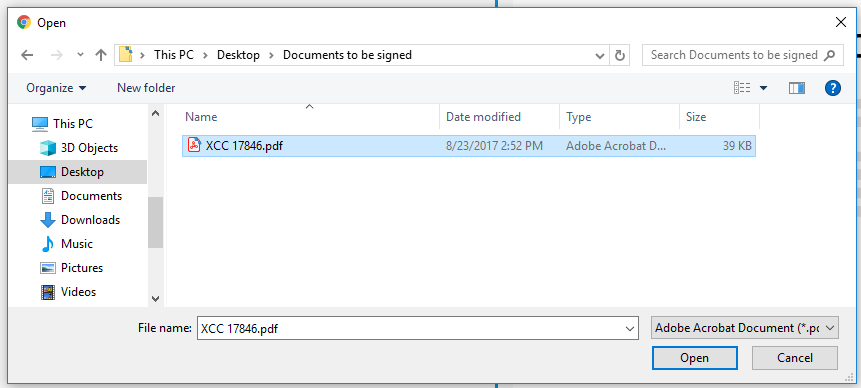
Upload the document to be signed by clicking on Select files to upload or by dragging and dropping the files in the grey zone.
Note: The platform only accepts PDF files.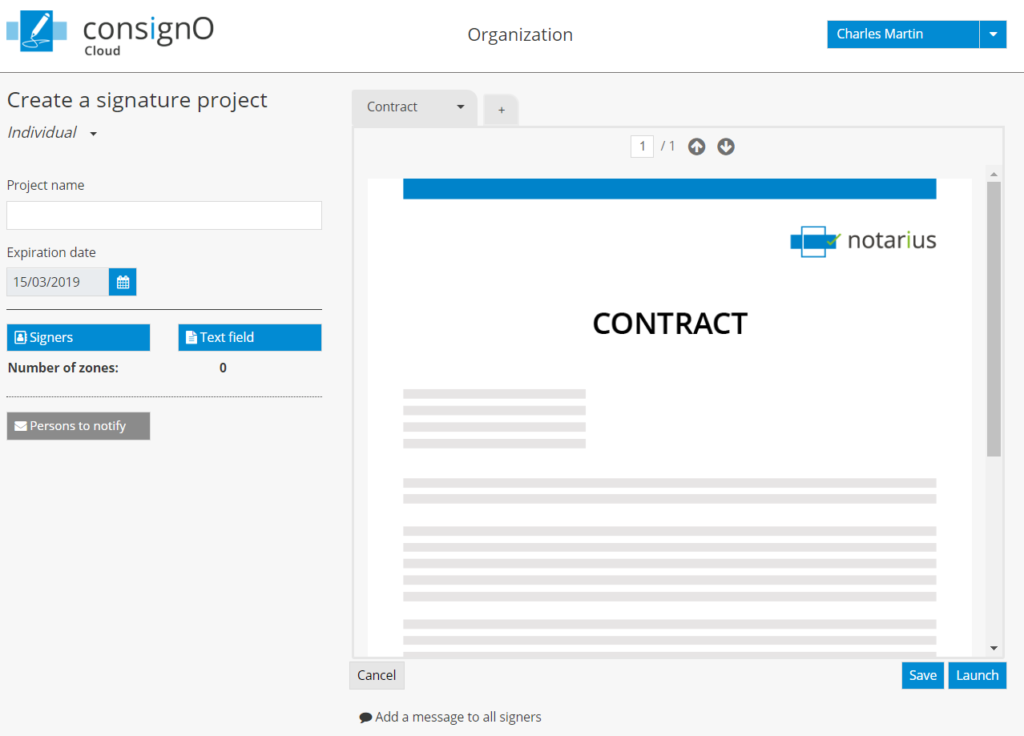
![]() You can delete documents by clicking on the trashcan icon located in the document tab. However, files cannot be deleted or replaced once the signature project has been launched.
You can delete documents by clicking on the trashcan icon located in the document tab. However, files cannot be deleted or replaced once the signature project has been launched.
3- Add signers to the signature project
Click on Signers to add a new signer or select the signer from your ConsignO Cloud address book.
To create a new signer, click on New signer.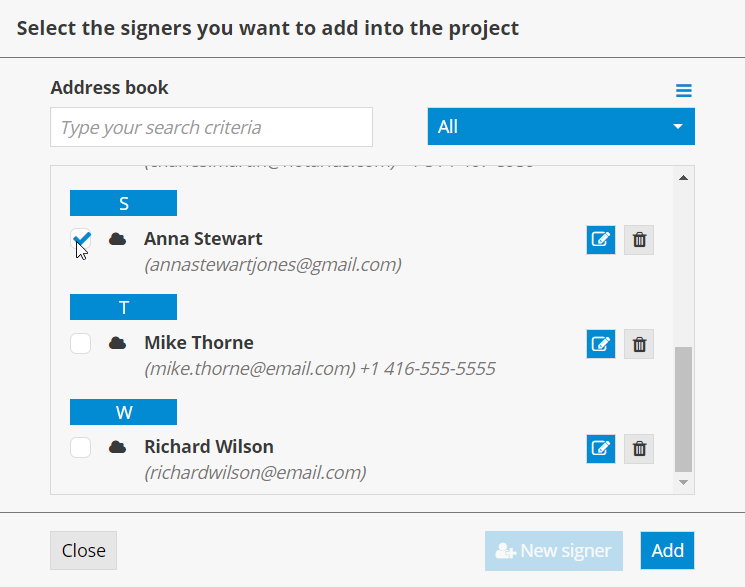
Once the signer has been selected, click on Add.
When you return to the signature project creation page, the selected signers will be displayed in the project participants zone.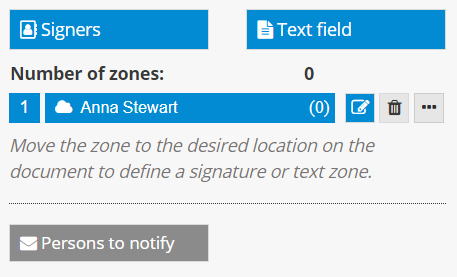
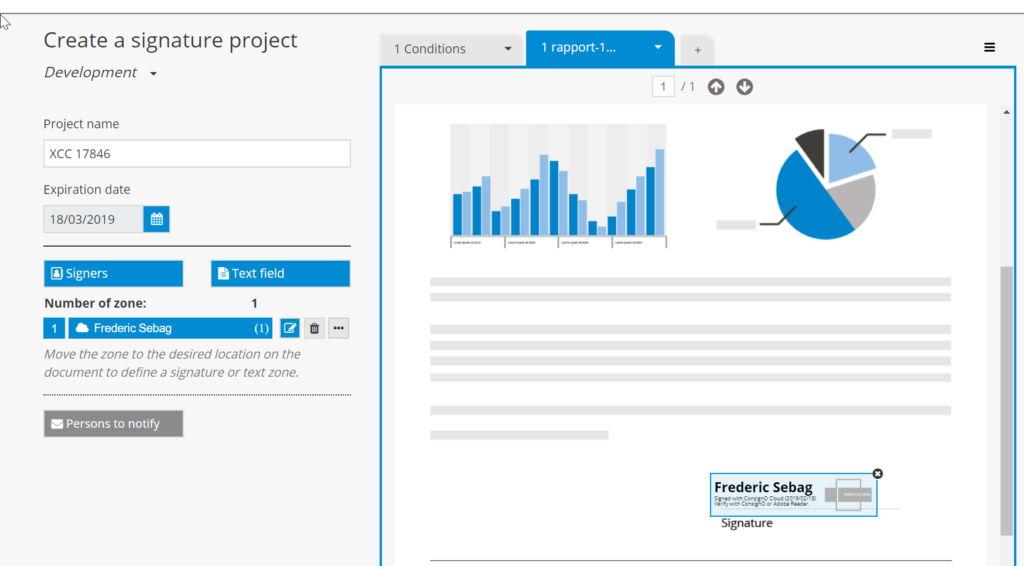
You must now determine where the signature zones for each signer will be displayed in your document.
To do so, first display the page where you would like to insert a signature zone by scrolling the document using your mouse or entering the page number.
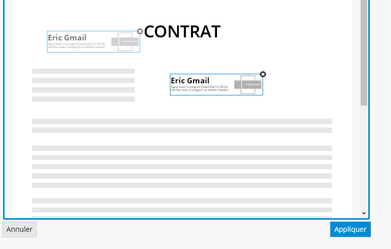
Then drag and drop the signature zone to the desired location (you must click on the signature zone, move it while holding the mouse button down and release the button when the signature zone is in the desired location on the document).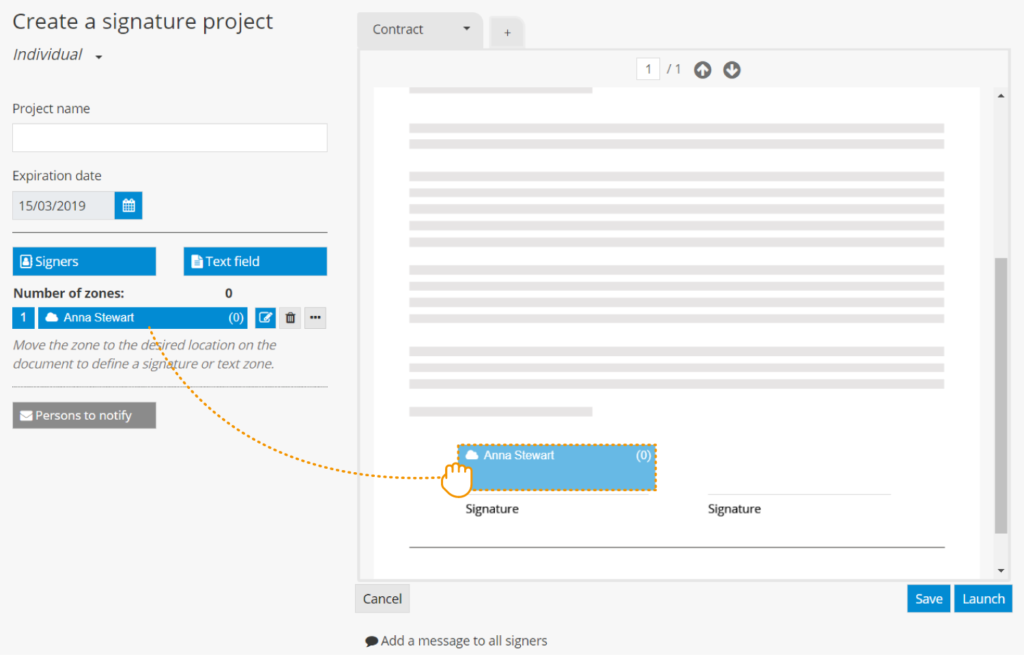
A preview of the signature zone will be displayed to indicate where the zone has been applied.
Note: A blue signature zone indicates that it is a zone to be signed.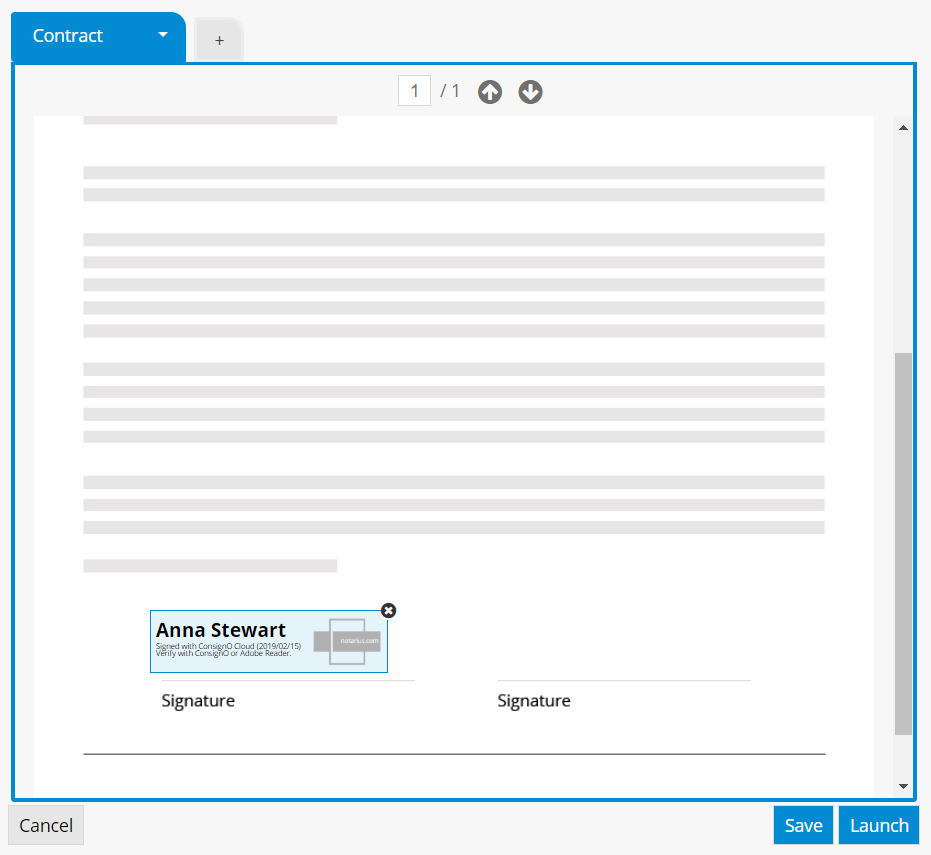
To move the signature zone, drag and drop it to the desired location (to do so, click on the signature zone, move it while holding the mouse button down and release the button when the signature zone is in the desired location on the document).
To remove the signature zone, simply click on “x.”
4- Launch the signature project
Once the project is ready to be sent, click on Launch.
The Terms of Use will be displayed. Click on “I have read, understood and agreed to these conditions” to launch the signature project. The signer(s) will then receive a notification inviting them to electronically sign the project that you have prepared.
![]() You will receive a notification each time a signer has signed the document and upon project completion.
You will receive a notification each time a signer has signed the document and upon project completion.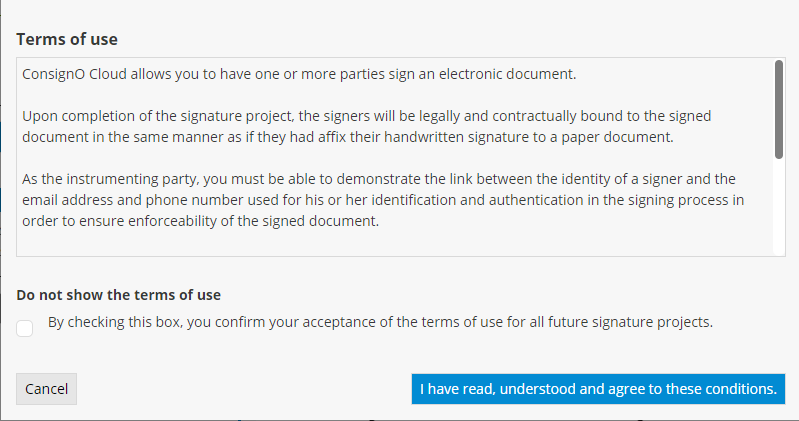
You can choose not to display the Terms of Use for future signature projects by checking the box designated for this purpose.
If you are not ready to launch your signature project, you can save it as a draft by clicking on Save. The signature project can then be accessed from the dashboard with the status of “Draft.”
*Default values may be different if your organization has set its own default values.
Managing the address book
Here we explain how to manage your address book.
Adding a signer to your address book
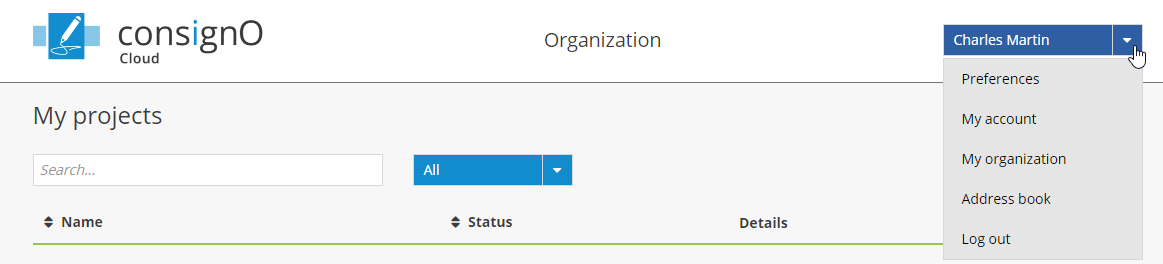
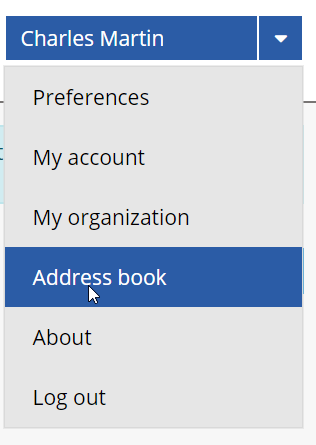
- In your dashboard, click on the arrow to the right of your name and select Address book in the dropdown menu
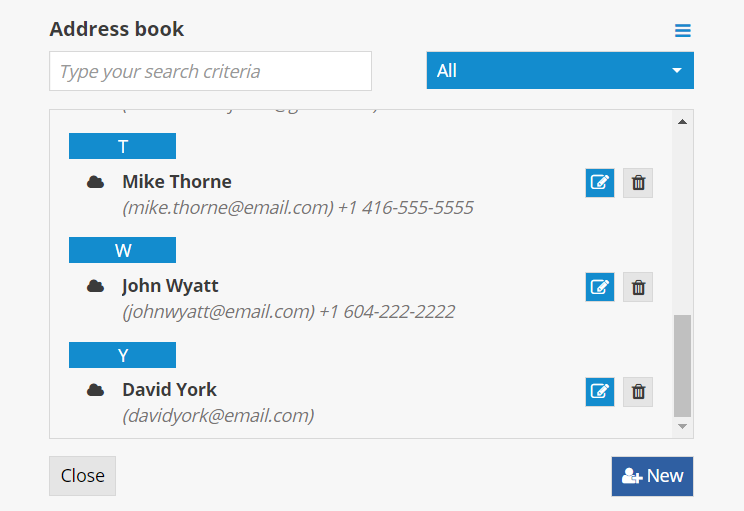
- Click on New to add a signer to your address book.
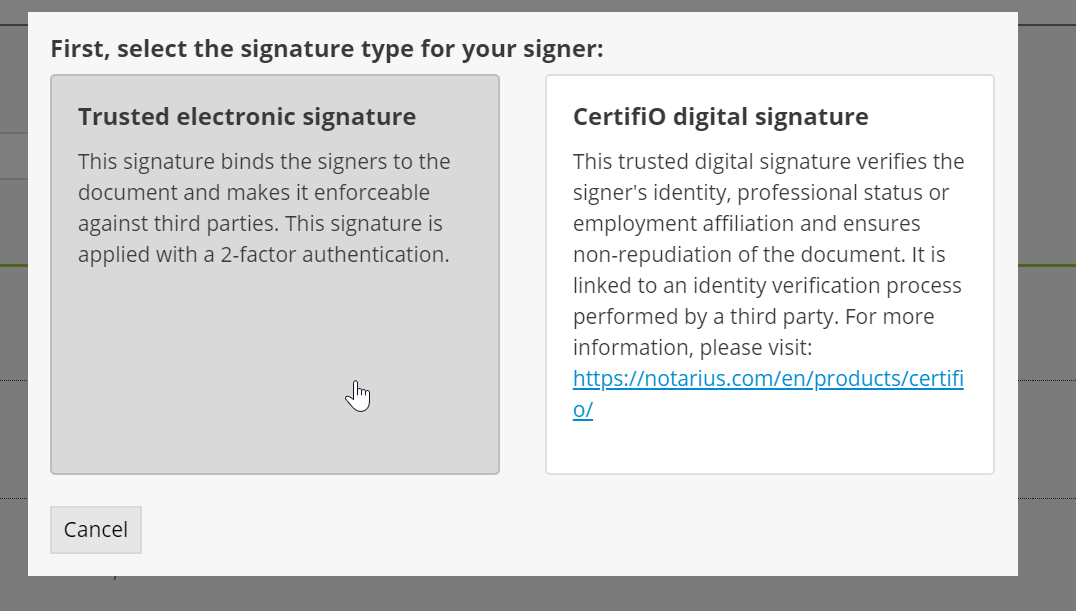
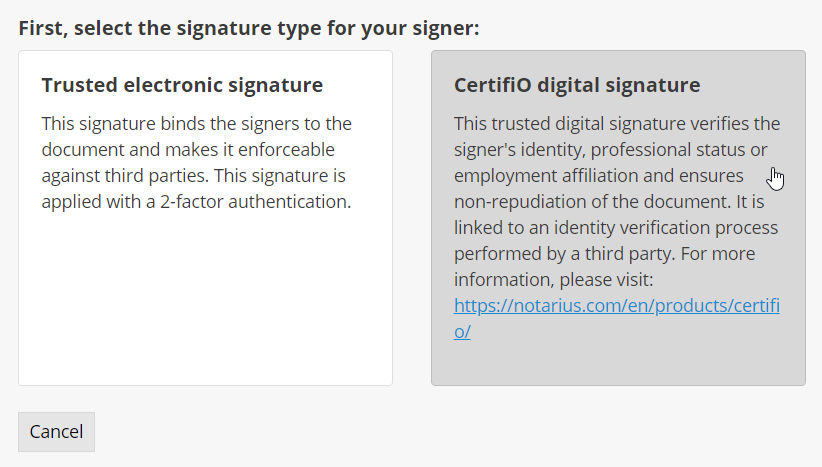
- Select the signer’s type of signature.
- Follow the steps below for a trusted electronic signature:
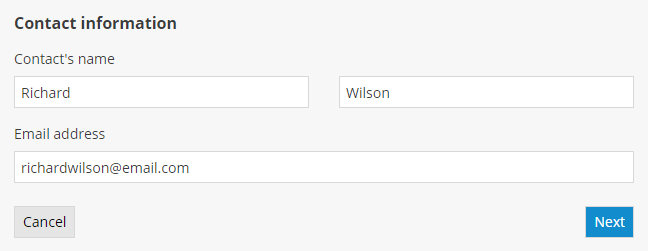
- Complete the fields with the signer’s information and click on Next.
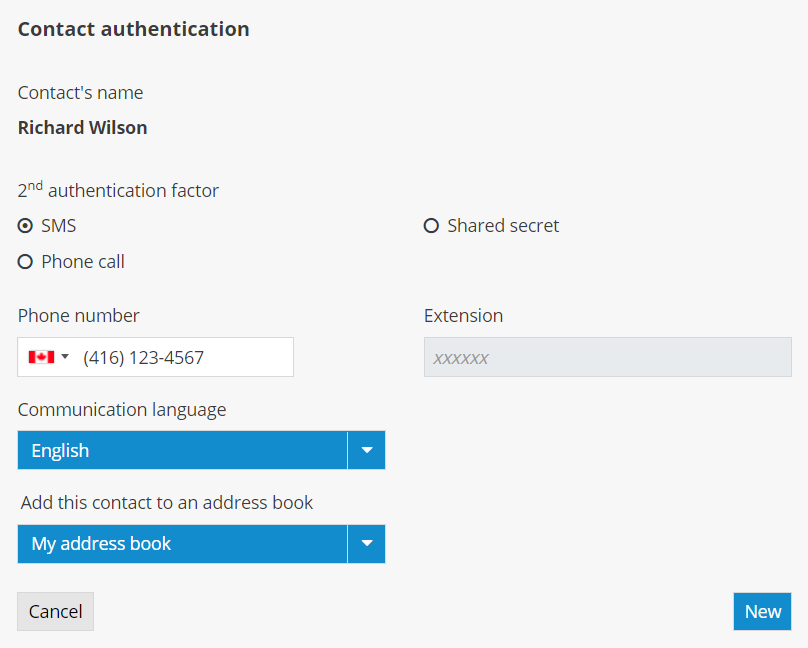
- Select the second authentication factor and the signer’s language of communication, then click on New.
The second authentication factor is used to increase the level of trust with regard to the signer’s identity. The signer will first receive an email inviting them to sign the document. When a signer clicks on the signature project link, they must enter the second authentication factor on the login page before they can access the document to be signed.
The three types of second authentication factors
- SMS: When the signer clicks on the signature project link, they will receive a text message with a code they must enter on the login page.
- Phone Call: When the signer clicks on the signature project link, they will receive a phone call (automated message) with a code they must enter on the login page.
- Shared Secret: The project manager must choose a secret question and answer that must be known by the signer. When the signer clicks on the signature project link, they must enter the response to the question on the login page.
- Complete the fields with the signer’s information and click on Next.
- Follow the steps below for a CertifiO digital signature:
- Complete the search fields with the signer’s information and click on Search.
 You do not need to complete all of the fields to complete a search.
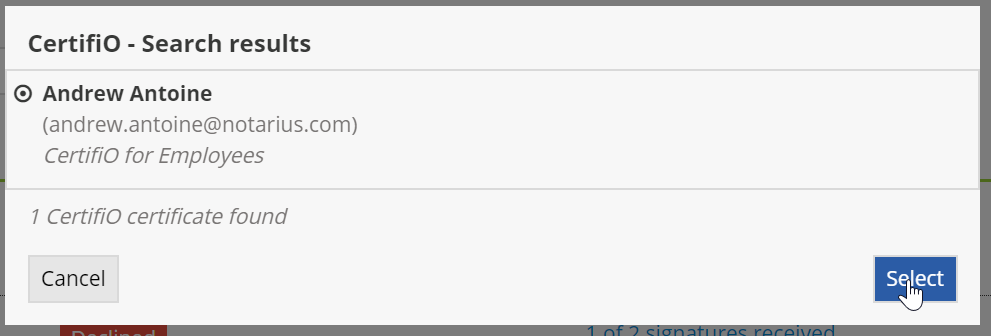
- Choose the signer’s digital certificate from the search results and click on Select.
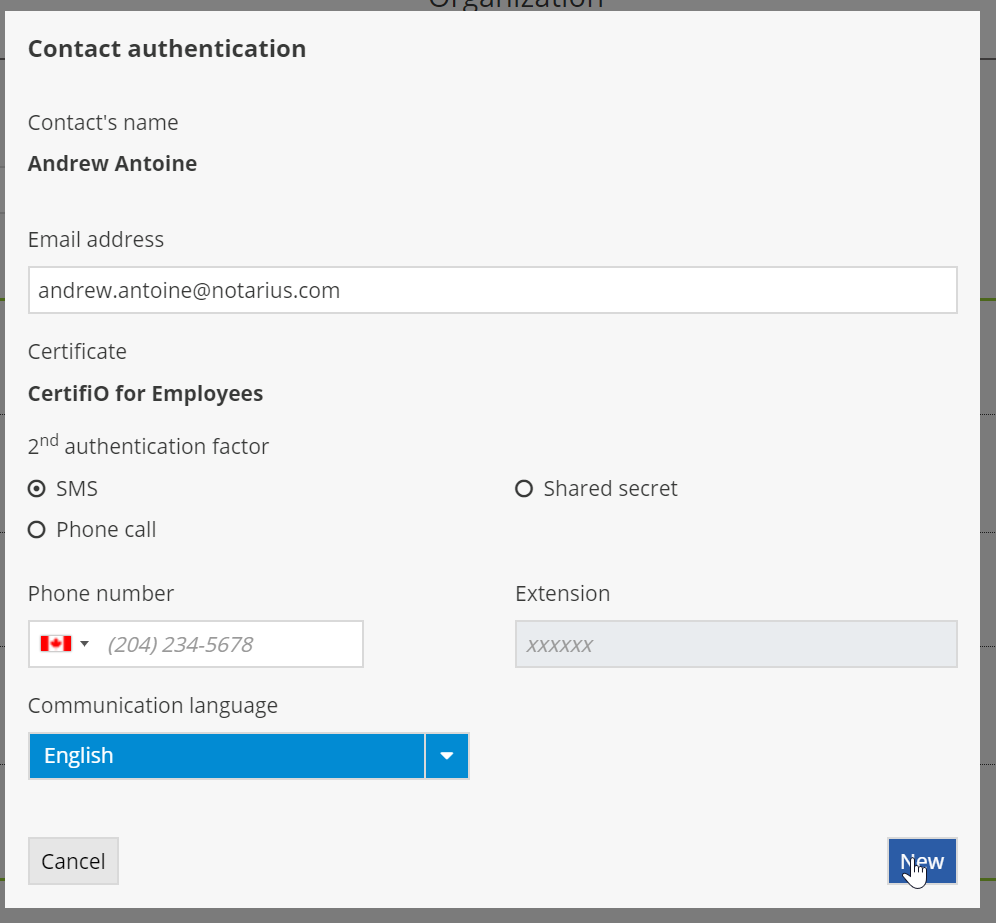
- Select the second authentication factor and the signer’s language of communication, then click on New.
- Complete the search fields with the signer’s information and click on Search.
- Follow the steps below for a trusted electronic signature:
Modifying a signer's information in your address book
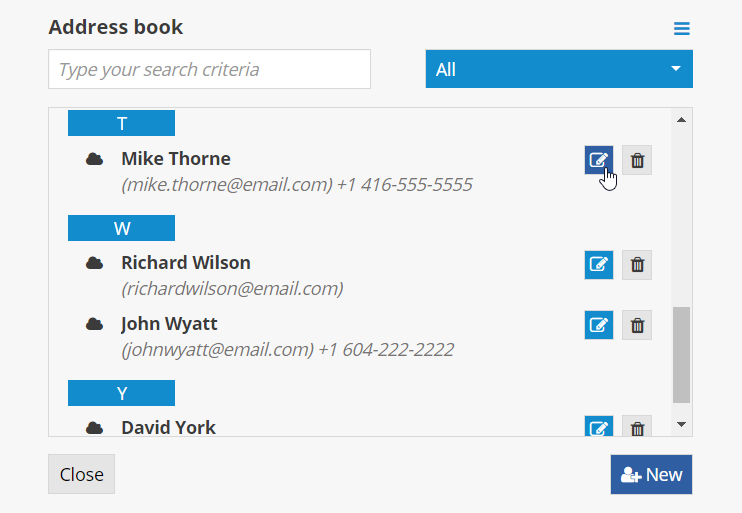
- Click on the pencil icon to update a signer’s information in your address book.
- Make the necessary modifications (name, email address, second authentication factor).


Deleting a signer from your address book
- Click on the trashcan icon to delete a signer from your address book.
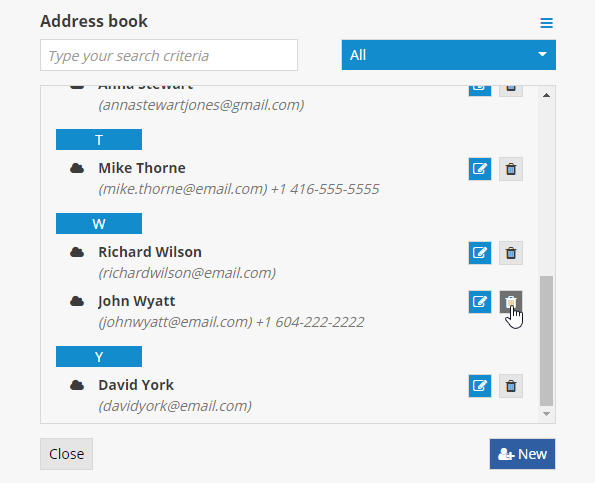
- Confirm that you would like to delete the signer from your address book.

Importing contacts into the address book
Management of the address book can be simplified by using the CSV Import functionality within the address book menu. Contacts can then be added in bulk instead of manually one by one. Two steps must be followed.
- Step 1: Download of the template file and definition of entries
- Step 2: Entries import in the address book
![]() This functionality can be used to import contacts of type Trusted electronic signature only and not of type CertifiO digital signature.
This functionality can be used to import contacts of type Trusted electronic signature only and not of type CertifiO digital signature.
STEP 1: Download of the template and definition of entries
- To start, click on the arrow to the right of your name at the top section of the window and select Address book.
- Click on the “burger” menu on the top right and select CSV Import.

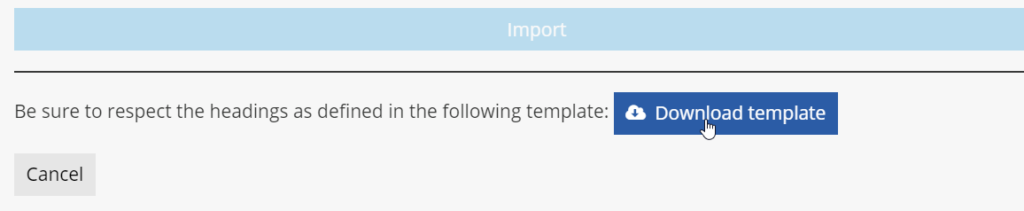
- In the Contacts Import window, click on the Download template button. This action will download on your local drive in the download directory of your browser the template file to be used. Open the file.
- Entries can now be added in the file as described in the first line of the template. The first line is always ignored when file is uploaded, so it must not be deleted and replaced with a real entry.
The following fields are always mandatory:
- Firstname
- Lastname
- Second factor (sms or call or secret or saml)
- Must be one of these values:
- sms
- call
- secret
- saml
- Must be one of these values:
- Language
- en
- fr
The following fields might be mandatory based on the value of the previous ones:
- Phone
- Is mandatory if second factor is call or sms
- Must be in international format without the + ex : 15141234567
- Add space and # for extension: ex #1234
- This is the number to which the second factor will be sent to
- Question
- Mandatory is second factor is secret
- Question to be shown to signer as the second factor
- Response
- Mandatory if second factor is secret
- Answer to be entered by the signer as the second factor
- IDP name (if SAML is used.)
- Save the file to a known directory.
STEP 2: Entries import into the address book
- To import entries, go back to the CSV Import menu. Select the address book to which entries must be imported. Based on your role, you might have different options, such as My address book or Organization’s address book.

- Select the proper template file on your drive using the Select the file to upload button or Drag and Drop the file directly within the window.

Filename should be shown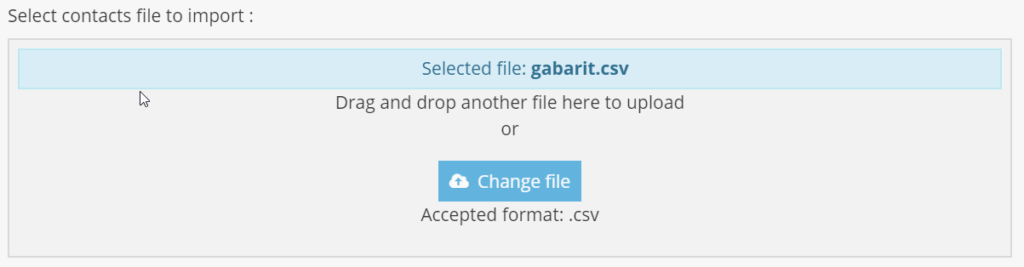
- Select Import
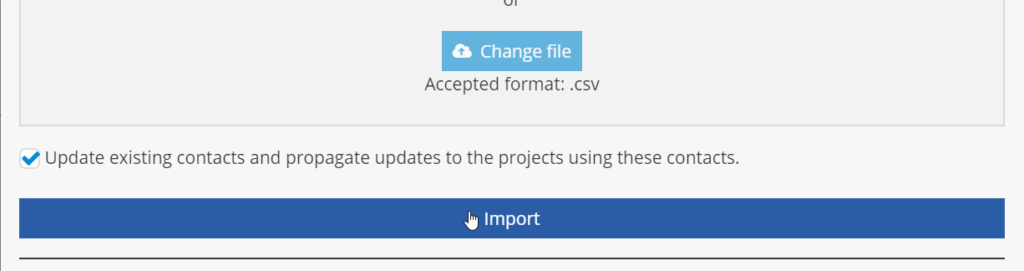
- Select Import with or without propagation
The action is dynamic and may vary based on the existence or not of contact and ongoing signature projects with those contacts.
- A Result window will popup with the outcome of the import: a confirmation of entries added or errors (if some information was missing from the input template file).

- Select Close
Contacts should now be added within the proper address book.
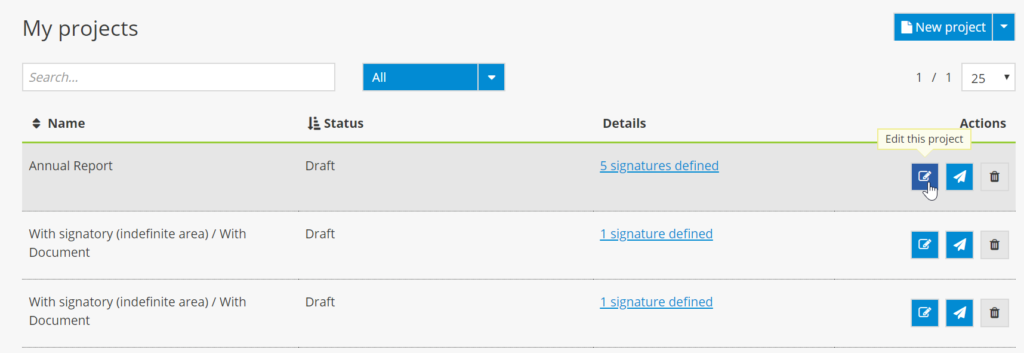
Modifying a signature project
A signature project can be modified as long as it has not yet been completed.
- In the dashboard, click on the “Edit this project” icon next to the project you would like to modify.

- Once the project has opened, you can add a signer or remove a signer who has not yet signed the document.
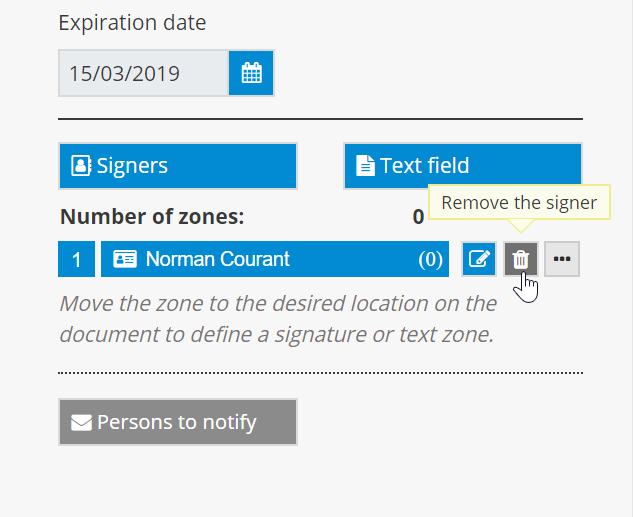
- You can replace a signer who has not yet signed with another signer, or modify the current signer’s information.


- It is also possible to modify the position of an unsigned signature zone in the document.
- Lastly, you can modify the project’s expiration date or the project name.
Please note: It is not possible to modify a project once a signature has been applied.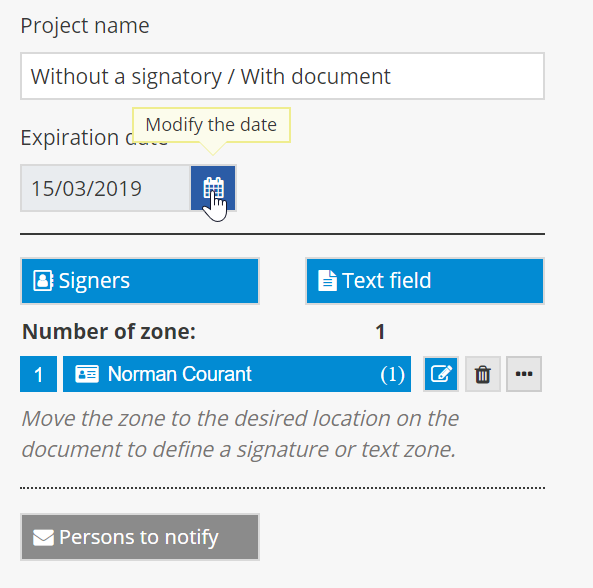
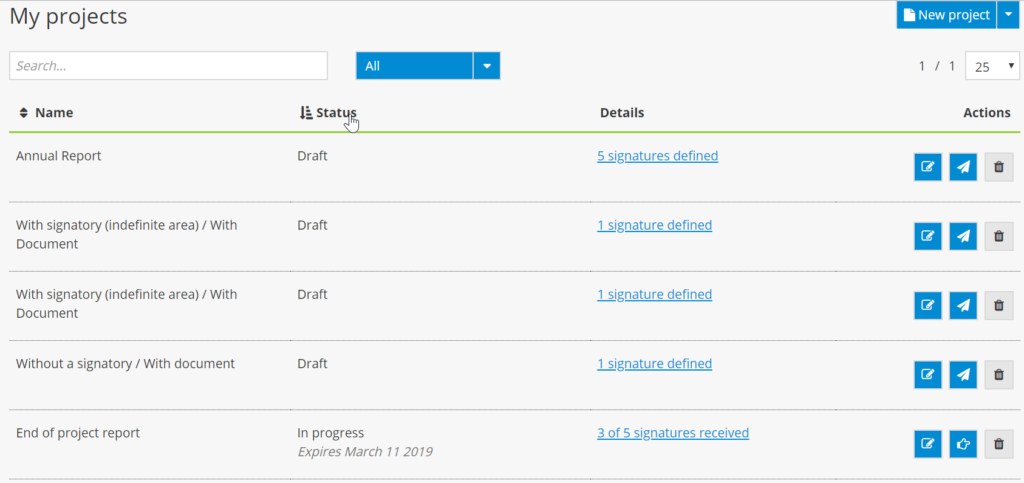
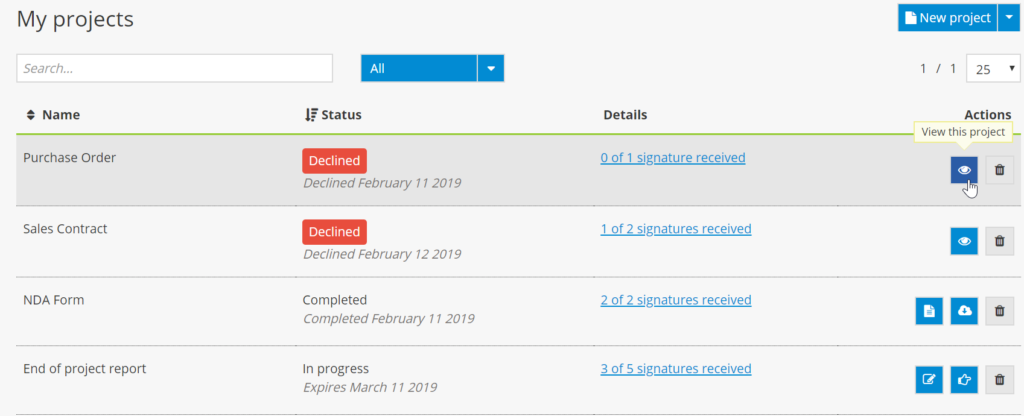
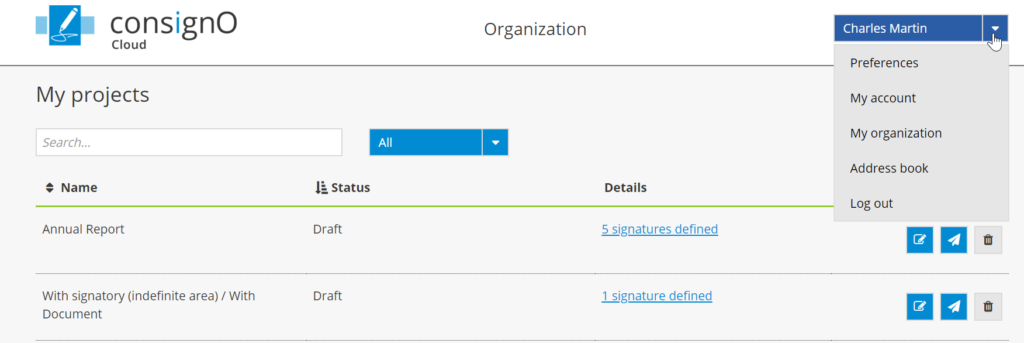
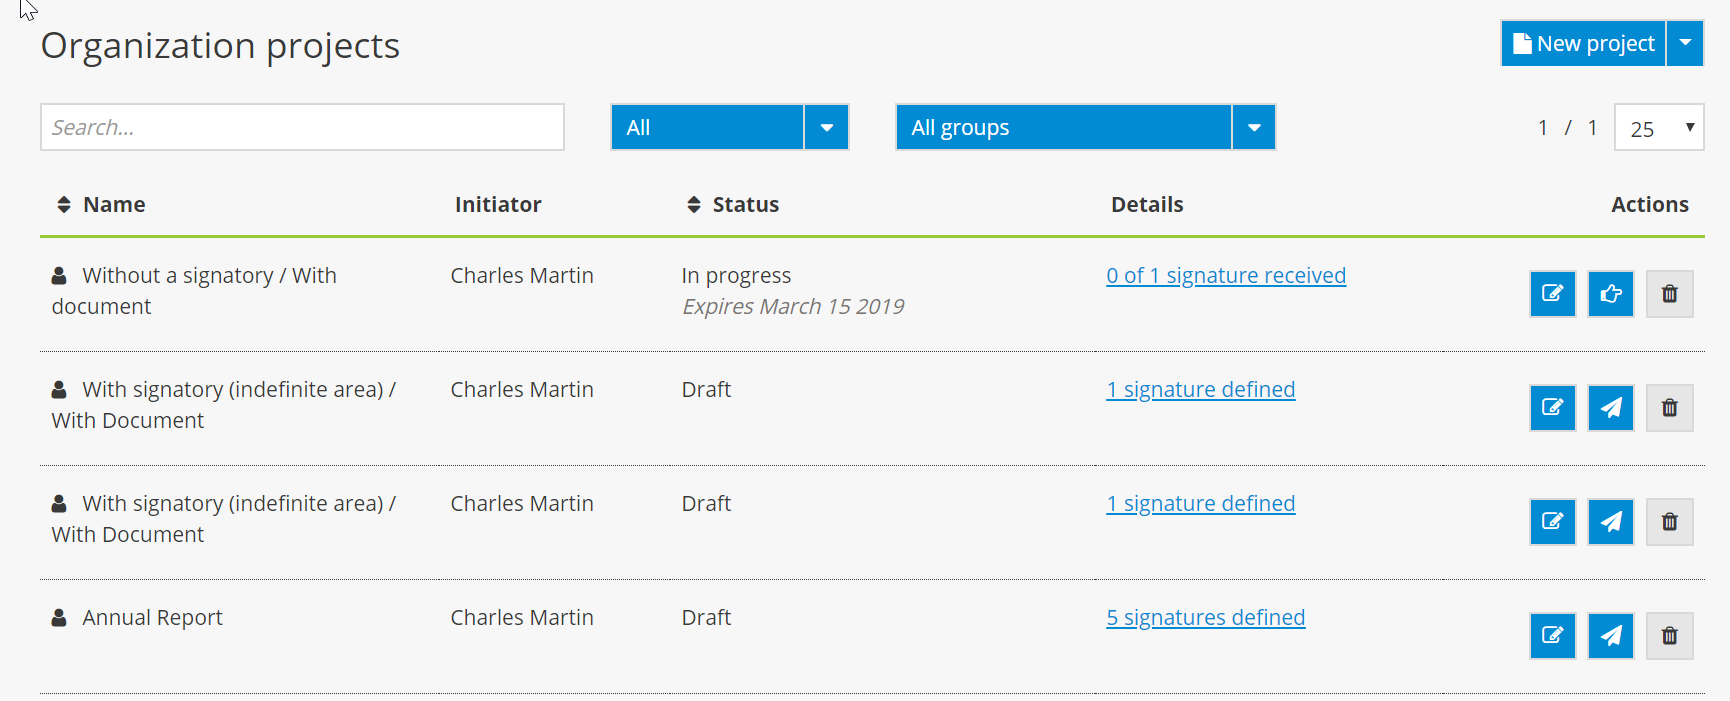
The dashboard
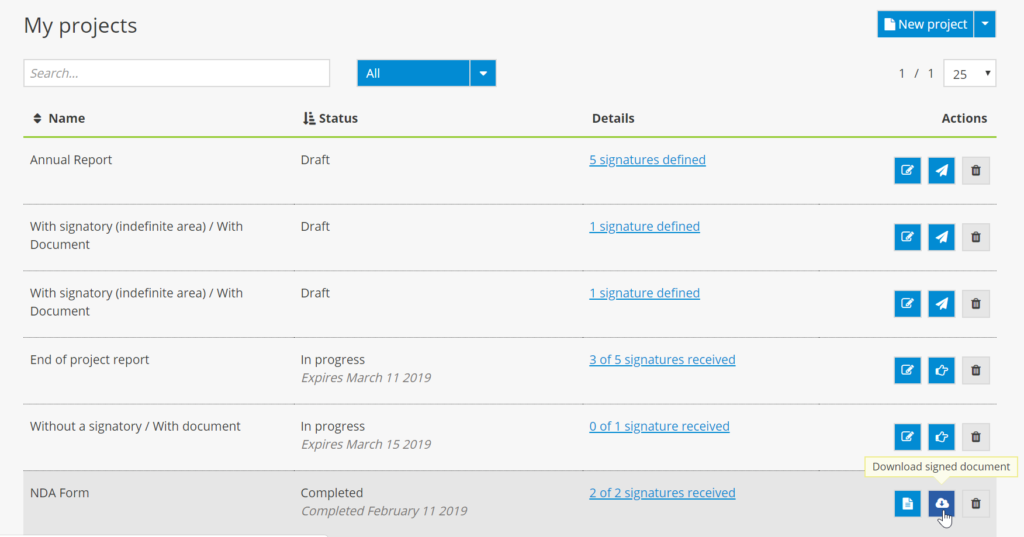
Here is an example of a ConsignO Cloud dashboard: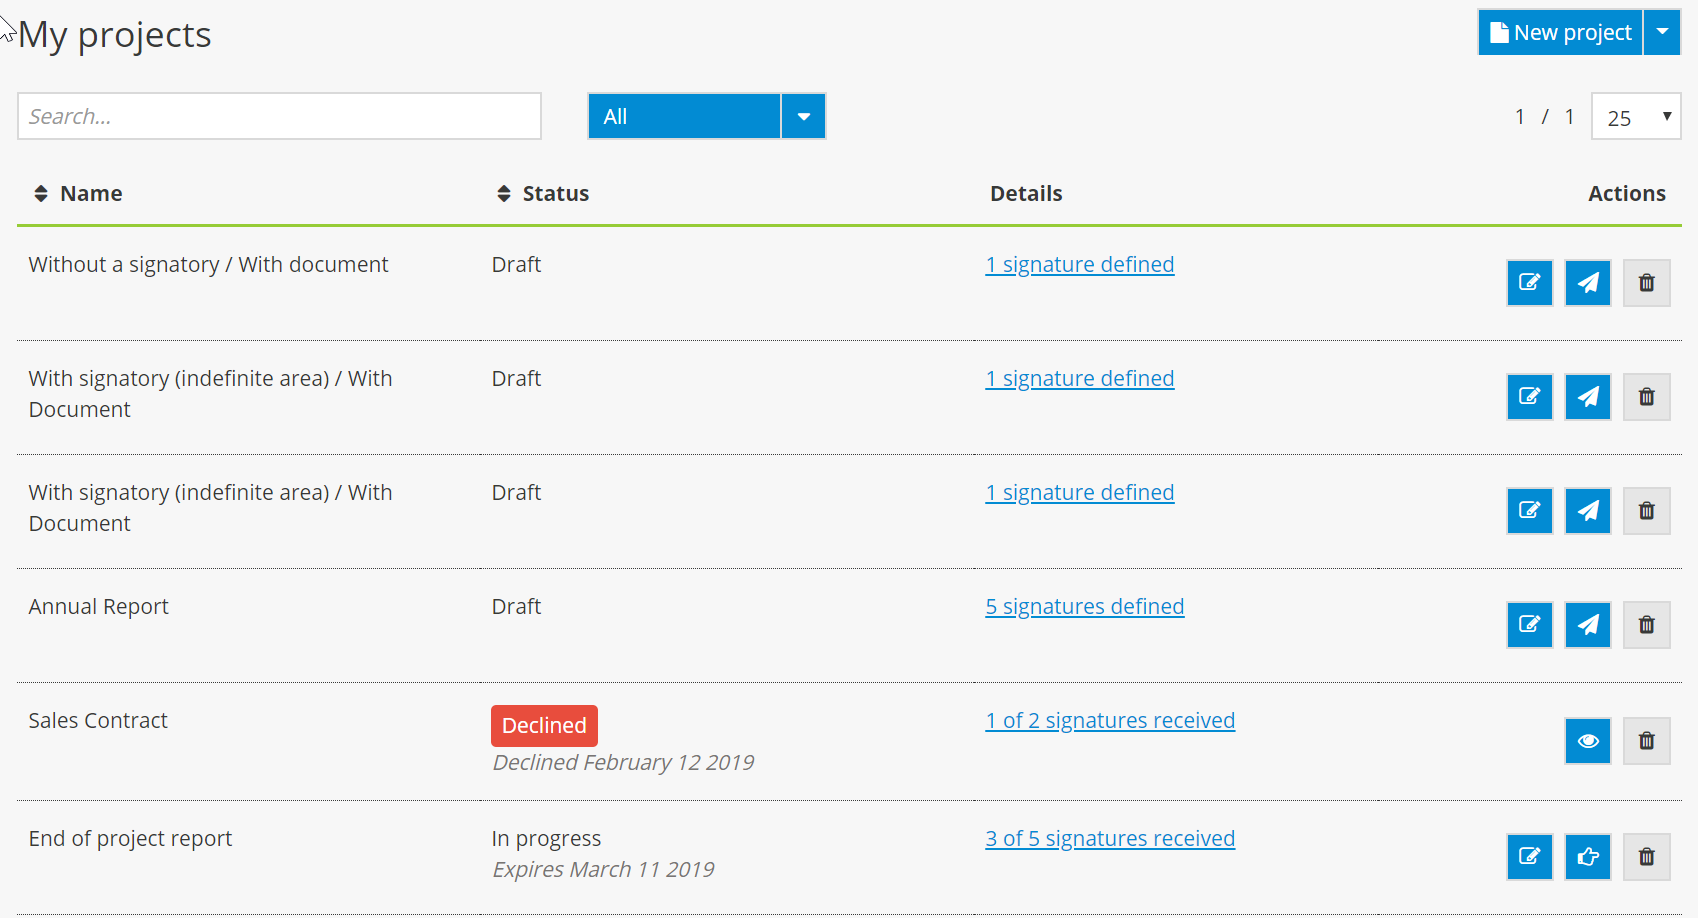
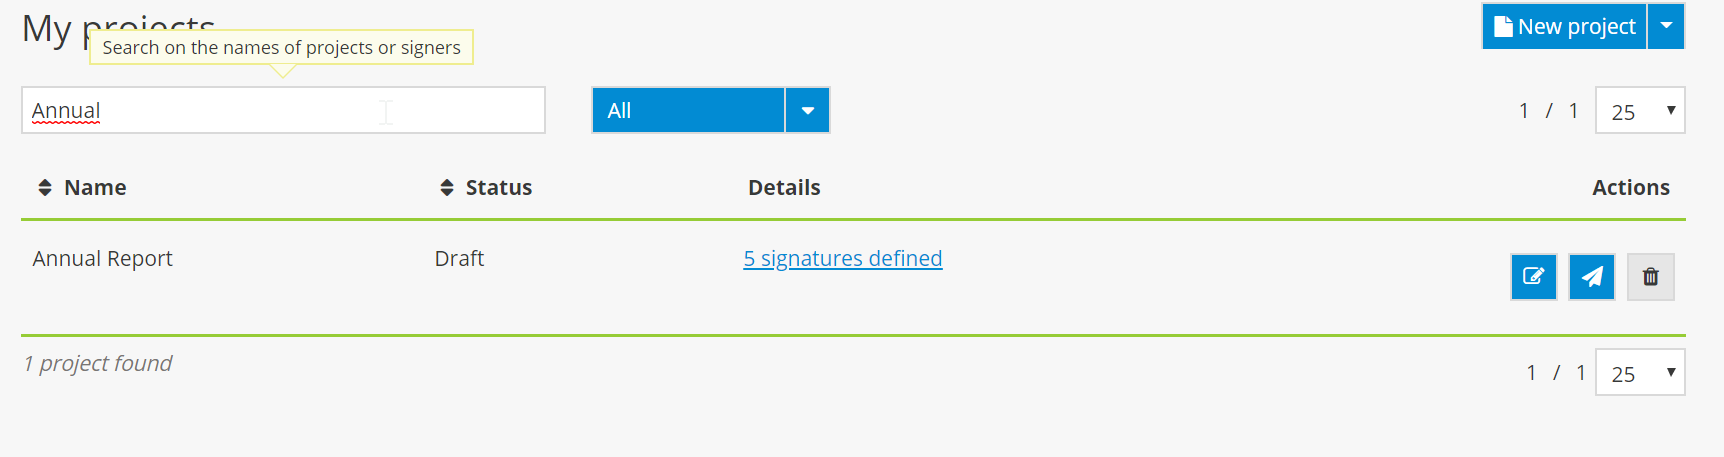
Search
- In the Search field, enter the name of the project you wish to find.
Project Order
- Click on Name to display your projects in alphabetical order according to the project name (from A to Z or from Z to A).
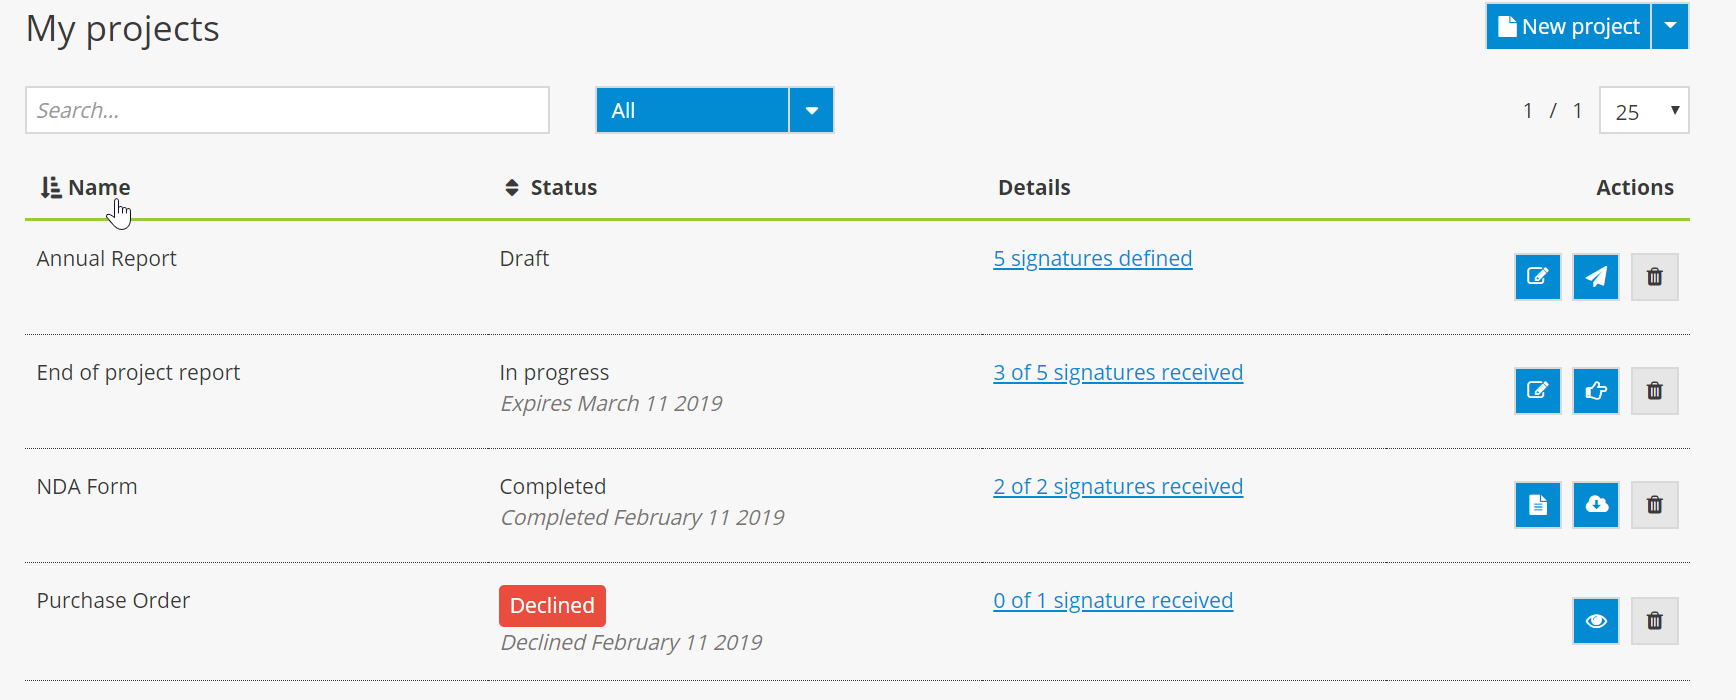

- Click on Status to display your projects in alphabetical order according to status (from A to Z or from Z to A).
The different statuses include:
- Draft – The signature project has been saved but has not yet been launched.
- In progress – The signature project has been launched and the first signer(s) have received a notification inviting them to sign the document.
- Expired – The signature project has reached its expiration date and at least one signer did not sign.
- Completed – The signature project has been completed and all of the signers have signed. The audit trail, as well as the signed documents, are available.
- Declined – One of the signers has refused to sign. The project has been put on hold.
- To sign – The signature project requires the project manager’s signature.
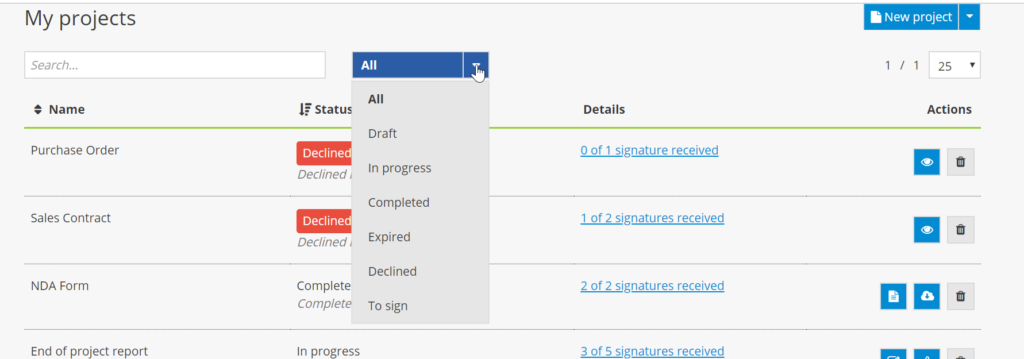
- Click on the arrow for the dropdown menu and select All, then select a status to display all of your projects according to status.
Project Details
- In the Details column, click on the project hyperlink to see the most recent information on signature progress.

![]() The signature status for each signer is displayed in the Status column. The Reminder column indicates when the next automatic reminder will be sent.
The signature status for each signer is displayed in the Status column. The Reminder column indicates when the next automatic reminder will be sent.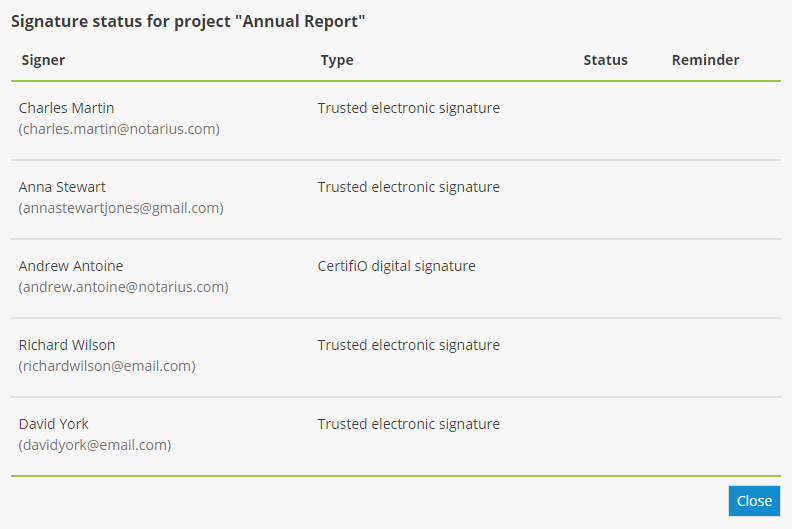
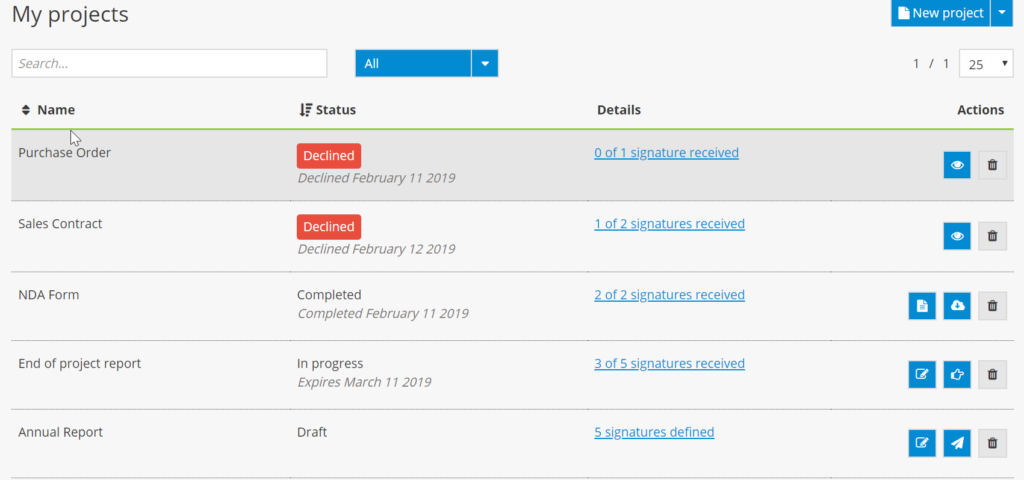
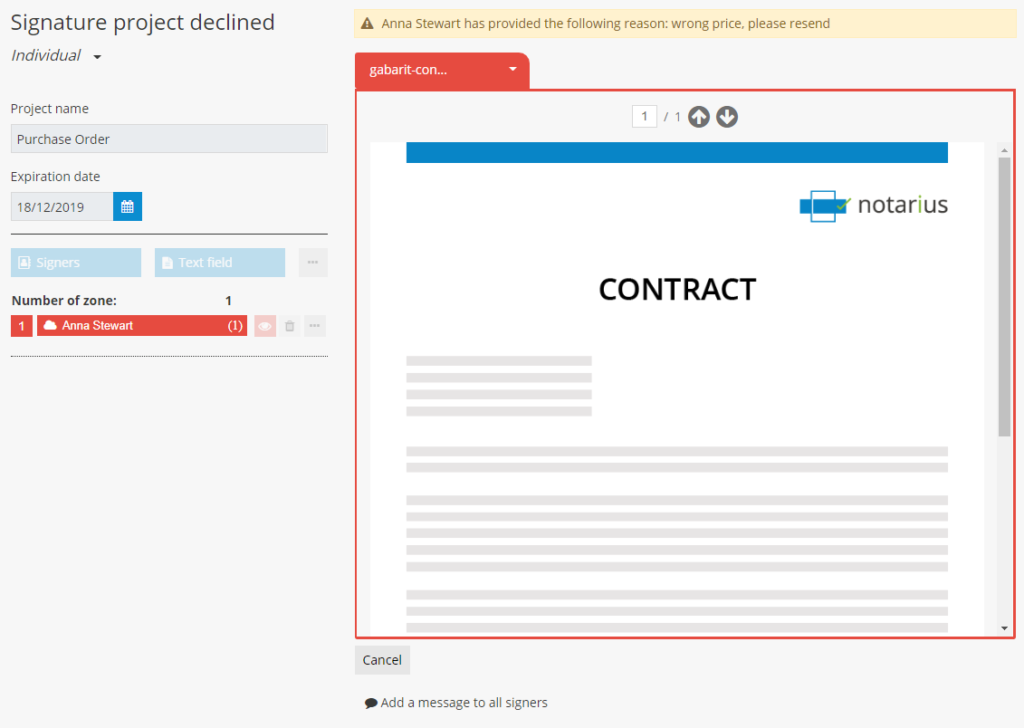
Icons
- For a “Declined” project, click on the eye icon to view the reason for the decline.
- For a project that is “In progress” or in the “Draft” stage, click on the pencil icon to modify the project.
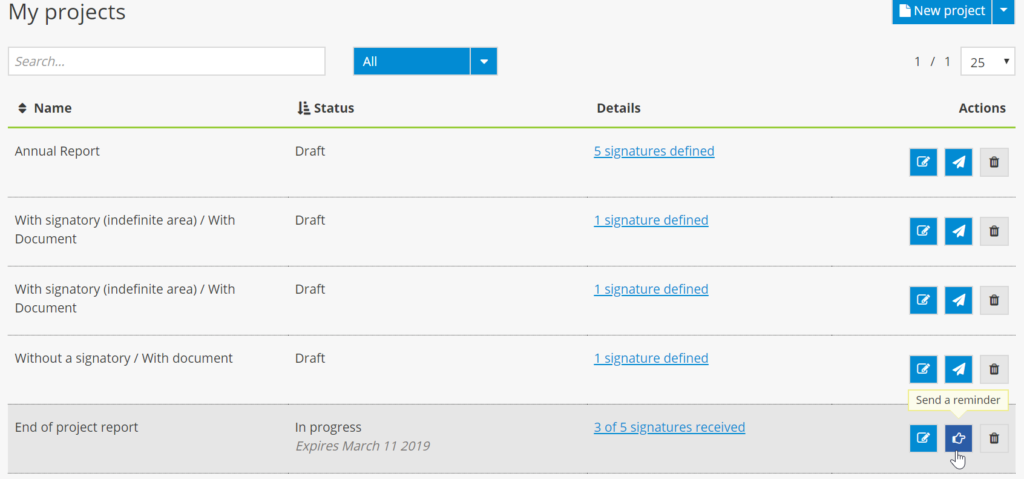
- For a project with “Draft” status, click on the paper airplane icon to launch the project.

- For a project that is “In progress,” click on the pointing finger icon to send a reminder to signers that it is their turn to sign. This feature can be used by the project manager when he or she believes that a signer has forgotten about a project or did not receive the first email notification.
- For a project that is “In progress,” click on the checkmark icon to sign the project from the dashboard. This icon indicates to the project manager that it is his or her turn to sign.

- For a “Completed” project, click on the document icon to download the audit trail and on the cloud icon to download the signed document(s).
- Click on the trashcan icon to delete a project from the list.

- Side bar menu
From the side bar menu on the left-hand side of the screen, click on the document icon to create a project template or to go to the list of project templates.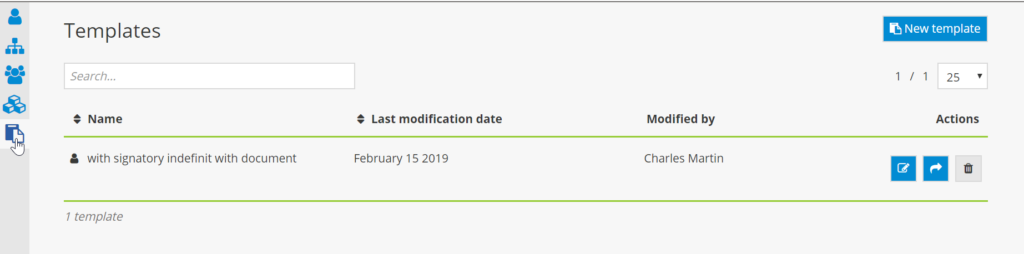
From the side bar menu, click on the person icon to return to the main dashboard.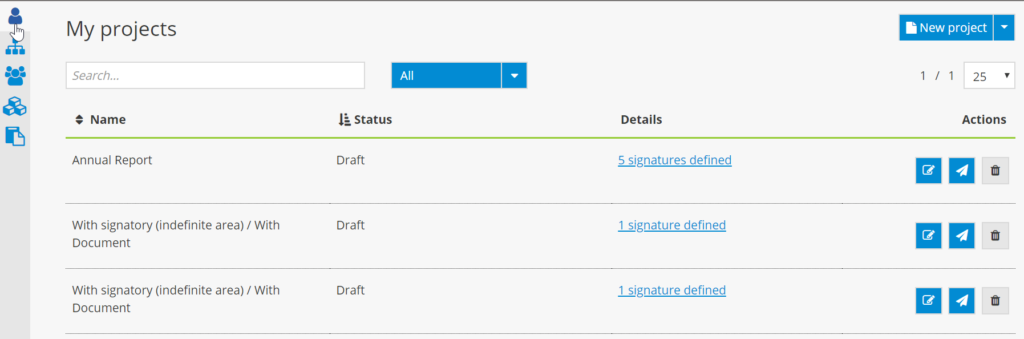
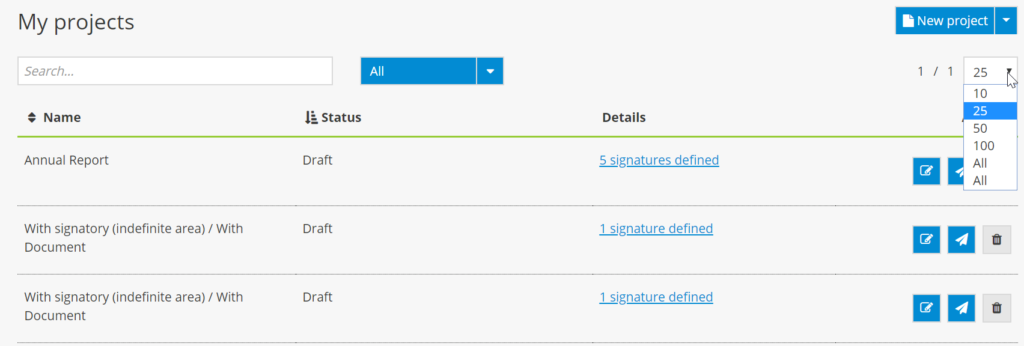
- Click on the arrow to the right of the number of projects per page to select the number of projects you would like to display per page.
Account Management
- Click on the arrow to the right of your name to manage your account using the dropdown menu.
Creating and using a template
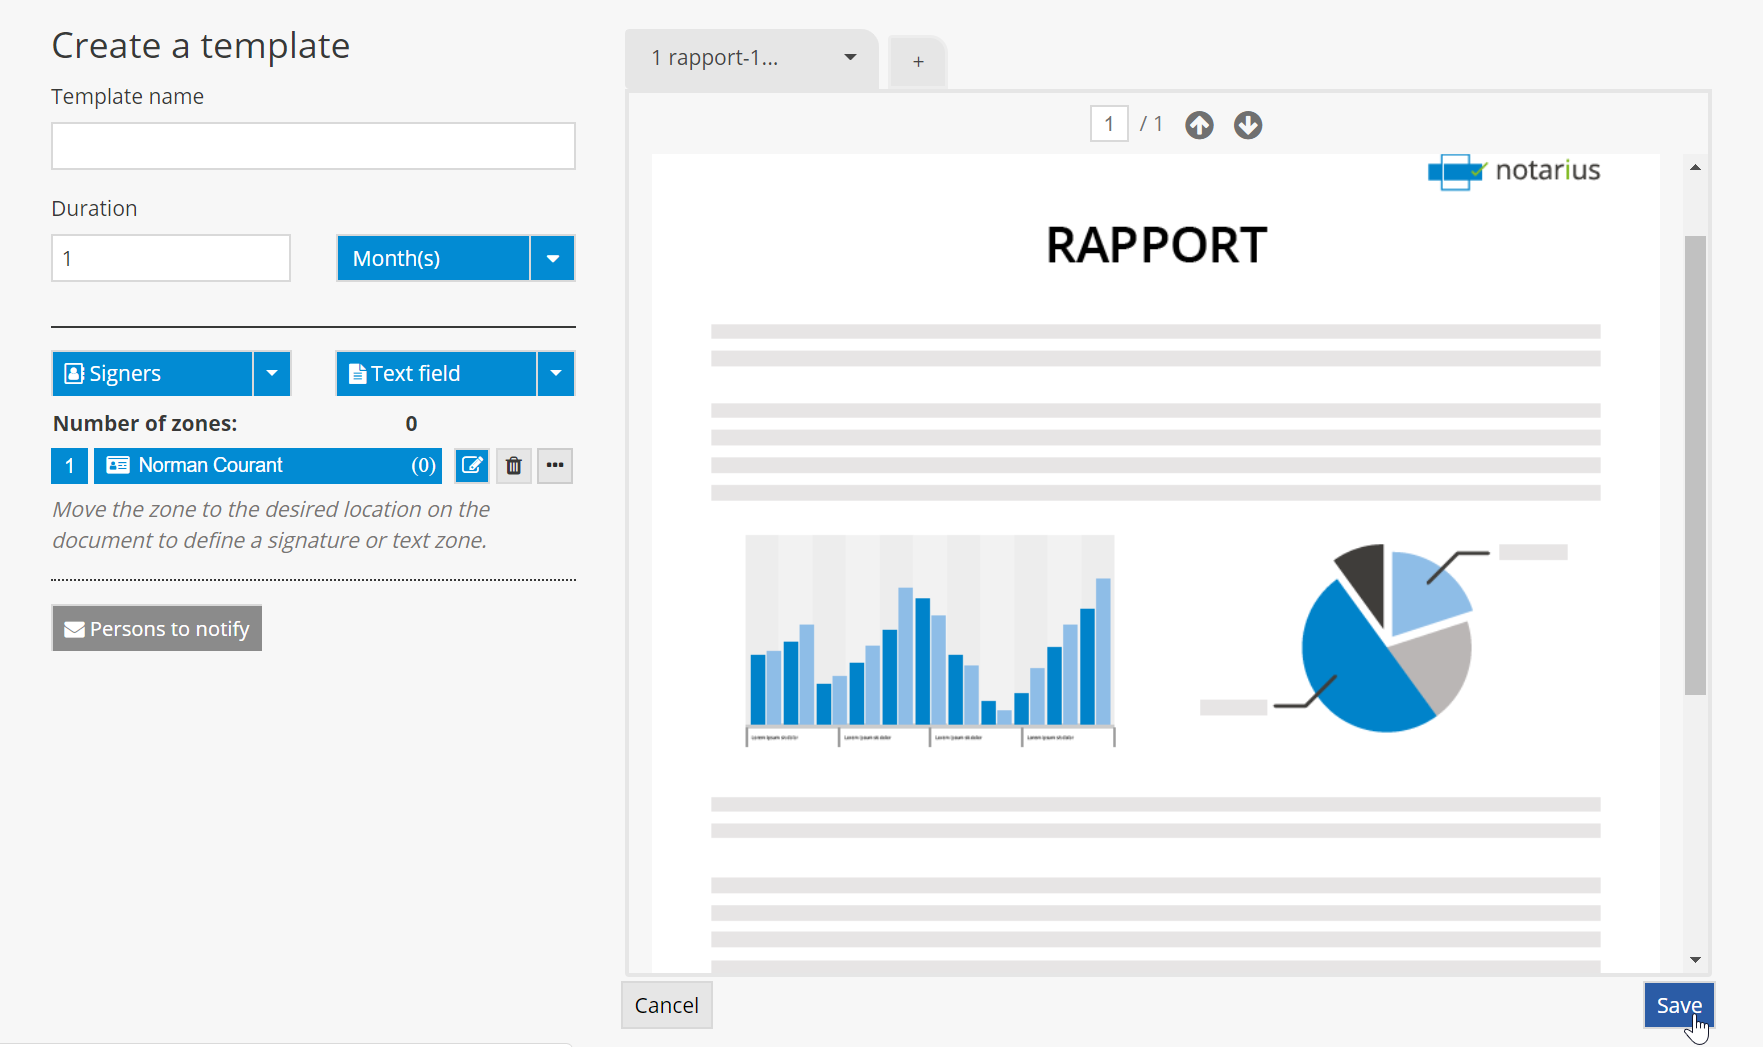
Create a template
- From the dashboard, in the left-hand side bar menu, click on the template icon.

- Click on New template.

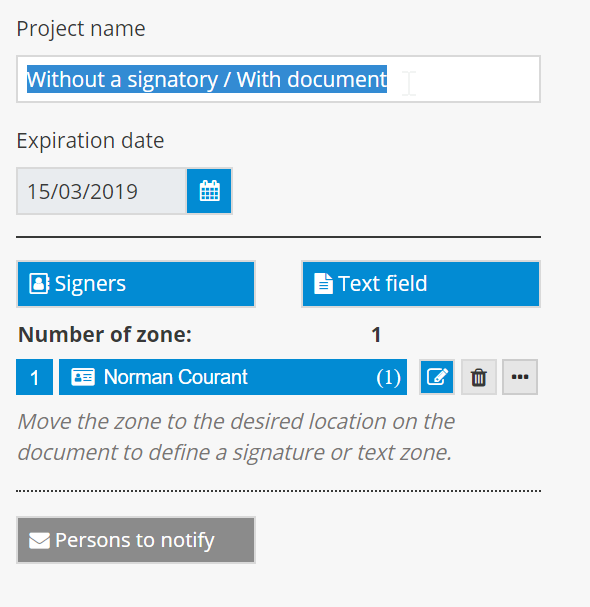
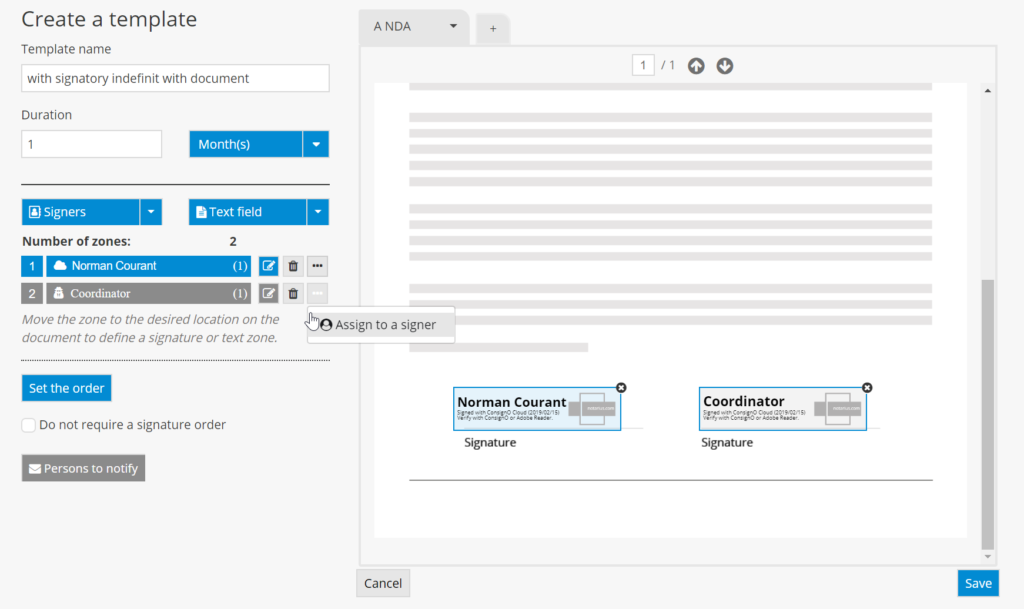
- Once you’ve configured the settings, click on Save. Here is an example of a project template with a defined signer and without a defined signature zone.
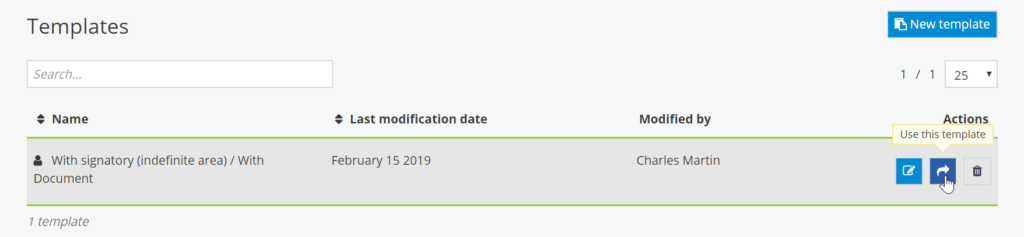
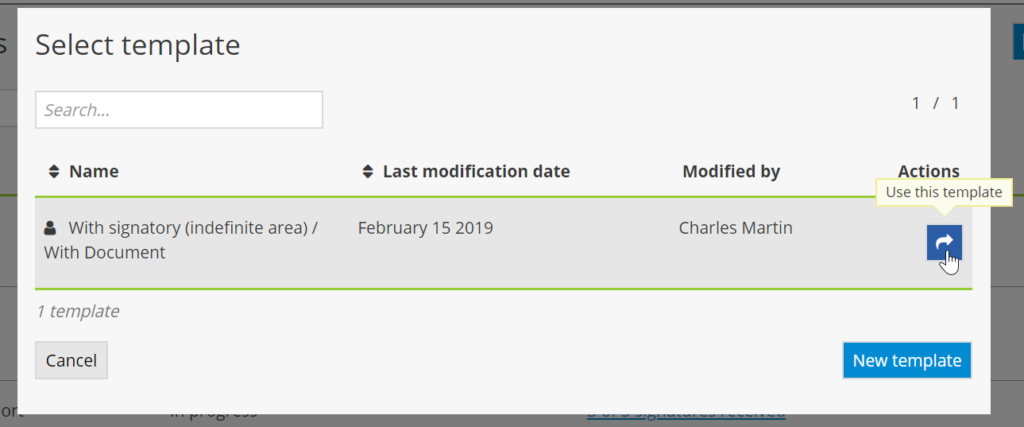
- To use a saved project template, click on the “Use this template” icon.
- Once you’ve entered your modifications (if necessary), launch the project by clicking on Launch.

- You can also create a project using a template by going to the dashboard and clicking on the arrow to access the New Project dropdown menu.

Template types
Here is an example of a project template with a defined signer and without a defined signature zone.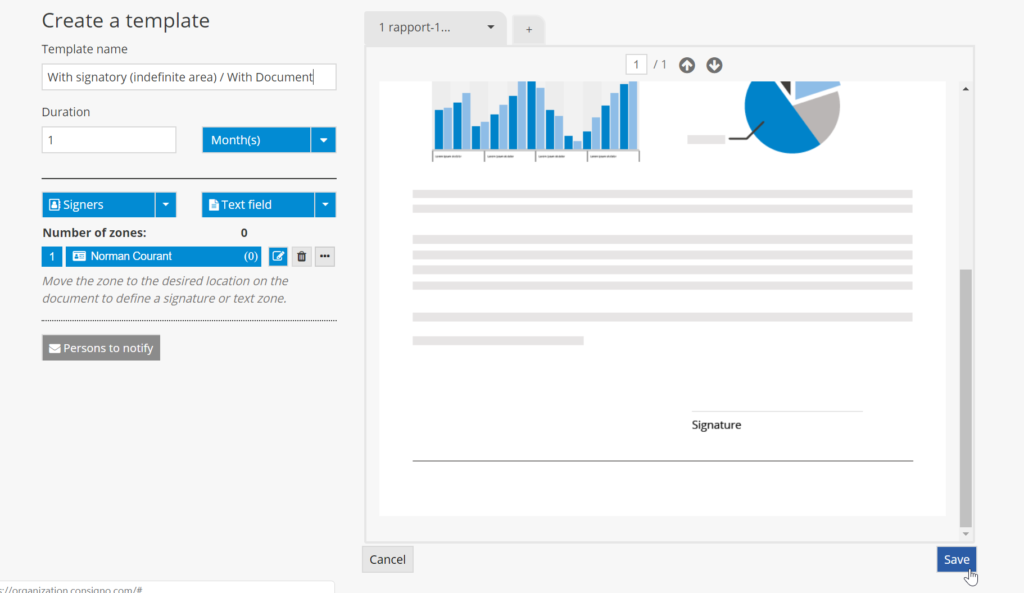
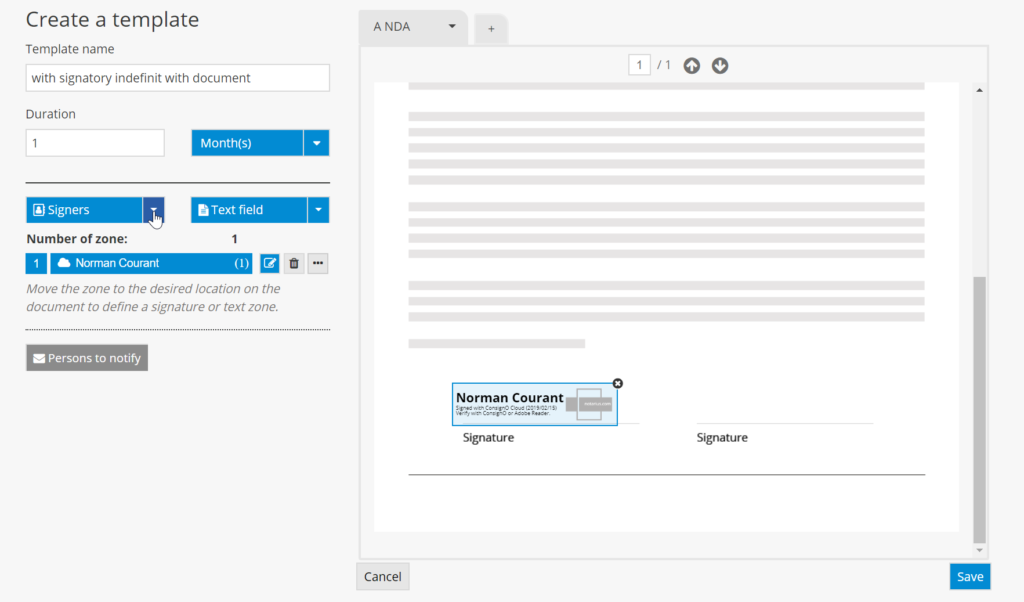
Here is an example of a project template where a signer and signature zone have been defined.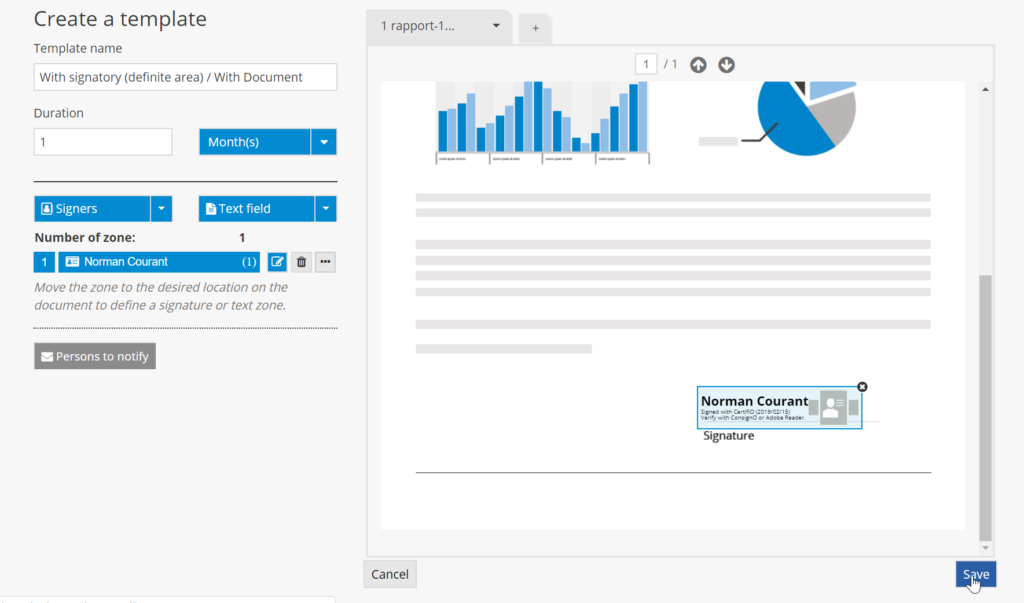
Here is an example of a project template where a signer has been defined.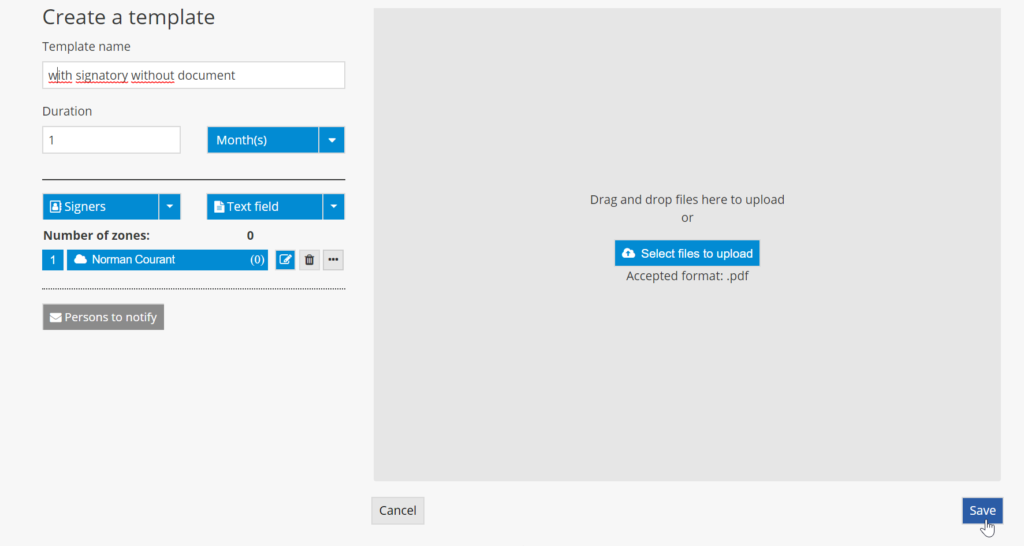
Here is an example of a project template with a document and without a defined signer.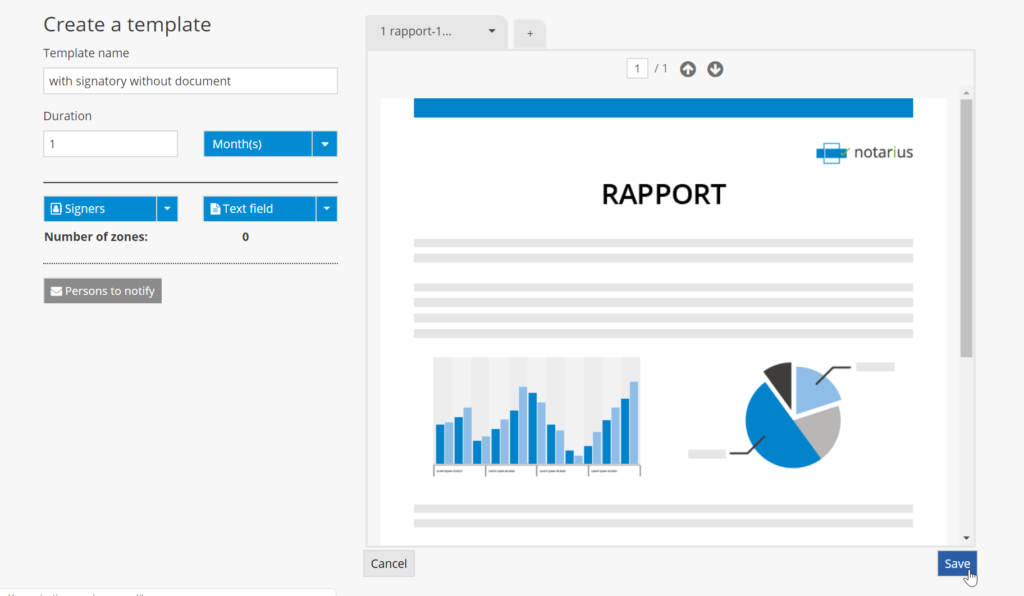
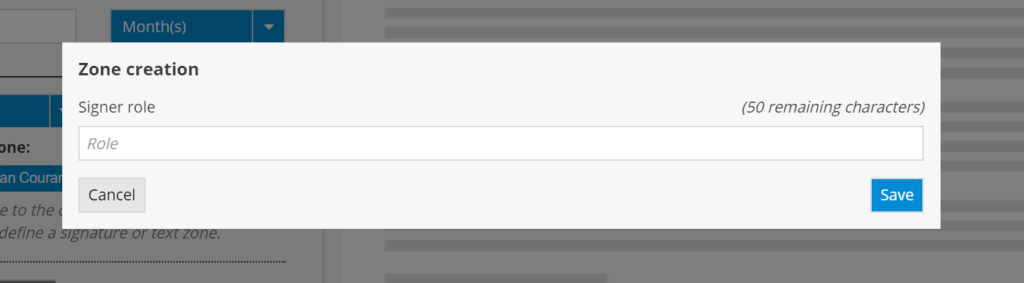
- You can also create a template with an “undefined” signer. Here is an example of a project template with a document, a defined signer and an undefined signer. To add an undefined signer, click on the arrow to access the Signers dropdown menu.
- Select Undefined Signer.

- Complete the field, then click on Save.
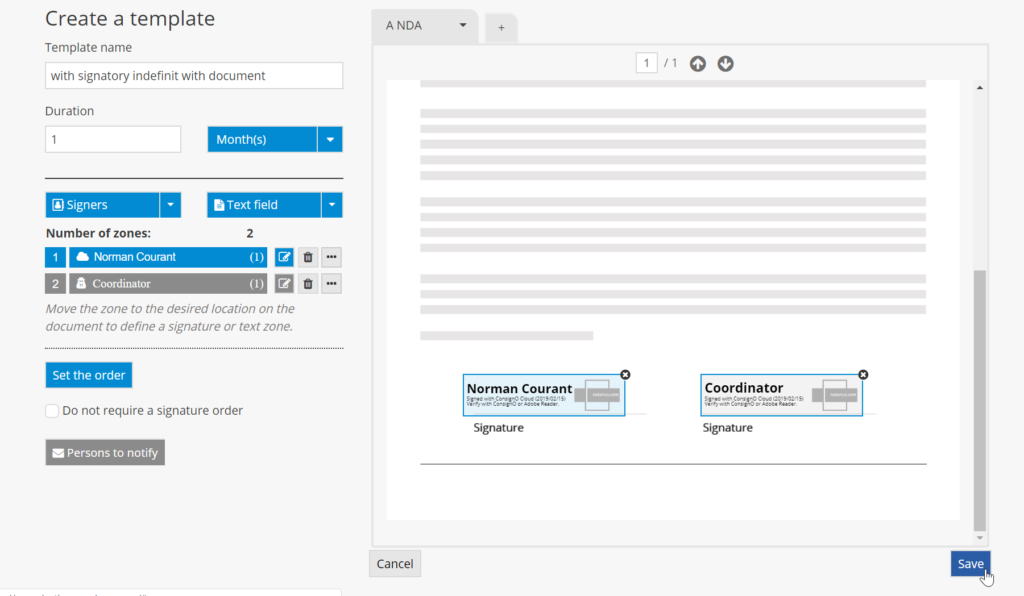
- Once you’ve defined the signer, click on the person icon.
- You can also assign a role to a contact in your address book (as in the example below) or to a new signer. Click on Assign to confirm.

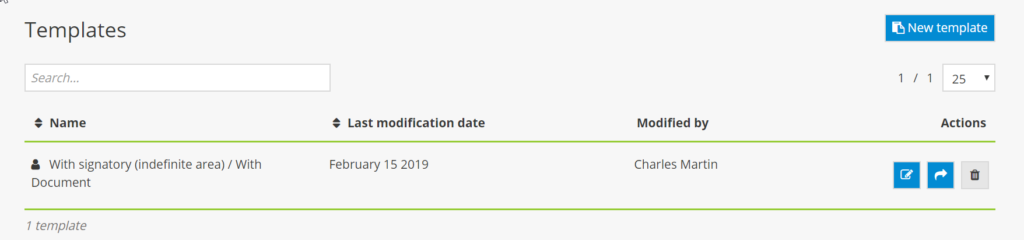
Modify a teamplate
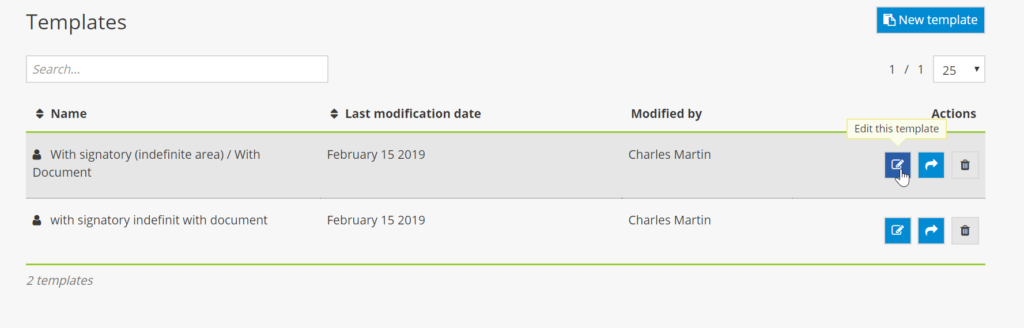
- From the dashboard, click on the pencil icon.
- Make the necessary modifications. You can also modify the duration of projects that have not yet expired in the settings for the template used. To do so, click on the arrow for the Duration dropdown menu.

- Once you’ve made the modifications, click on Apply.

Delete a template
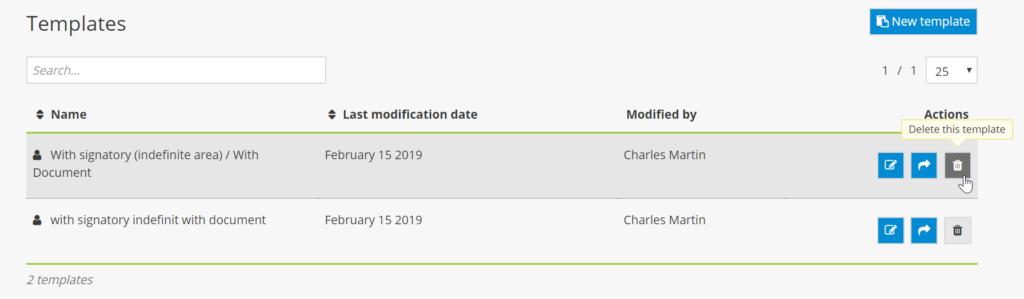
- From the dashboard, click on the trashcan icon.
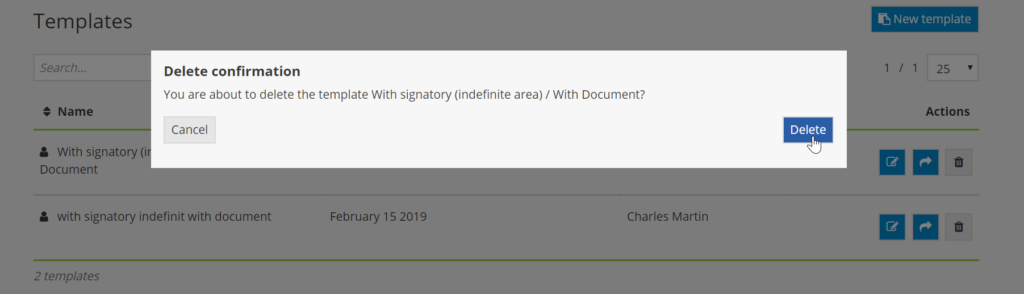
- Confirm the action by clicking on Delete.
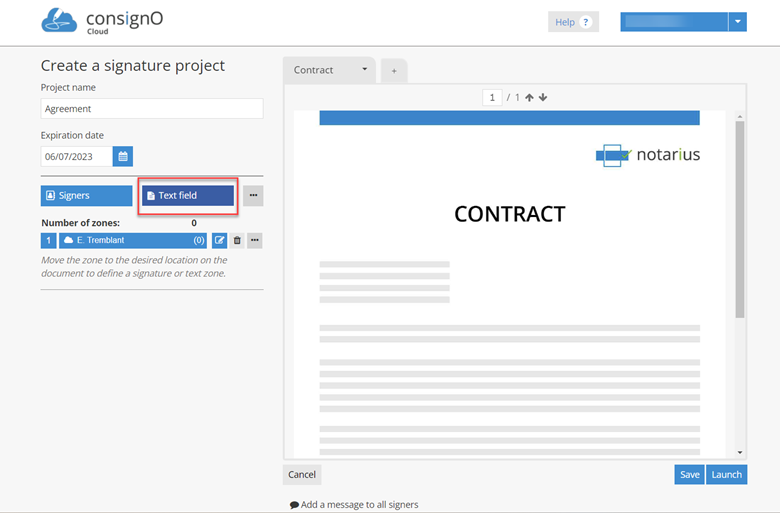
Text field
The text field allows the project initiator to define a free text area that they will assign to a person responsible for filling it out. A wording must be defined by the project initiator for each text field in order to guide the respondent on the information expected.
- No formatting is possible other than resizing the field. Add a text field.
- Add the text and specify the label of the field according to the expected information. in the example below, you are asked to indicate the city of residence
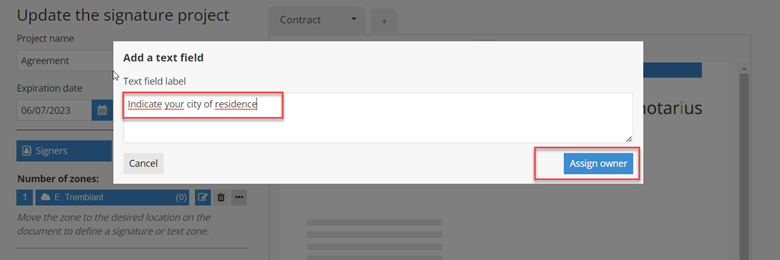

- Then assign the field to a manager from the address book or by creating a new contact,
- The text field appears in the “defined zone” section, once all the zones have been placed on the document, launch the signature project

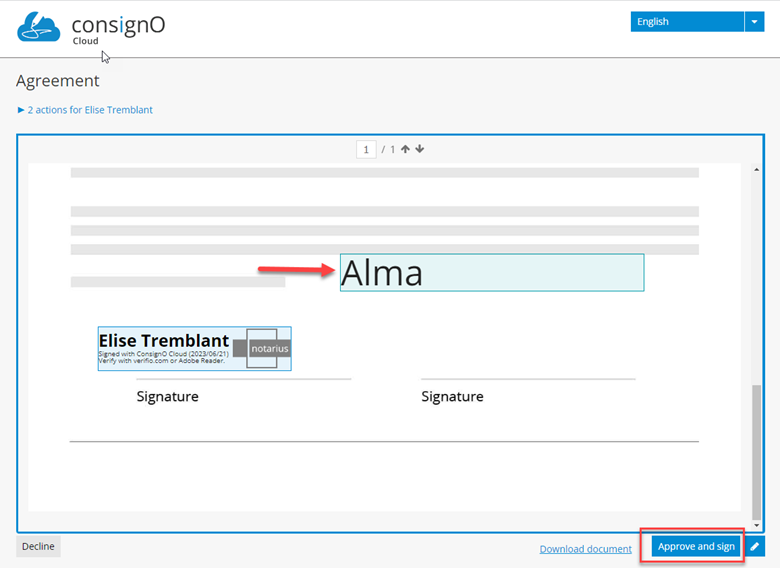
- Receive email to sign the project signature with text field, click on the link to access the document, the document will indicate 2 actions to complete
- Fill in the text field
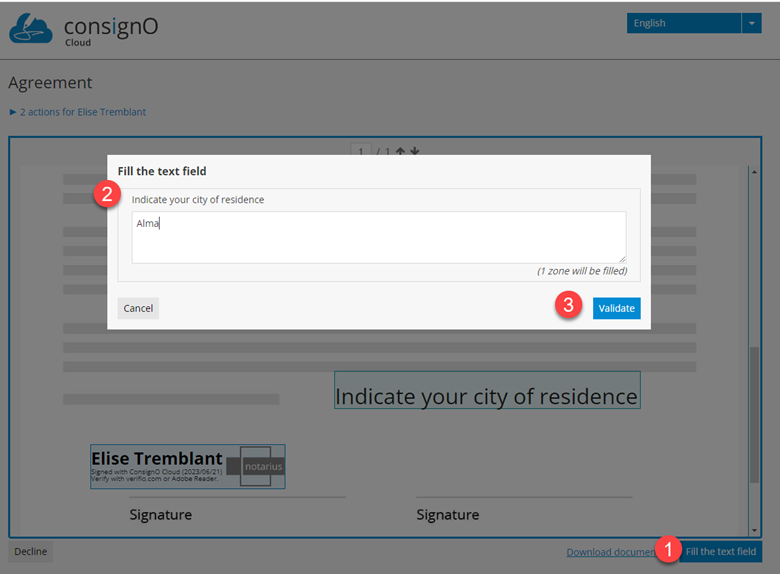
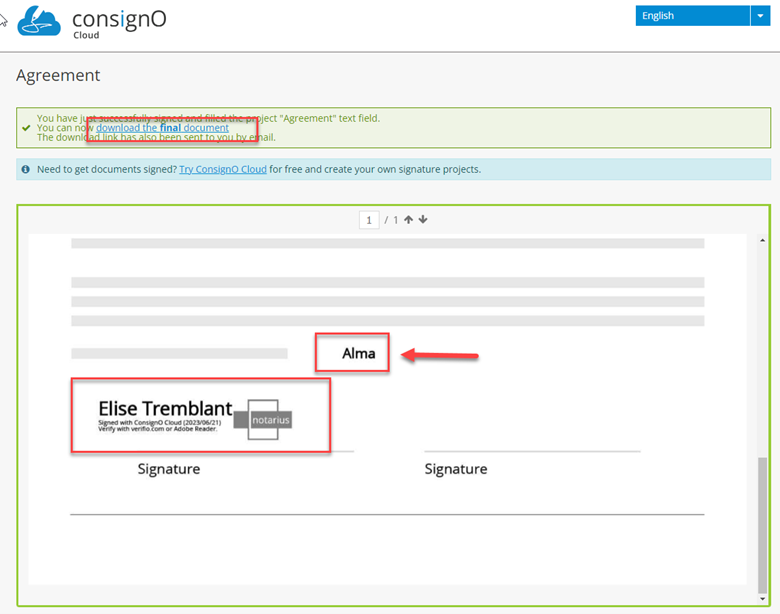
- Complete the signature project by clicking on “Approve and sign”, you will find that the city name is now indicated in the document
- The final document is available for download with the signature and the text field completed
- Fill in the text field
The Trash Bin
The trash bin allows you to download documents for signature projects that have been deleted within the last 30 days.
![]() Note: Signature projects deleted more than 30 days prior are permanently deleted and linked documents cannot be recovered.
Note: Signature projects deleted more than 30 days prior are permanently deleted and linked documents cannot be recovered.
By clicking the trash can icon (option) in menu bar on the left of your screen, a list of recently deleted signature projects will be displayed.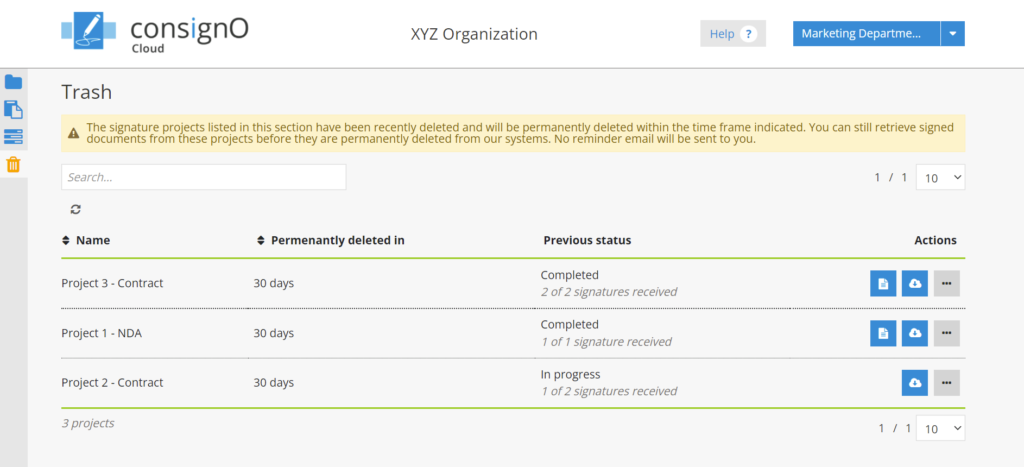
For completed signature projects, if the signed documents as well as the audit log need to be retrieved, simply press the linked download button to save them to your workstation.
For incomplete signature projects, the download button allows you to retrieve the document(s) in their current state and, if necessary, initiate a new signature project from them.
In all cases, it is still possible to duplicate a deleted signature project. This will create a new signature project in the initial state of the original project, that is, before the signature is received.
The column titled “Definitive deletion in” indicates the time remaining before the final deletion of the ConsignO Cloud platform signature projects and all related documents. Once this period has elapsed, the data is permanently deleted and cannot be recovered; these signature projects will no longer appear in the trash bin.
SharePoint Connector Documentation for ConsignO Cloud
Step 1: Setup by your administrator
The connector must first be installed by your SharePoint site administrator before it can be used:
Step 2: Use and manage the connector
The project initiator may use the SharePoint connector for two main actions:
- Create a signature project
- Download signed documents from the ConsignO Cloud account to SharePoint
- Create a signature project
- Synchronizing and downloading signed documents (Synchronize)
- Management and Troubleshooting
- Validate the account
- Delete the connector
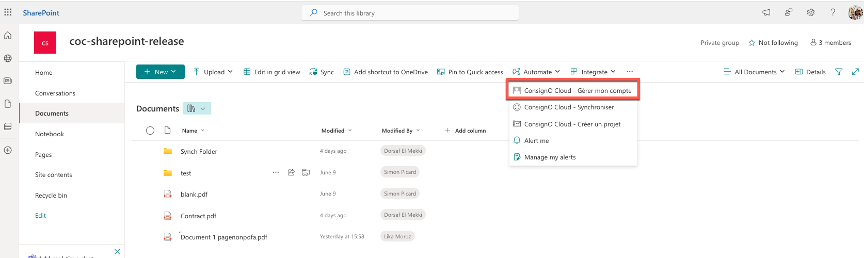
To create a signature project from SharePoint, two options are available:
- Select one or multiple files, then from the menu, chose Create Project.
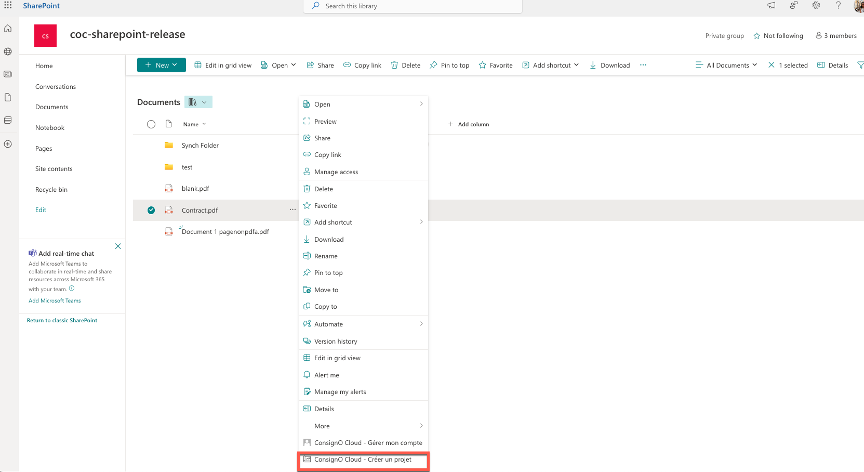
- Or, from the Option button (vertical …) on the right side of the file, select the option ConsignO Cloud – Create Project

- The user should then be redirected to the signature project creation page as it would be normally shown when creating a project directly through the ConsignO Cloud interface.
- It will then be possible to define signers and set the signature zones on the document before launching the project.

- Once the project is launched, the user should be redirected automatically back to SharePoint.
2. Synchronizing and downloading signed documents (Synchronize)
There is no automatic download of documents back into the SharePoint directory. Project initiator will receive notification via email once a project is completed and should then log into SharePoint to download and save the signed project.
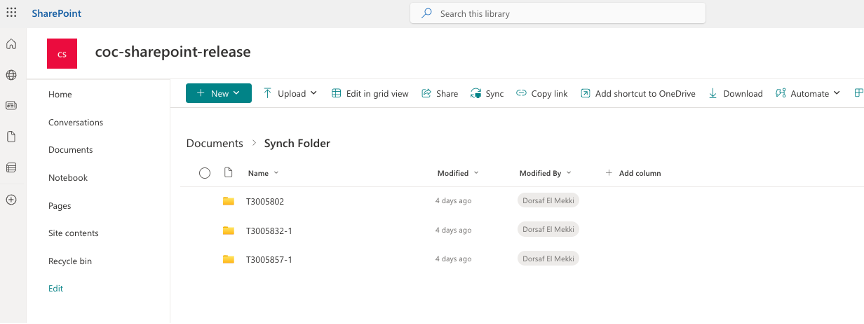
A specific folder should be selected first. This step is mandatory and has been favoured to give more flexibility to the end-user to save completed projects in a distinct folder if needed, and to make sure not to overwrite the original document.
To download a completed project:
- Through the Documents section, simply select a folder where you would like to save the signed documents. Then using the menu, select the option to Synchronize.
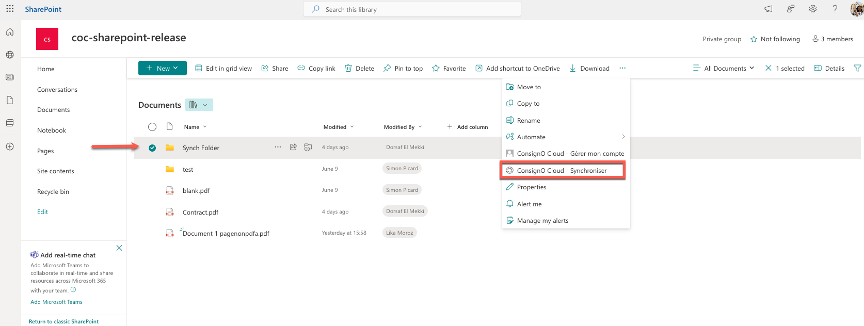
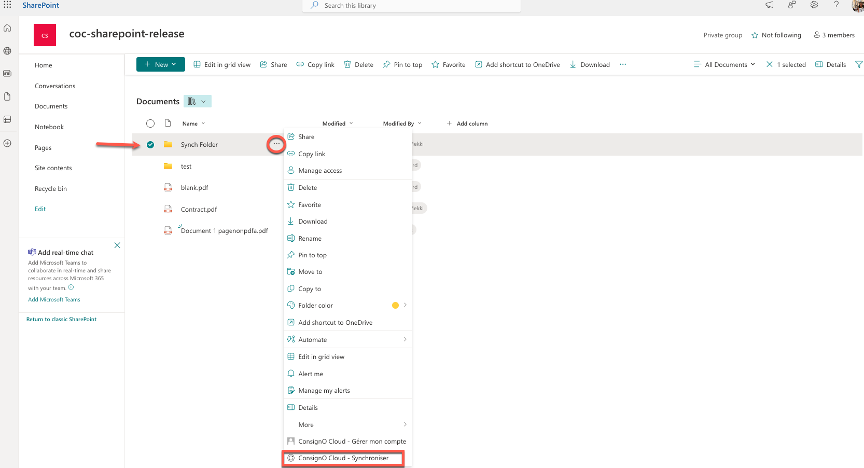
- You can also select this step from the option menu (vertical …) next to the selected folder.
- You should then be redirected to a dashboard where you can see all completed projects available for download.
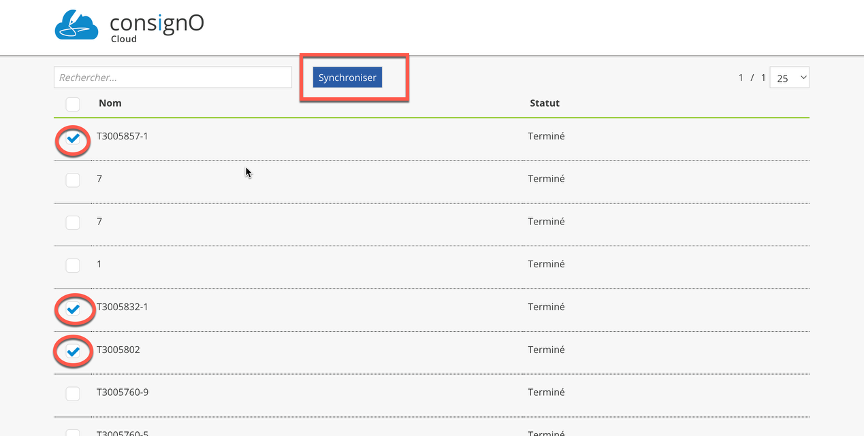
- Select the projects you want to synchronise and download back to SharePoint and click on the Synchronize button.
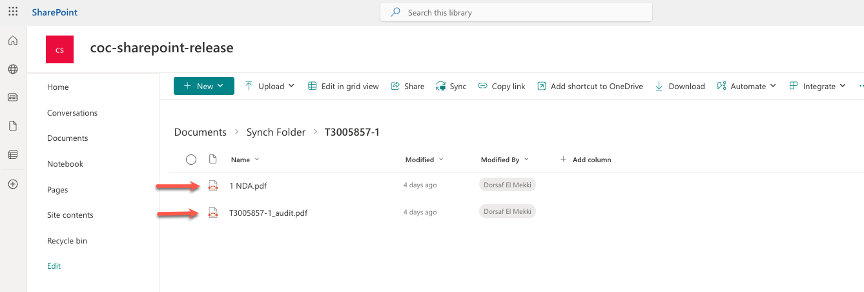
- A new folder will be created for each project. This folder contains the signed document as well as the audit trail document.
 3. Management and Troubleshooting
It may happen that some configurations are lost when ConsignO Cloud or SharePoint updates are performed. Here are some troubleshooting tips.
a. Validate the account
The first step should always be to check and link the accounts again, if needed.
- Using the menu select “ConsignO Cloud – Manage my account”
You will then be taken to the ConsignO Cloud info page where you can access the Account Information.
From here, users Modify the account and link a new account to SharePoint or simply Delete an account from SharePoint altogether.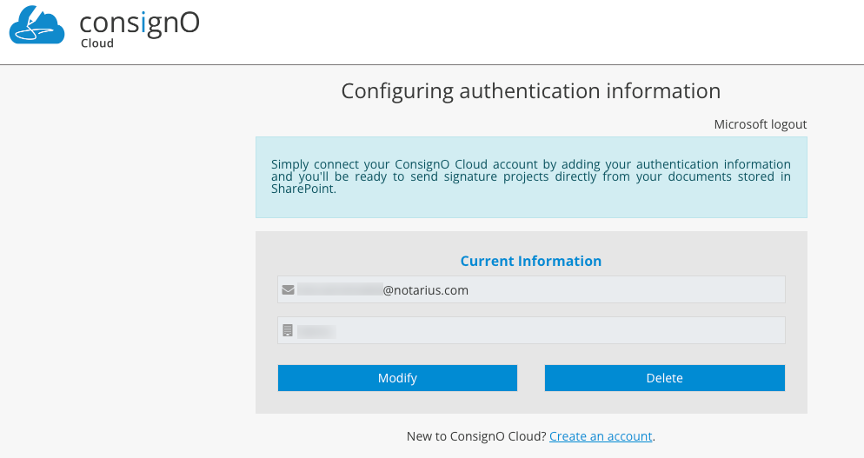
When an account is configured within SharePoint, a reference to it can be viewed within the ConsignO Cloud account. Go to the Preference menu in ConsignO Cloud then Third Application password.
You should see an entry ConsignO Cloud SharePoint like the one illustrated below: If there are none or multiple, it may be a good idea to delete them all and start from scratch from SharePoint directly.
b. Delete the connector
Warming : This should be your last resort. You will remove the application and then install it again.
From the menu on the left, select Site Contents site and then Apps for SharePoint.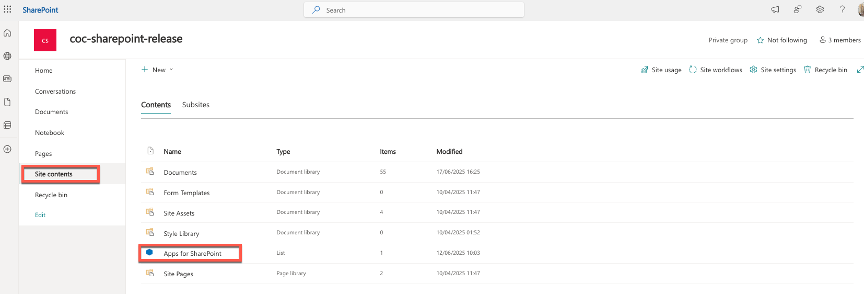
“Once on the page, locate ConsignO Cloud, click on the ‘…’ menu, then click on it again to reveal additional options, including ‘Delete’.”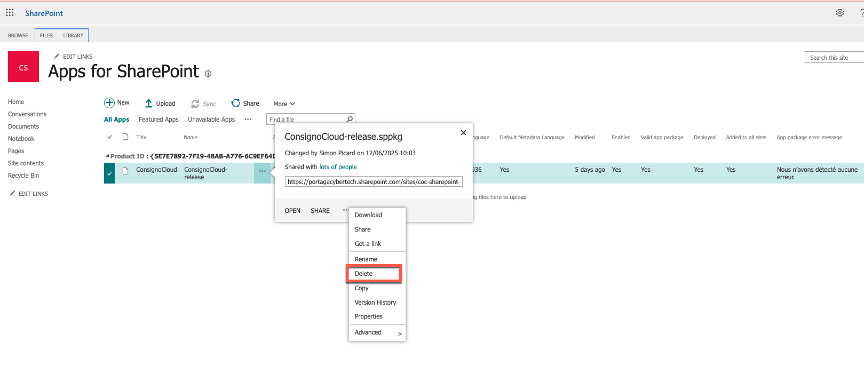
Digitally sign a ConsignO Cloud project
A CertifiO digital signature is issued to a person by a professional association or an organization and is issued by Notarius. To digitally sign on our online platform ConsignO Cloud, make sure that you or your signatories have subscribed to one of our CertifiO signatures.
To digitally sign in ConsignO Cloud, be sure to sign from a computer where your digital signature (.epf file) is accessible.
Select your current situation from the options below:
- I want to digitally sign a ConsignO Cloud project
- I want to digitally sign a Consigno Cloud project via the ConsignO Desktop application
I want to digitally sign a ConsignO Cloud project
During this process, we will sign a received ConsignO Cloud project. If you want to create a ConsignO Cloud project yourself, visit the Create a signature project section.
Follow these steps:
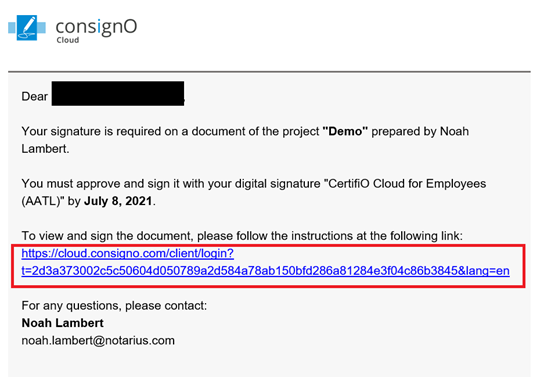
- Open the email sent by consignocloud@notarius.com inviting you to sign the ConsignO Cloud signature project. Then, click on the link.
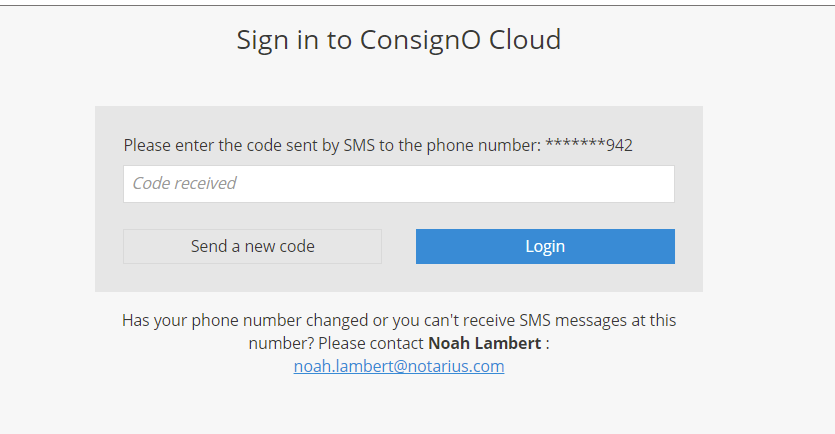
- Enter the code sent by SMS to your associated cell phone number.

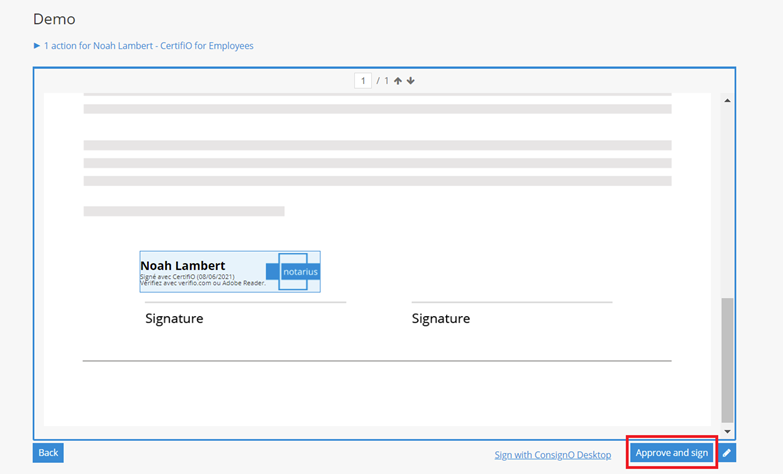
- View the project and click on Approve and Sign.
- An Entrust window will appear prompting you to enter your digital signature password. Enter your password and click OK.
![]() Your digital signature (.epf file) must be on the computer you are signing from.
Your digital signature (.epf file) must be on the computer you are signing from.
You have digitally signed a document on ConsignO Cloud. When all parties have signed. You will be able to download the final document and the audit log.
I want to digitally sign a Consigno Cloud project via the ConsignO Desktop application
During this process, we will sign a ConsignO Cloud project received in the ConsignO Desktop application. If you want to create a ConsignO Cloud project yourself, visit the Create a signature project section.
Follow these steps:
- Open the email sent by consignocloud@notarius.com inviting you to sign the ConsignO Cloud signature project. Then, click on the link.

- Enter the secret code sent by SMS to your associated cell phone number.
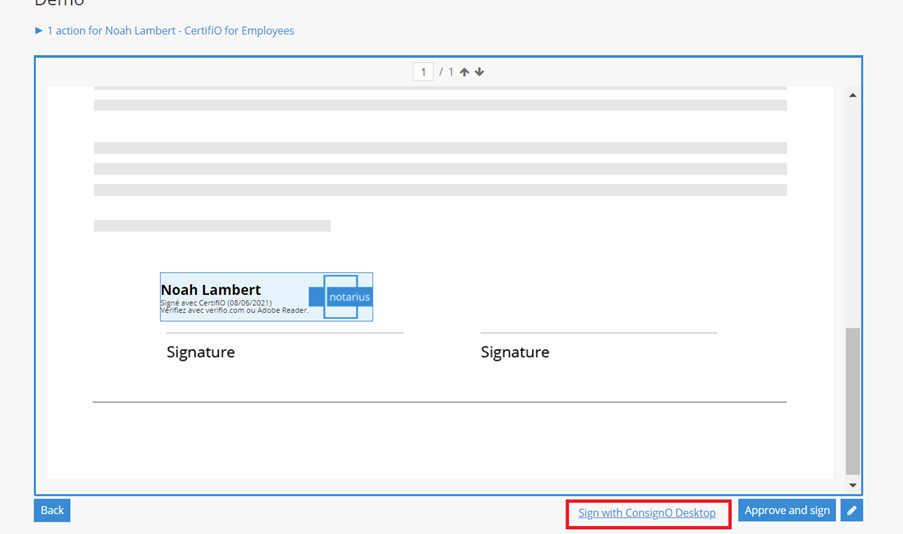
- View the project and Click on Sign with ConsignO Desktop. A page named Send your signed document should open and you will download the project in PDF format. To make the process easier, keep your browser open on the page.
- Open ConsignO Desktop and Open the downloaded PDF document in the application.
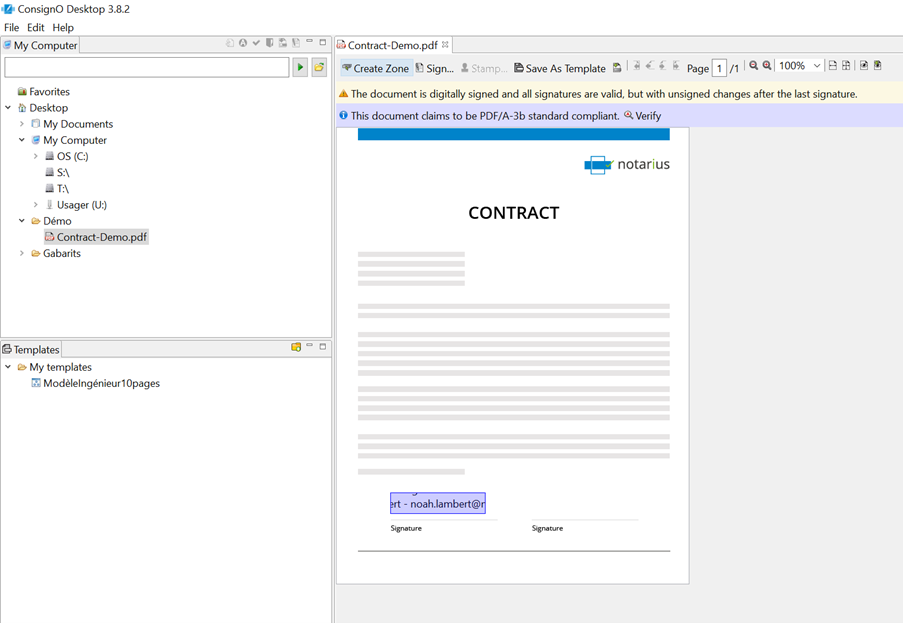
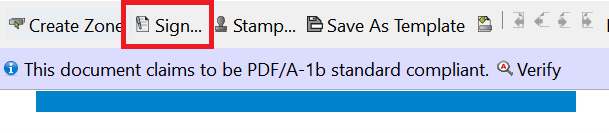
- Click Sign.
- In the Signature Wizard window, select the required digital signature, then click Sign.
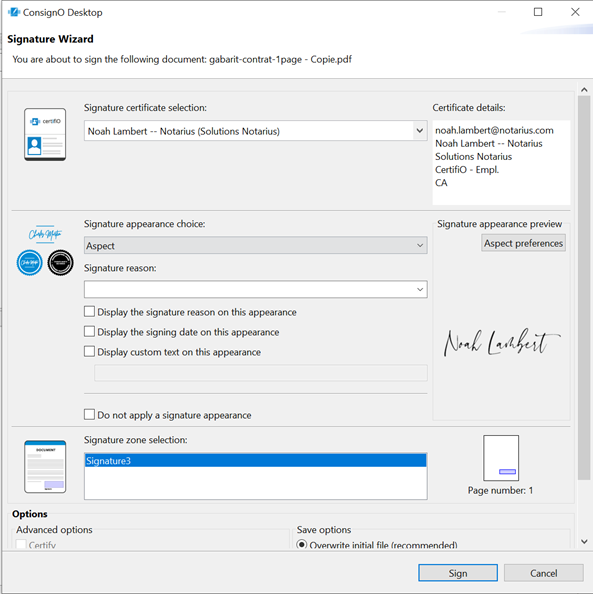
- An Entrust window will appear prompting you to enter your digital signature password. Enter your password and click OK.
Your digital signature (.epf file) must be on the computer you are signing from.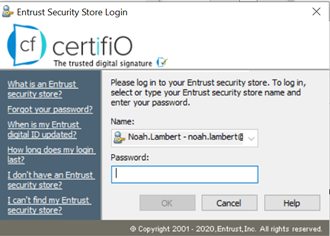
- Go back to your browser and Upload the signed PDF document. Then, click Send signed document.
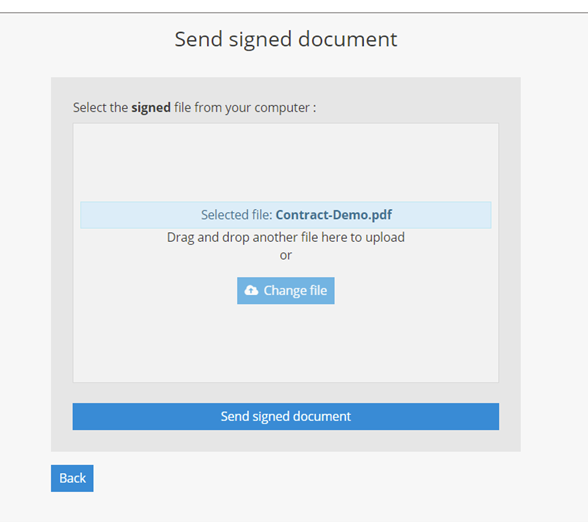
- A dialogue box will advise you that the signed PDF document has been uploaded.

You have digitally signed a document on ConsignO Cloud. When all parties have signed. You will be able to download the final document and the audit log.
Organisation Features - Business and Enterprise plans
Inserting multiple documents
Adding documents
- From the project creation page, click on the
 tab to add a document.
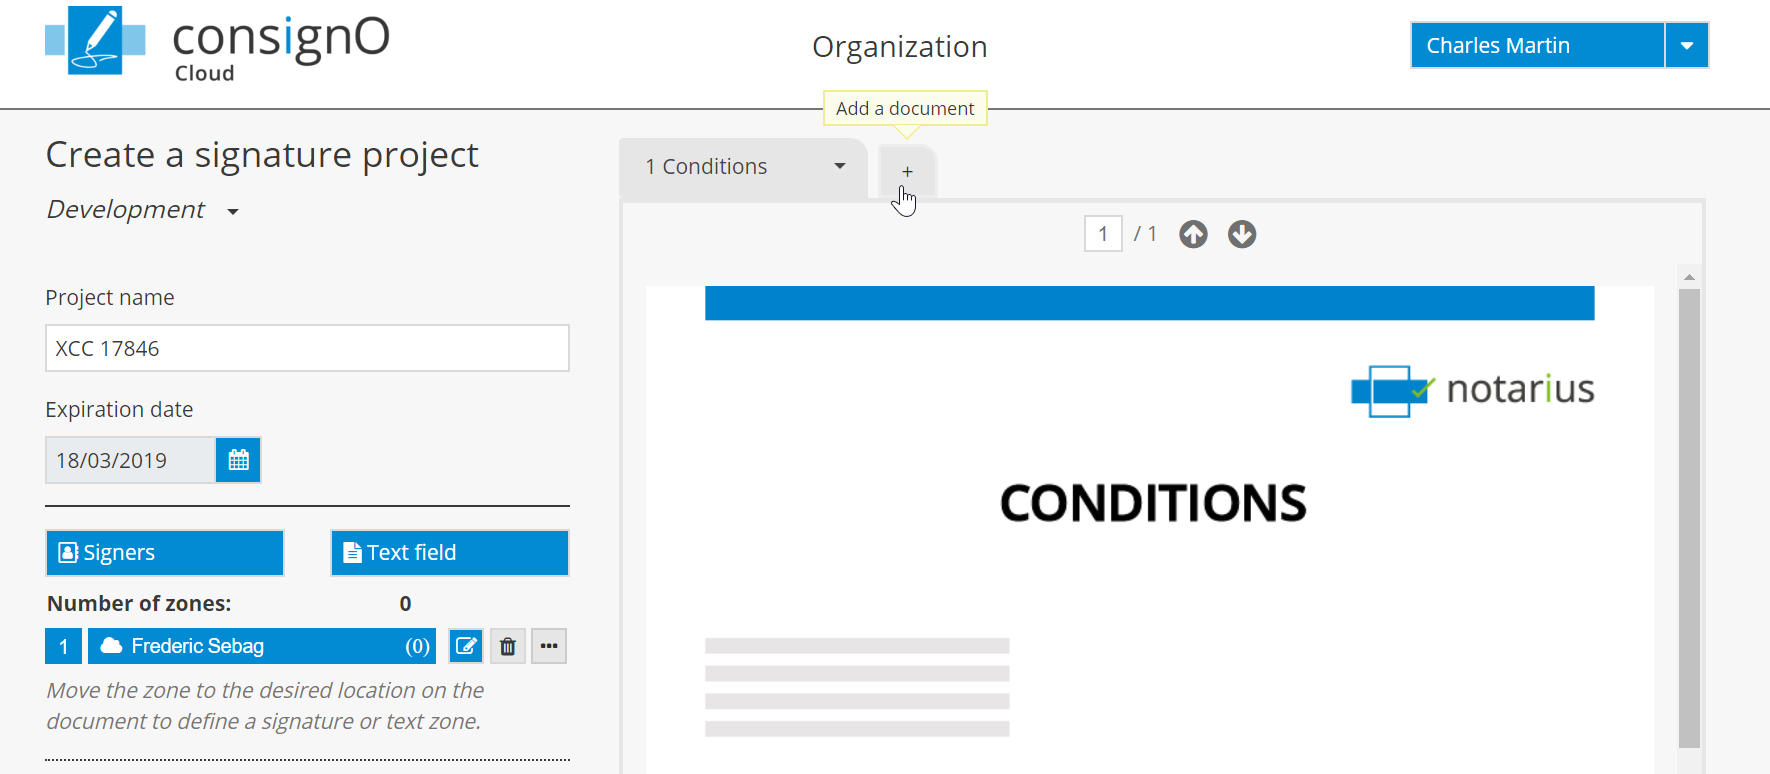
- Select the document to be added. It can be a document that you would like to have signed or a document that you are providing for informational purposes and which doesn’t require a signature.
You can select and upload multiple documents at once to a signature project.
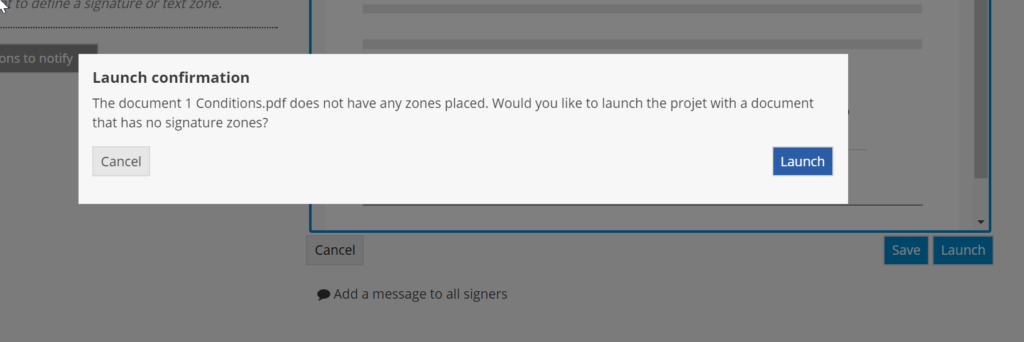
- If the document contains a defined signature zone, the document tab will be blue; if the document is for informational purposes and does not contain a signature zone, the document tab will be grey. Once the project is ready to be sent, click on Launch.
- If the project contains a document that does not contain a signature zone, a request for confirmation will be displayed. To continue, click on Launch once again.
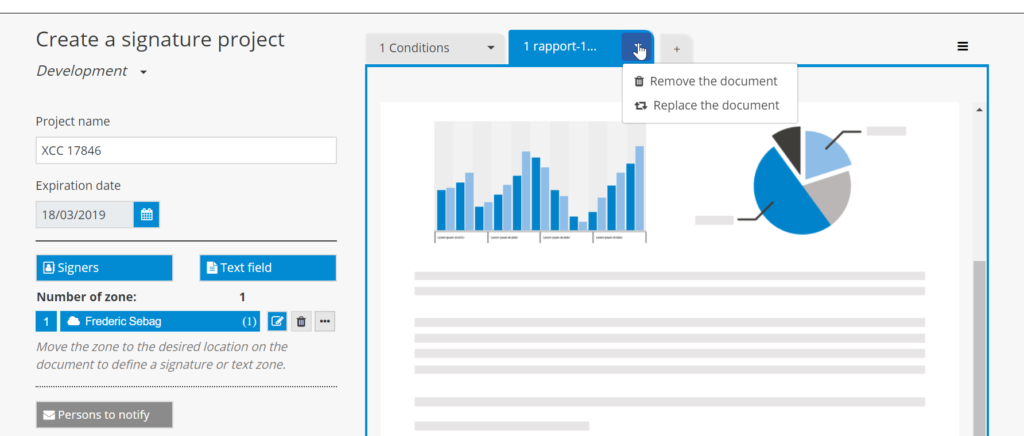
Deleting a document
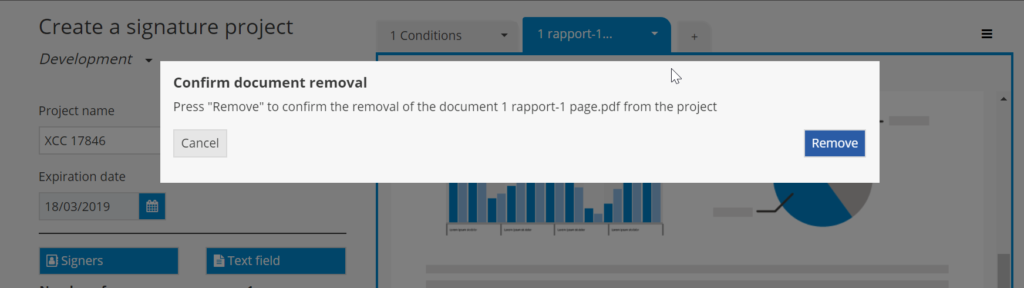
- Click on the arrow in the document tab and select Remove the document.
- Confirm the action by clicking on Remove.
Replacing a document
- Click on the arrow in the document tab and select Replace the document.
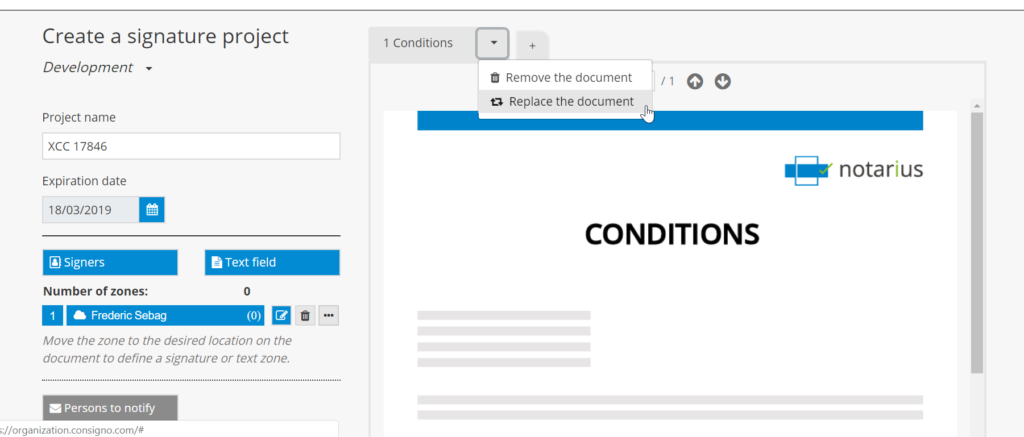
- Select the new document.
Modifying the document display order
The project documents will be presented to signers in the same order as that displayed on the project creation page. To modify the document display order, click on the tab for the document you wish to move, drag it by holding the mouse button down and drop it in the desired location by releasing the mouse button.
Organizational dashboard
You can access your organization’s project dashboard by clicking on the organization projects icon located in the sidebar on the left-hand side of the screen.
![]() This icon is not displayed if the user has been assigned an additional role or is part of a group of users.
This icon is not displayed if the user has been assigned an additional role or is part of a group of users.
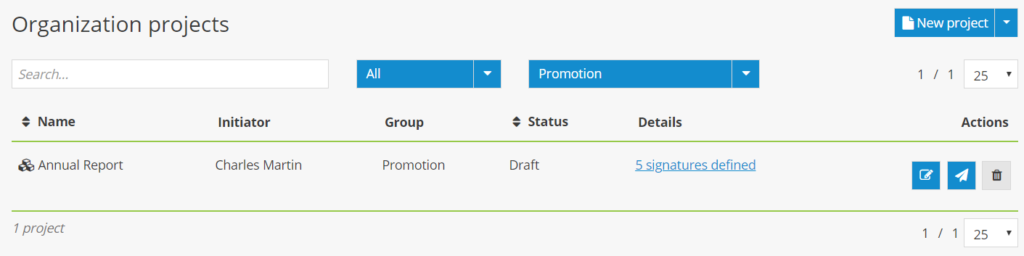
The organization project dashboard displays all of the organization’s projects for which the current user has the necessary rights.
The organization project dashboard contains:
- Projects created by the current user
- Group projects for groups to which the user belongs
- All of the organization’s projects for which the user has been assigned an additional role and has the necessary rights
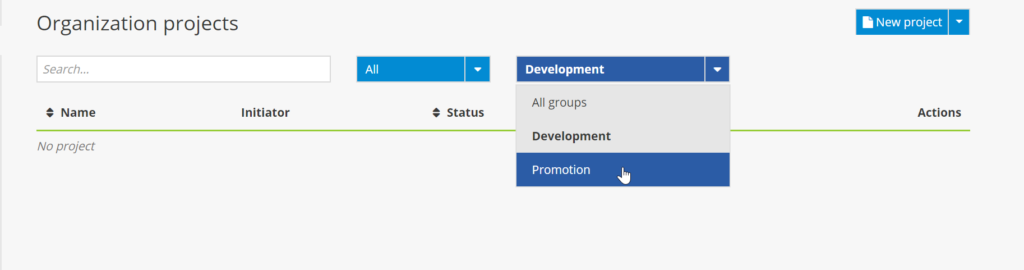
In addition to the dashboard features, the organization project dashboard allows you to see who the project manager is (the person who created the signature project) and includes a search filter to display a specific group’s signature projects.
Managing users
Only users who are designated as an Administrator or Manager under the Business or Enterprise plan have access to the user management option.
- You can access the user management page by clicking on the user management icon located in the sidebar on the left-hand side of the screen.

- The list of users linked to your organization’s account will be displayed.
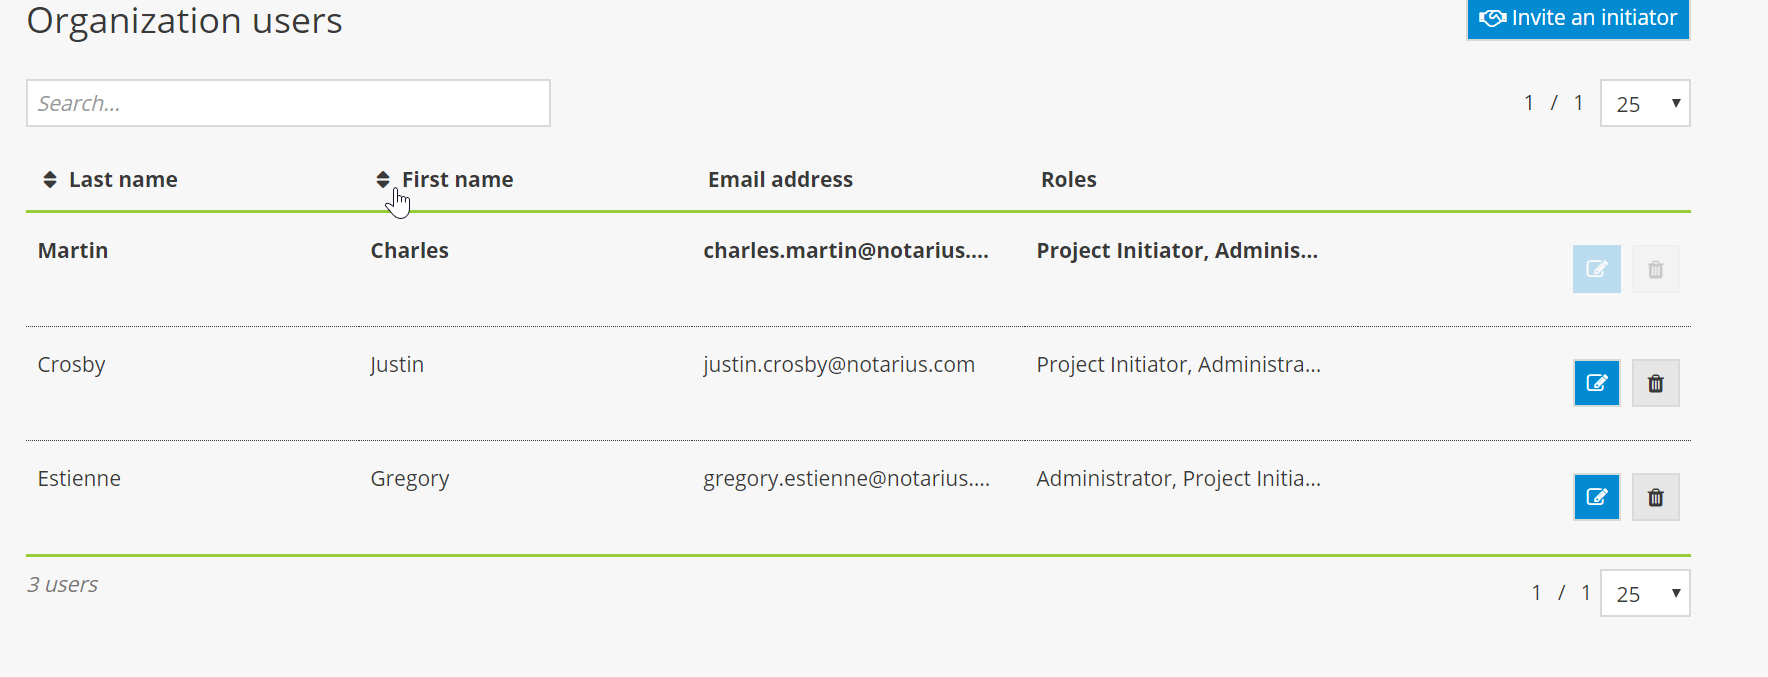
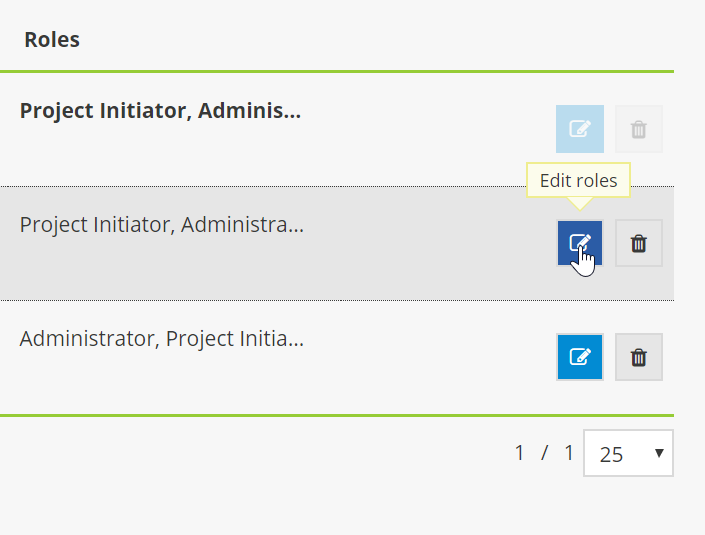
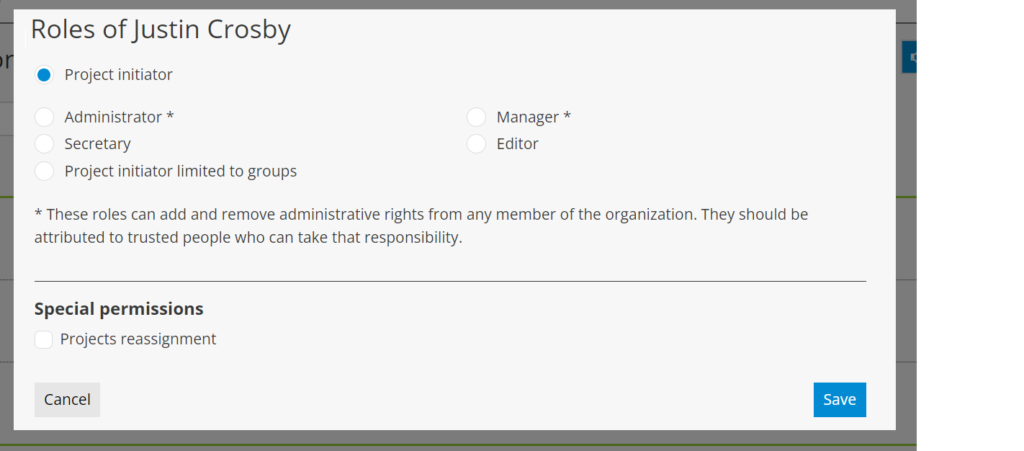
- You can assign an additional role to a specific user by clicking on the role modification icon.
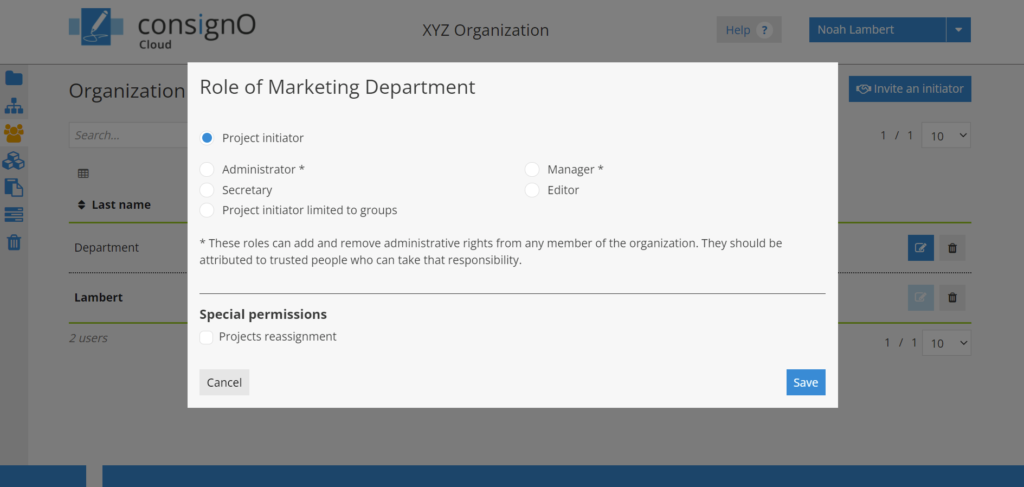
The additional roles available include*:
- Administrator: Has the right to modify the organization’s projects, shared content, the organization’s settings, user management and billing;
- Manager: Has the right to modify shared content, the organization’s settings, user management and billing;
- Secretary: Has the right to access the organization’s completed projects and modify shared content;
- Editor: Has the right to modify shared content;
- Project initiator: Has the right to access projects created by users and shared content;
- Projet initiator limited to groups: Has to be part of a group to launch signature projects, does not have access to a personal address book and cannot edit signers added to a signature project.
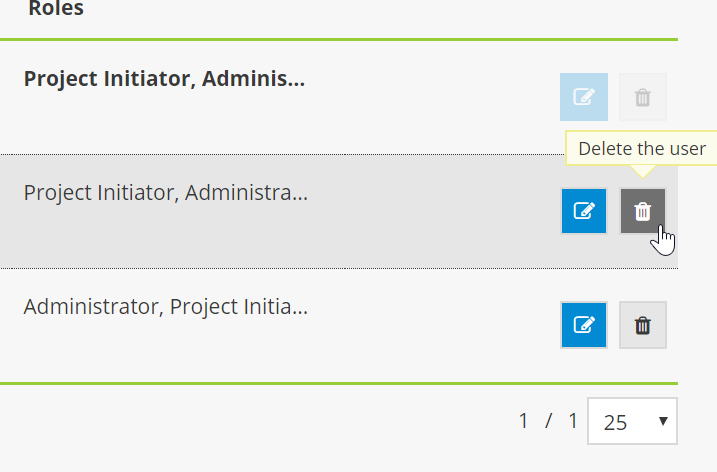
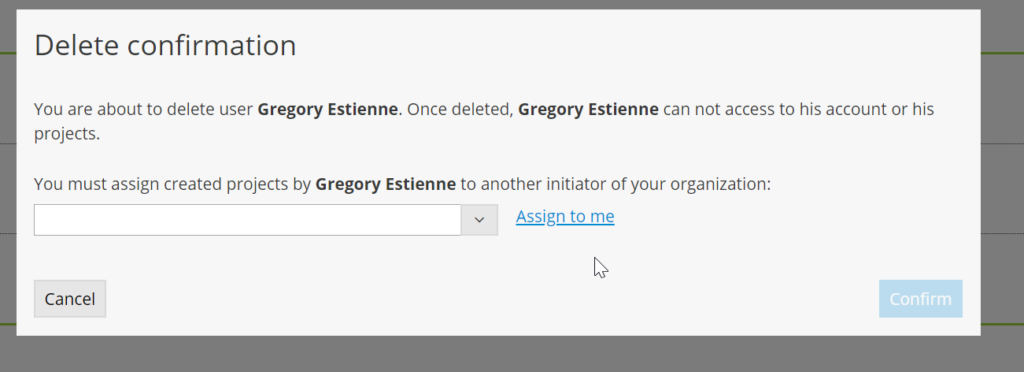
- You can remove a user from the organization’s account by clicking on the trashcan icon. The person who removes a user must then assign the user’s projects to himself or herself, or assign them to another person linked to the organization’s account.
- You can also invite a project manager (user) to register with the organization’s account.

- Enter the required information about the user that you would like to invite and click on Invite. For the Business plan, ensure that you have a licence available before inviting a new user.
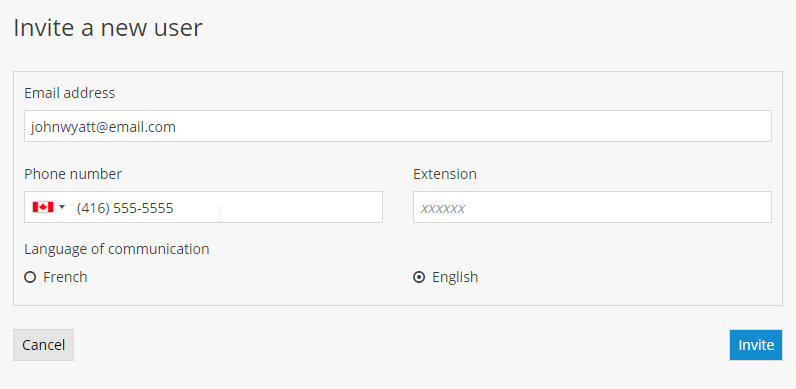
- The user will receive an email inviting him/her to register.

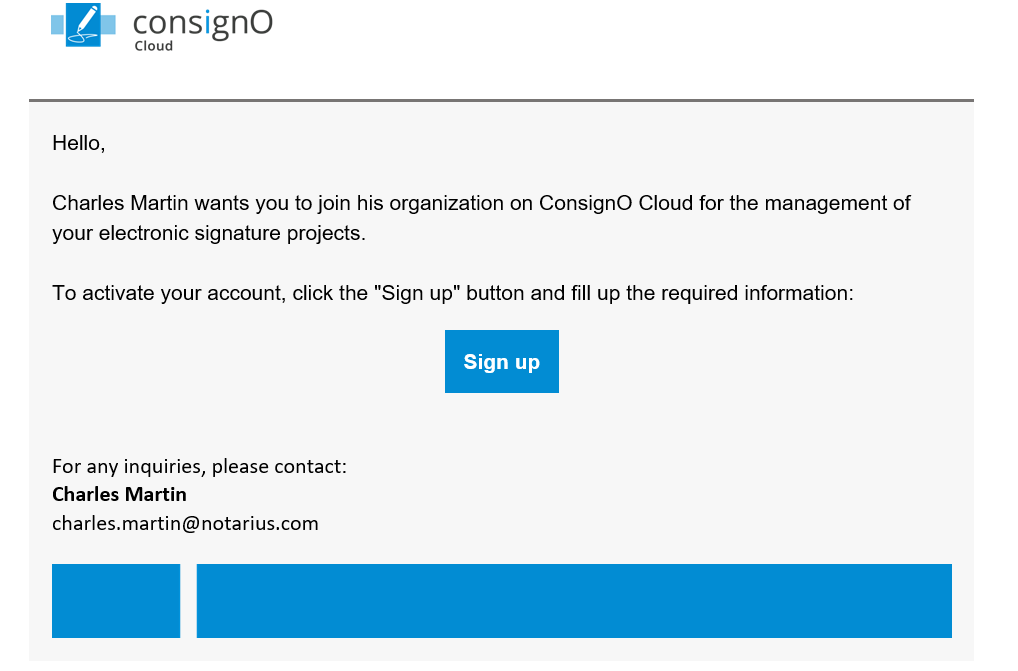
- After clicking on the link provided, the user must complete an invitation form and validate his/her information using a second authentication factor.
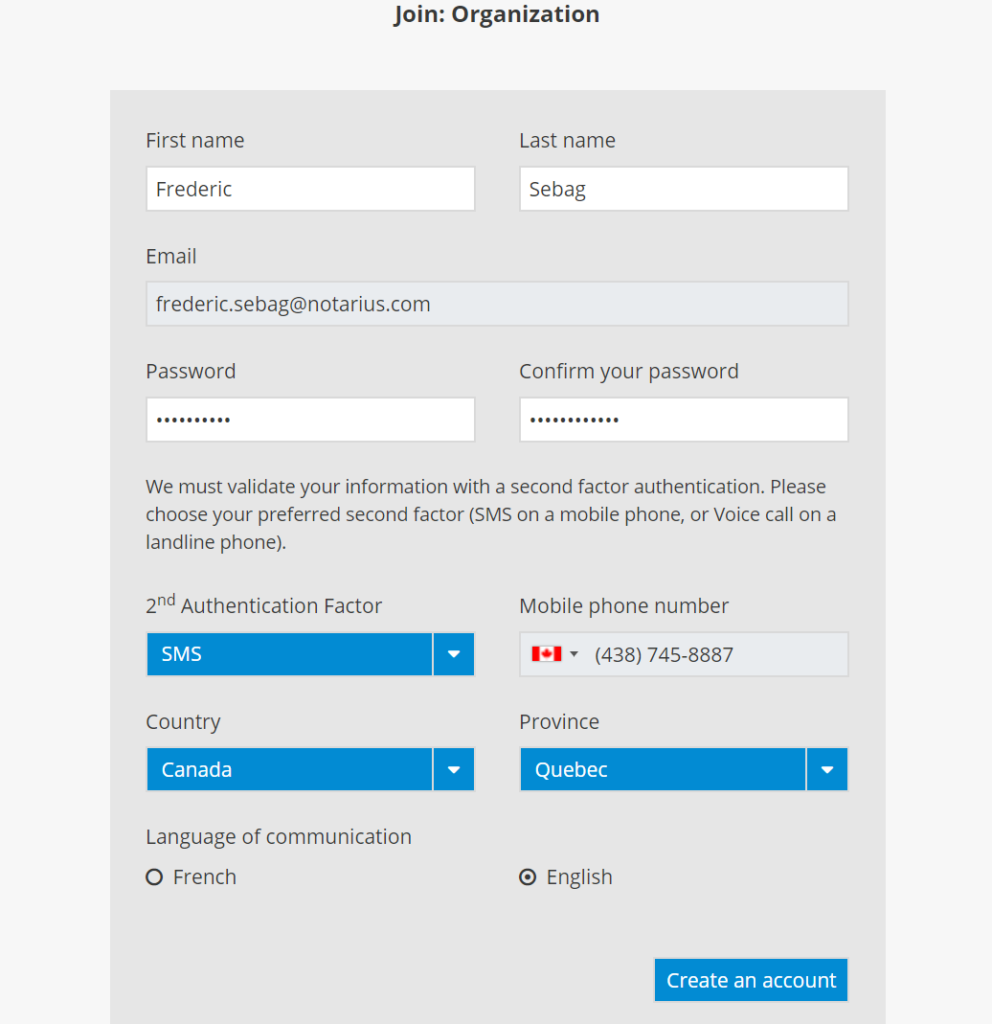
- Enter the required information about the user that you would like to invite and click on Invite. For the Business plan, ensure that you have a licence available before inviting a new user.
Managing an organization’s address book
All of an organization’s users have access to the organization’s address book, but only users with the following additional roles can modify it:
- Administrator
- Manager
- Secretary
- Editor
Adding a signer and modifications are completed in the same way as for a personal address book (see Managing your address book).
Accessing the organization's address book
In your dashboard, click on the arrow to the right of your name and select Address book in the dropdown menu to open the address book.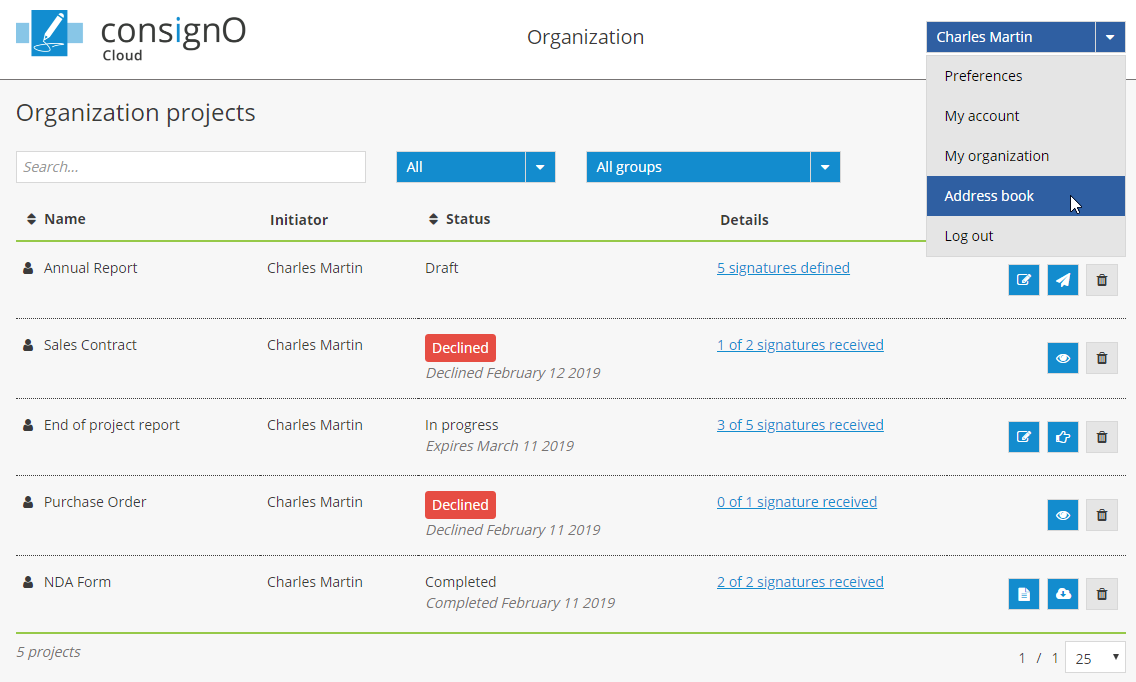
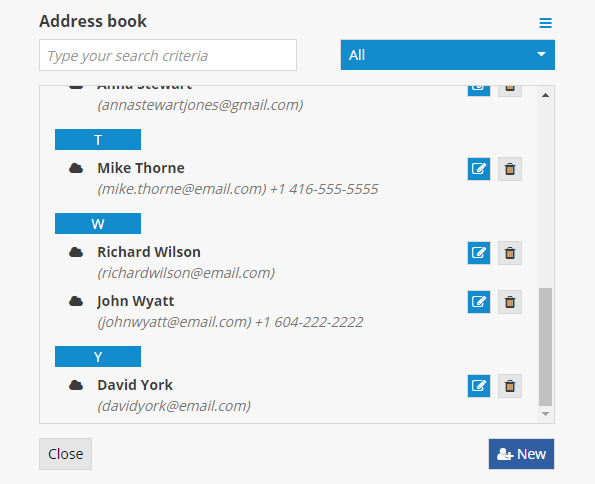
![]() The blue organization icon will be displayed to the right of the name of the contacts contained in the organization’s address book.
The blue organization icon will be displayed to the right of the name of the contacts contained in the organization’s address book.
Click on the All button to display all of the contacts or select the address book that you would like to consult.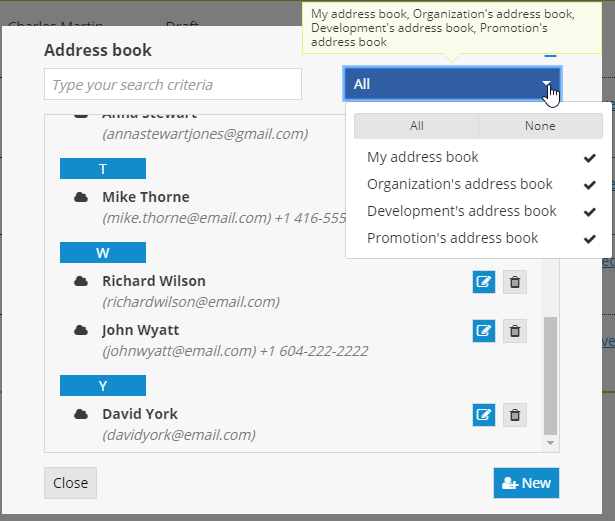
Adding contacts to a specific address book
If you hold an additional role that allows you to modify the organization’s address book, you must select the address book to which you would like to add a contact (yours or the organization’s).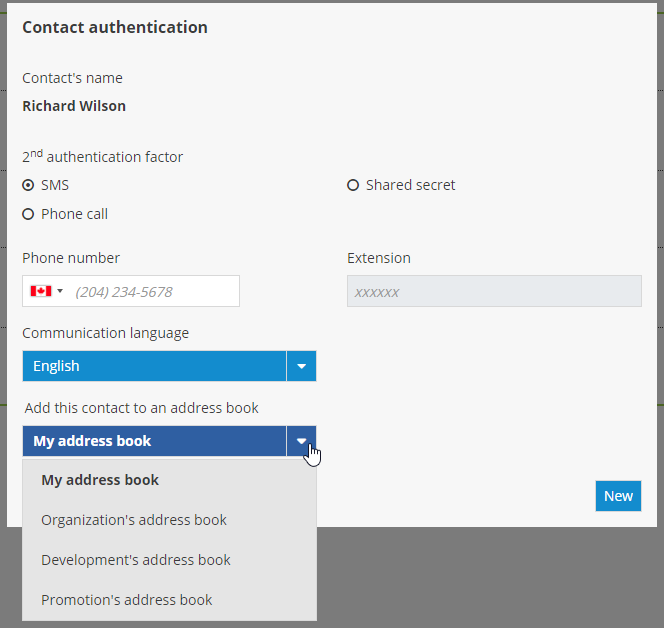
Creating groups and sharing projects
Creating a group in ConsignO Cloud allows you to share projects, address books and project templates between multiple users, or simply group and manage signature projects. You can also manage the rights of users in a group (see Managing the rights of users in a group) according to the group’s project needs.
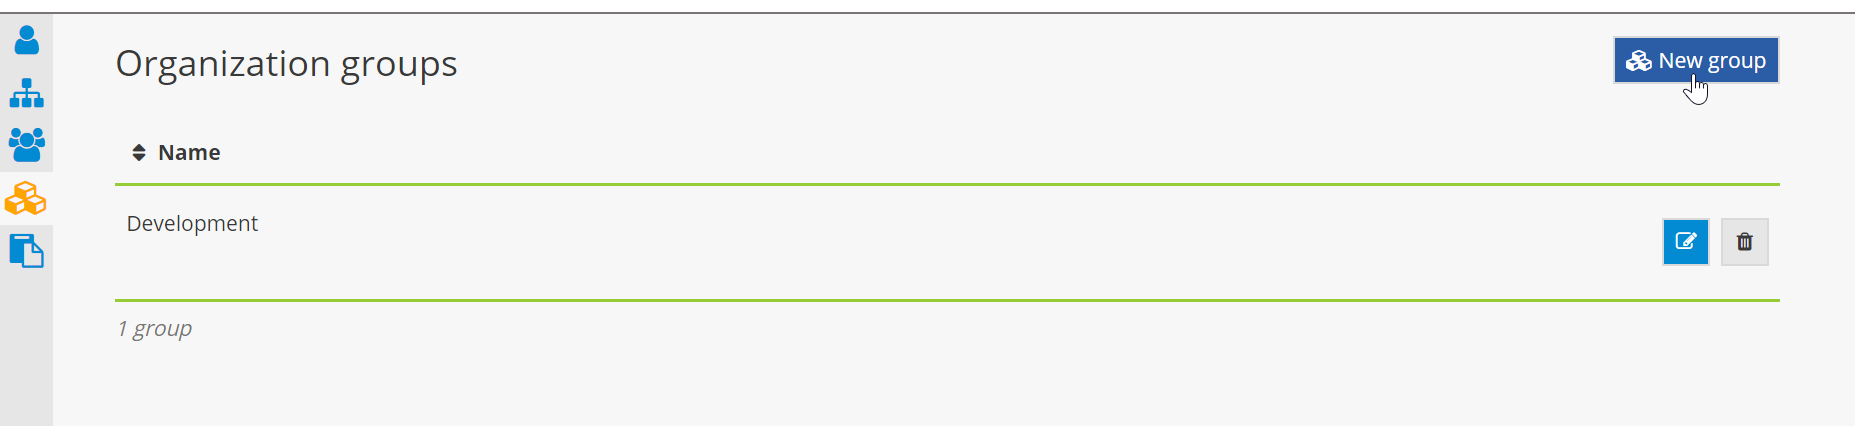
Creating a group
- From the dashboard, click on the button New group.
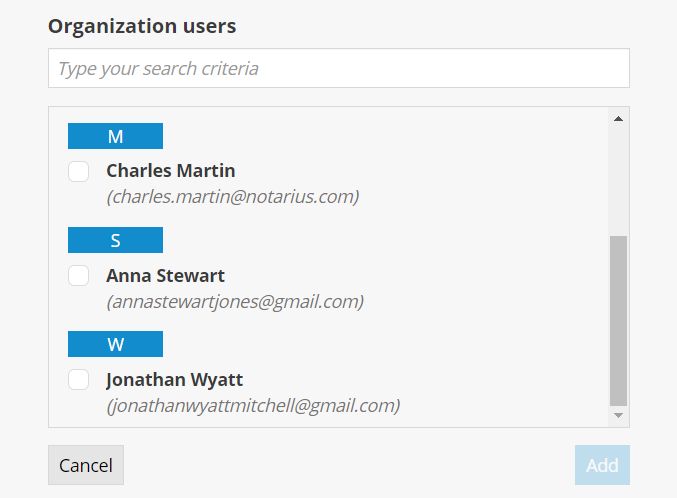
- Name the group, then add one or more of the organization’s users.
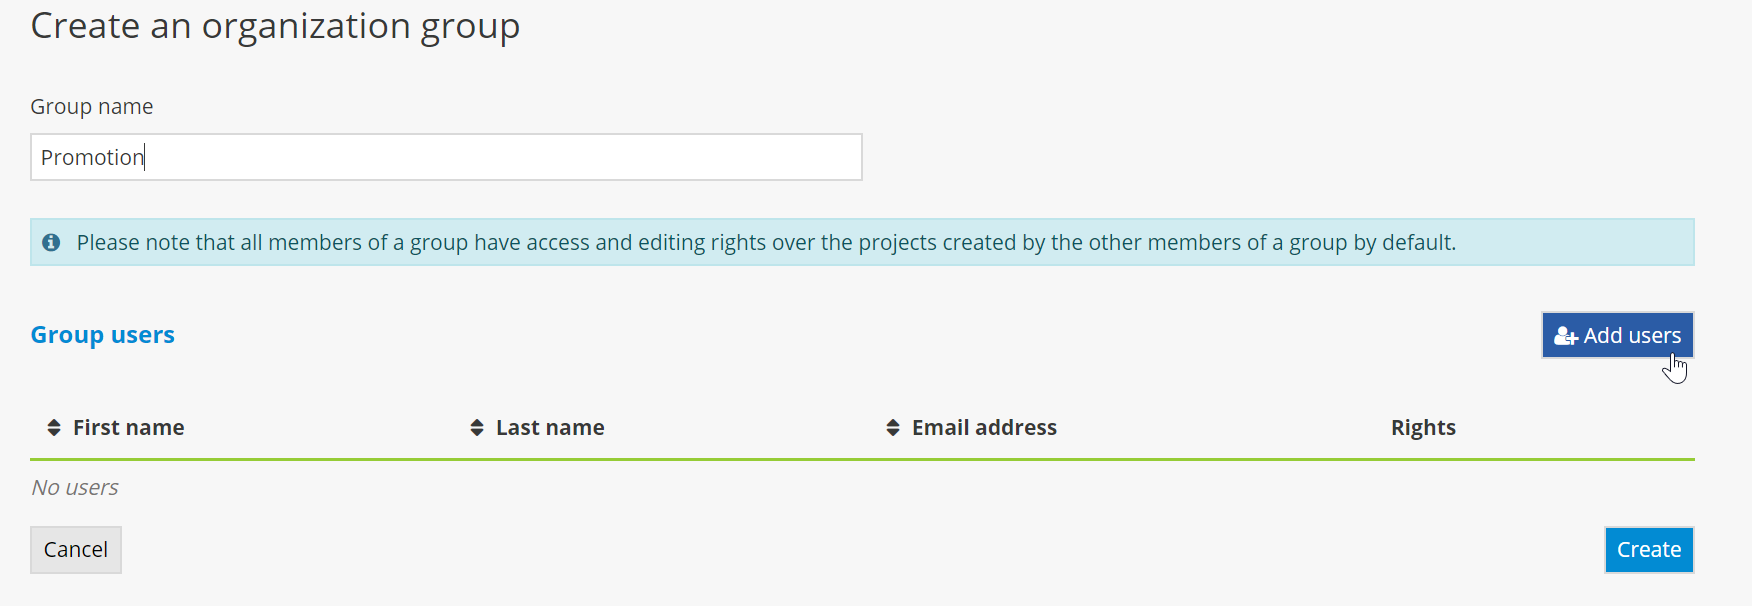
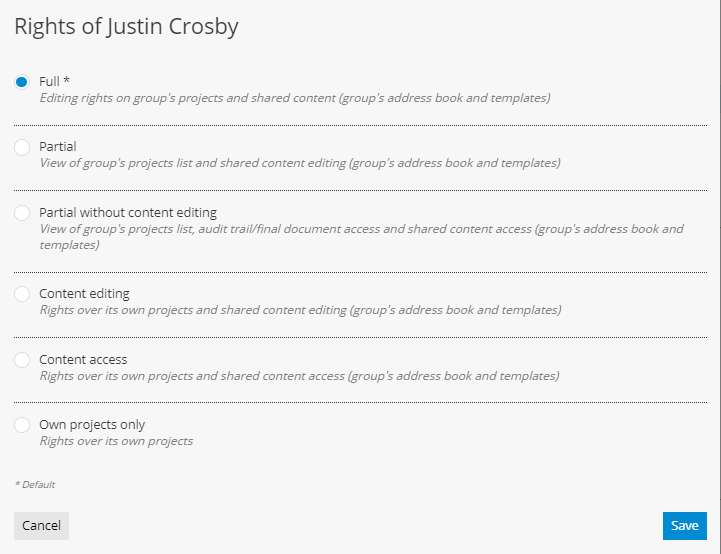
- Click on the pencil icon to display the rights level page for the selected user.

- Select the rights level that you would like to assign to the user, then click on Save.
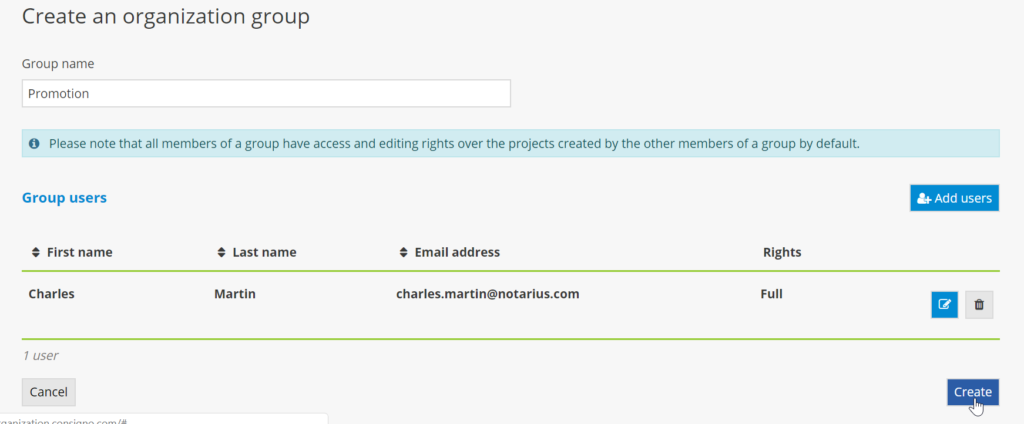
- Click on Create to finish creating the group.
Modifying a existing group
1. Click on the crayon icon to modify a group’s information.
2. Modify the group’s name or user information, then click on Save to apply the changes.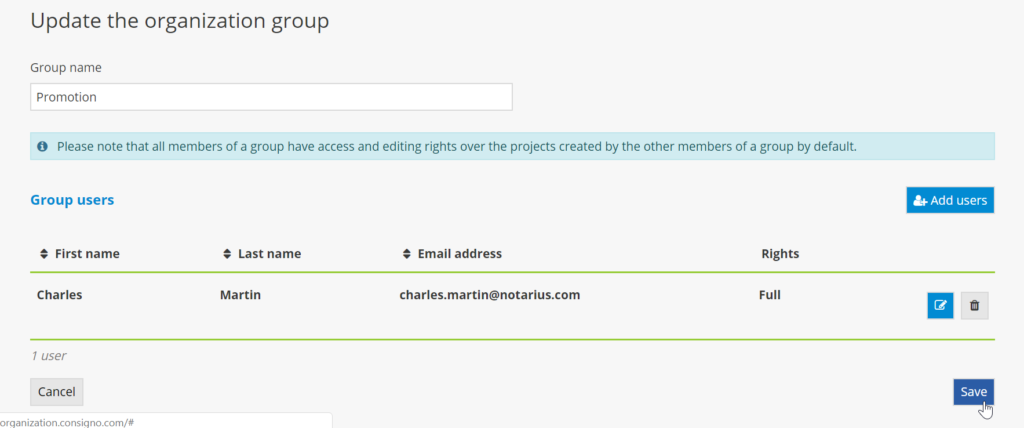
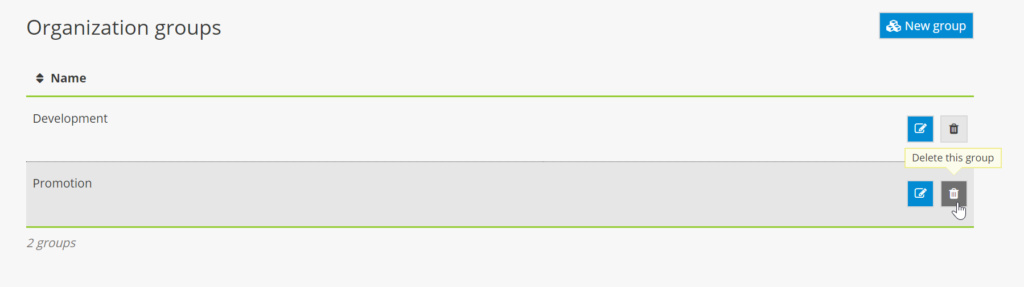
Deleting an existing group
- Click on the trashcan icon to delete a group.
Assigning a project to another group
- To assign a project currently in progress to another group, click on the pencil icon.
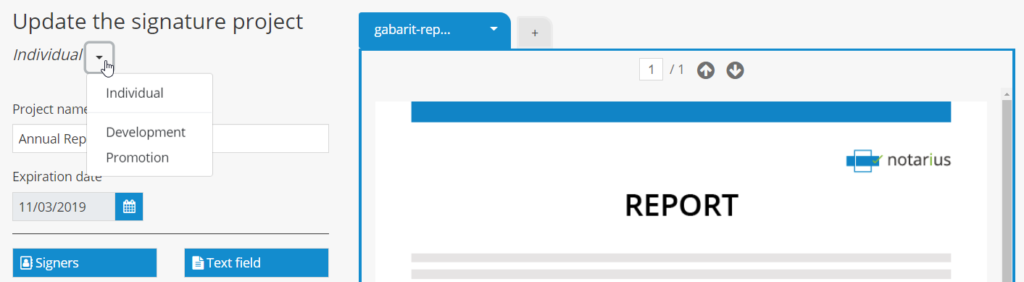
- Then click on the arrow to the right of the name of the current group and select the group to which you would like to assign the project.
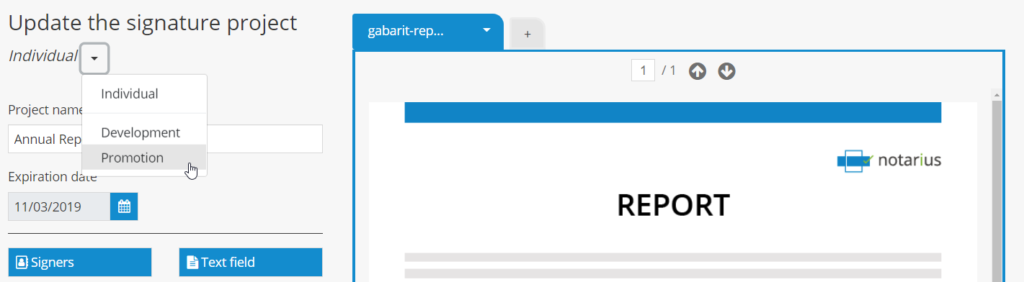
- Once you’ve selected the new group, click on Apply.
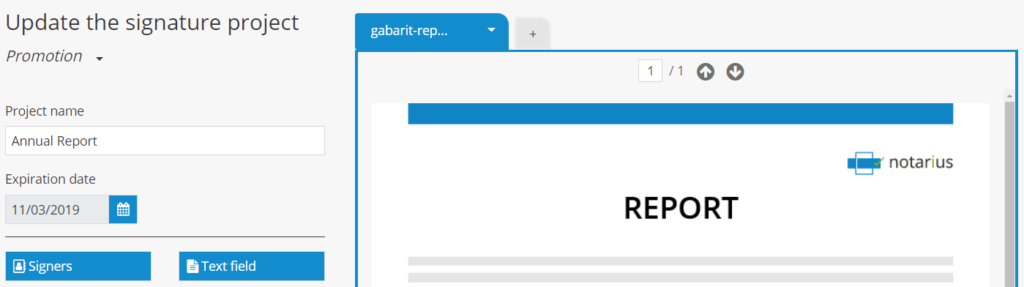
The project will no longer be displayed in the list of the former group’s projects.
- The project will now be displayed in the new group’s project list. To display the new group’s projects, click on the arrow for the dropdown menu to select the group from the dashboard, then select the name of the new group.
Managing rights in a group
A group’s users can have different rights based on the needs of the signature project. If you hold the role of Administrator or Manager, you can assign or modify the rights levels for users in a group.
To assign or modify a user’s rights, click on the pencil icon corresponding to the group in question.
![]() Ensure that the user is included in the group.
Ensure that the user is included in the group.
Once on the Update the organization group page, select the pencil icon corresponding to the user.
Then select the rights level that you would like to assign to the user and click on Save.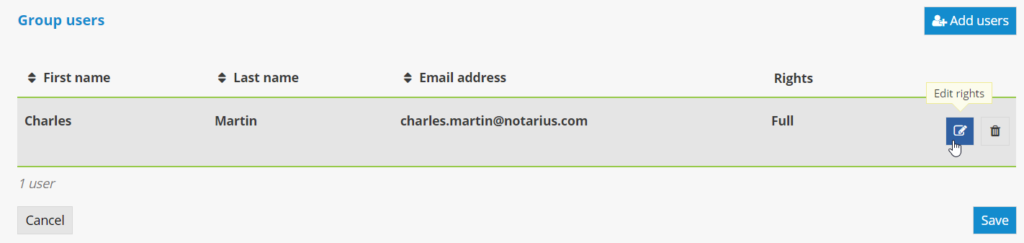


Sending projects in bulk
The bulk projects feature allows you to create and send out projects in batches within a single click.
To get started, go to My bulk projects dashboard by selecting it from the left sidebar.
Adding a list of signatories
The first step is to create a bulk project by clicking on the New bulk button: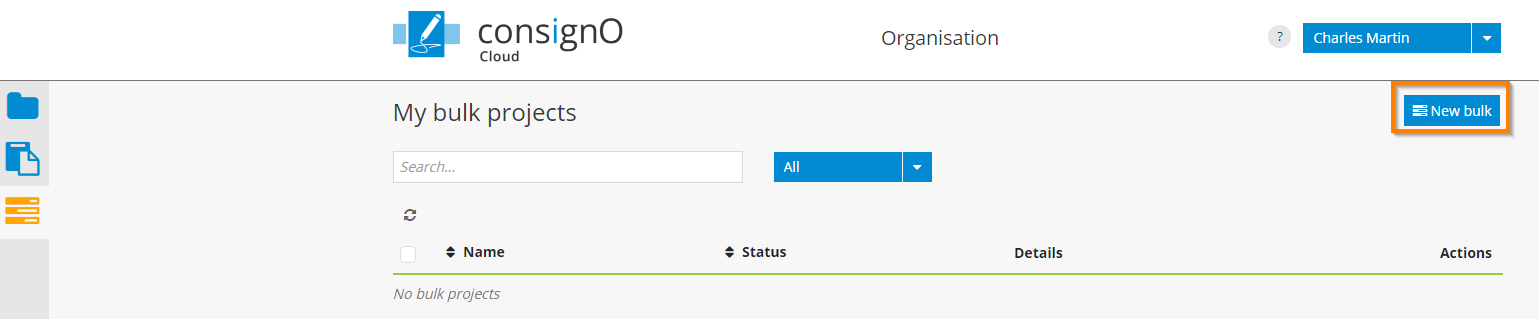
The page for creating a bulk project is similar to the one for creating an individual project. However, here you will have access to features that are exclusive to the batch sending functionality.
Start by importing a list of recipients, to which the individual signature projects will be sent to. To do this, click on “Bulk signers” and you will prompted to select your CSV file containing your list of participants. An option to download a template is also available to prepare your CSV file. Each line in the CSV file will equal to one participant and, thus one signature project launched.
Once uploaded, click on the “Create” button to import your CSV list.
![]() Tip: If your recipients are already in your address book, use the CSV export feature available from it to create your CSV file.
Tip: If your recipients are already in your address book, use the CSV export feature available from it to create your CSV file.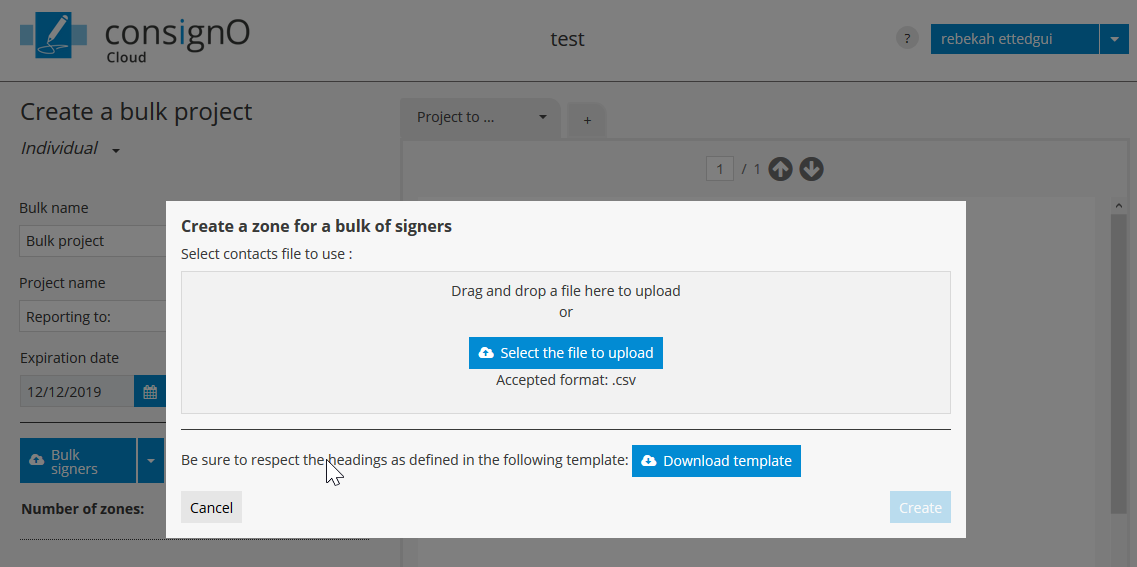
The list added will contain all the recipients for your bulk project and one signature project will be created for each recipient.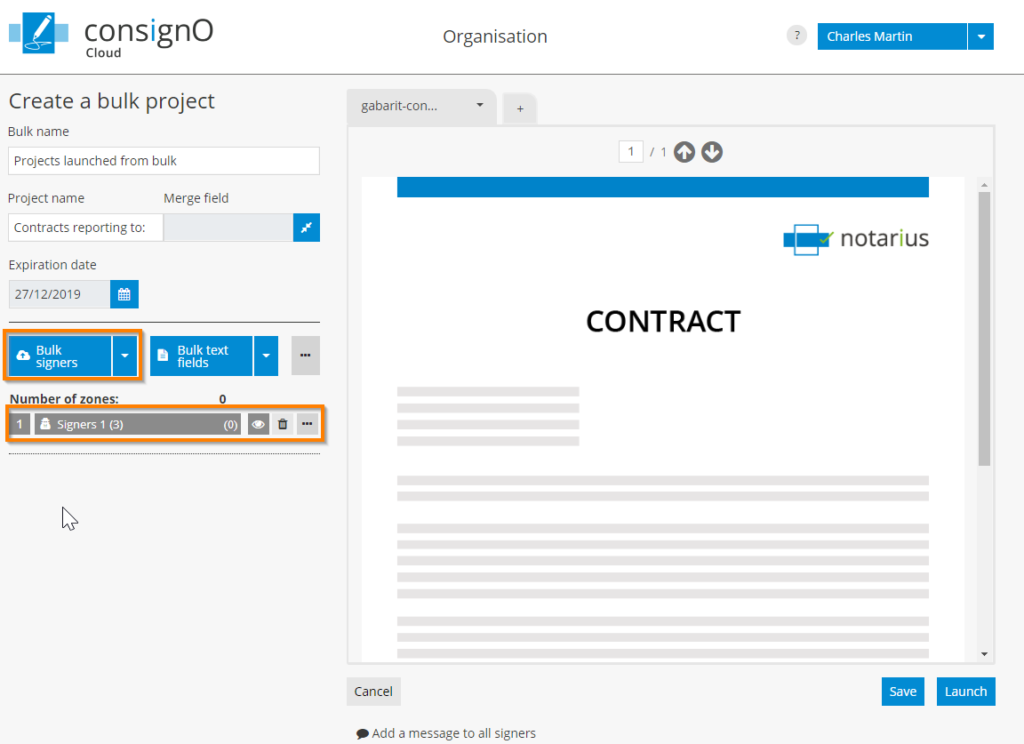
Drag the generic signature zone on the desired document area. You will see caption “First name Last name“. The first and last names will update dynamically per project launched: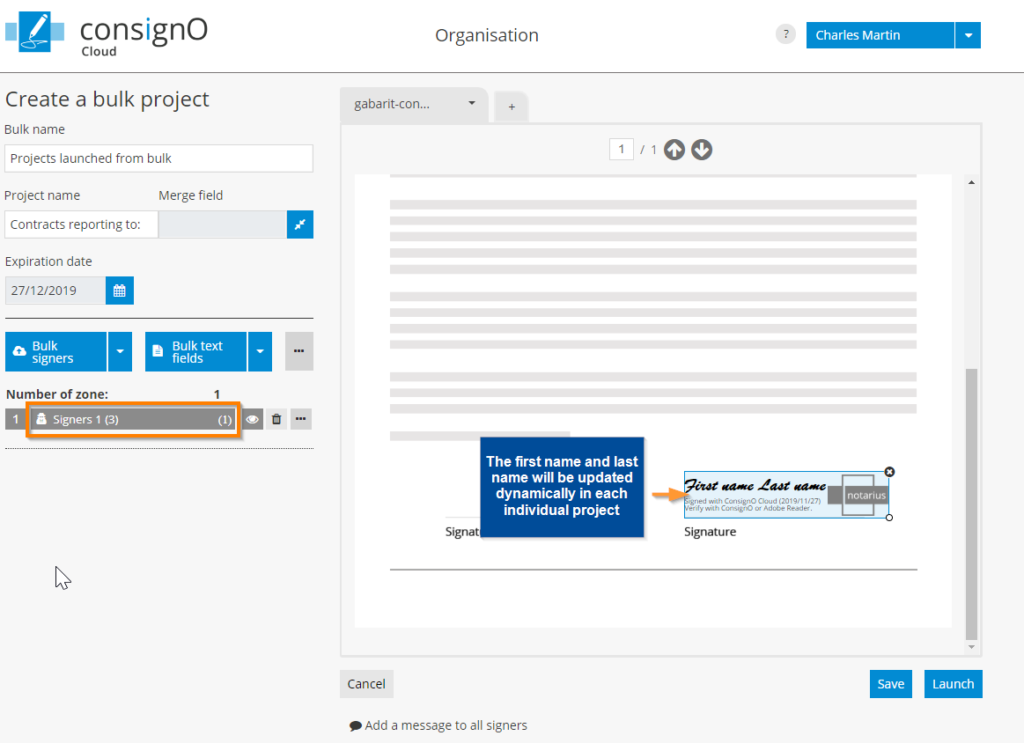
Option: Adding a defined signer
If you wish to add a defined signer that will be the same in all the projects launched from this bulk, click on the arrow next to “Bulk signers” to reveal the option “Signers“: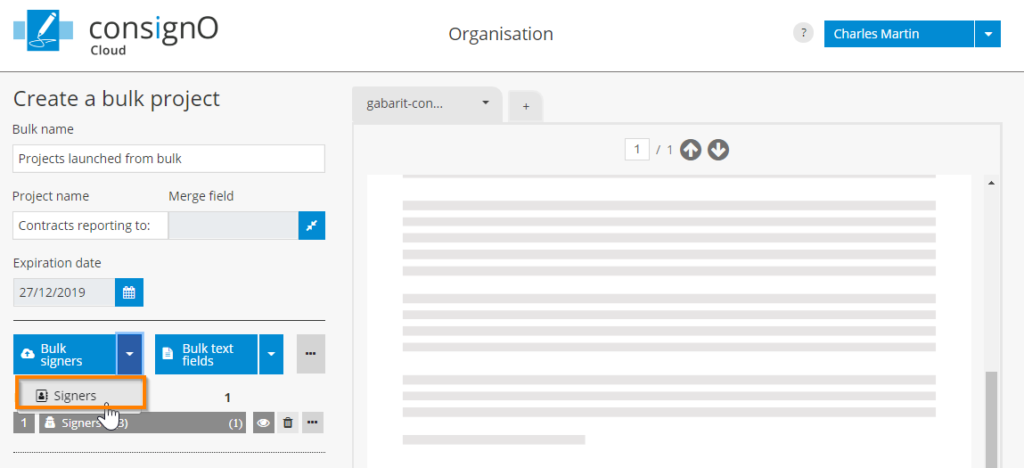
Select a signer from your address book (or define a new one) and drop it into the desired location within the document: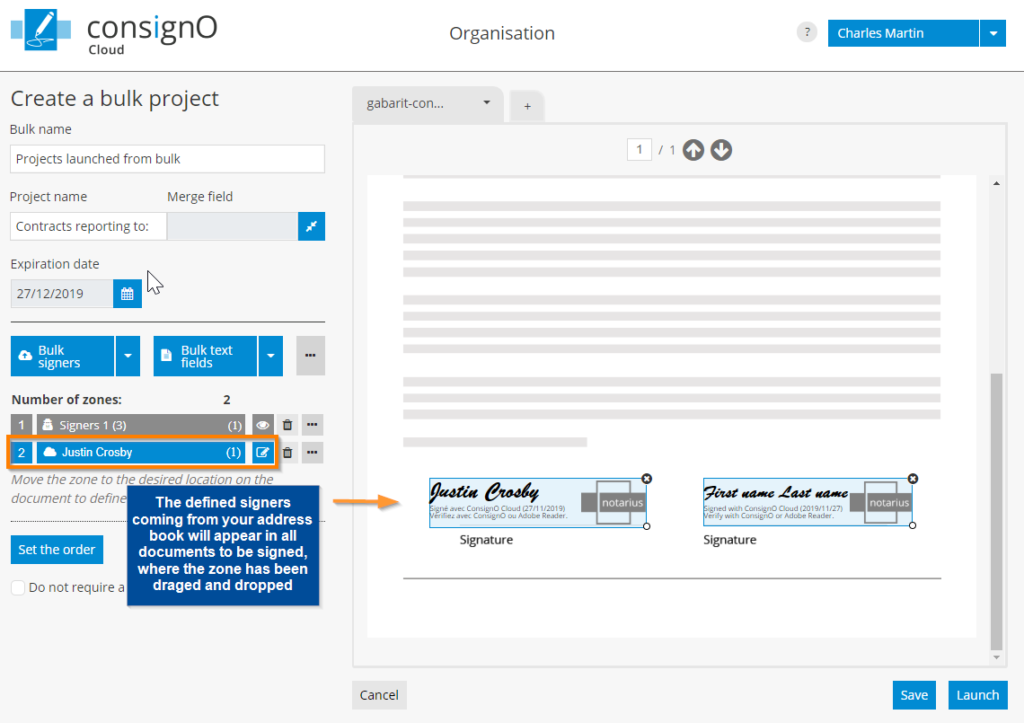
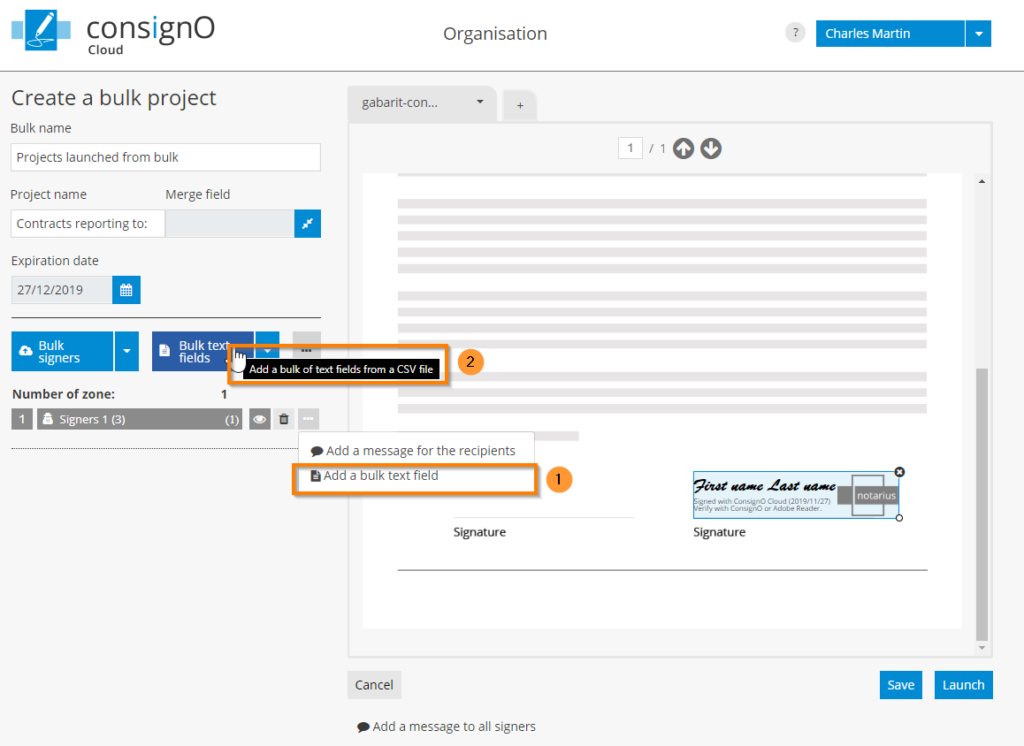
Option: Adding a bulk text field
You can also add text fields that will be assigned to all participants in a given list of your project in bulk. To do this you can either:
- Assign a text field to the already created list of signers by selecting the “Add a bulk text field” option from the menu to the right of the signer’s field
- Use a new list of participants by importing a new CSV file via the “Bulk text fields” button
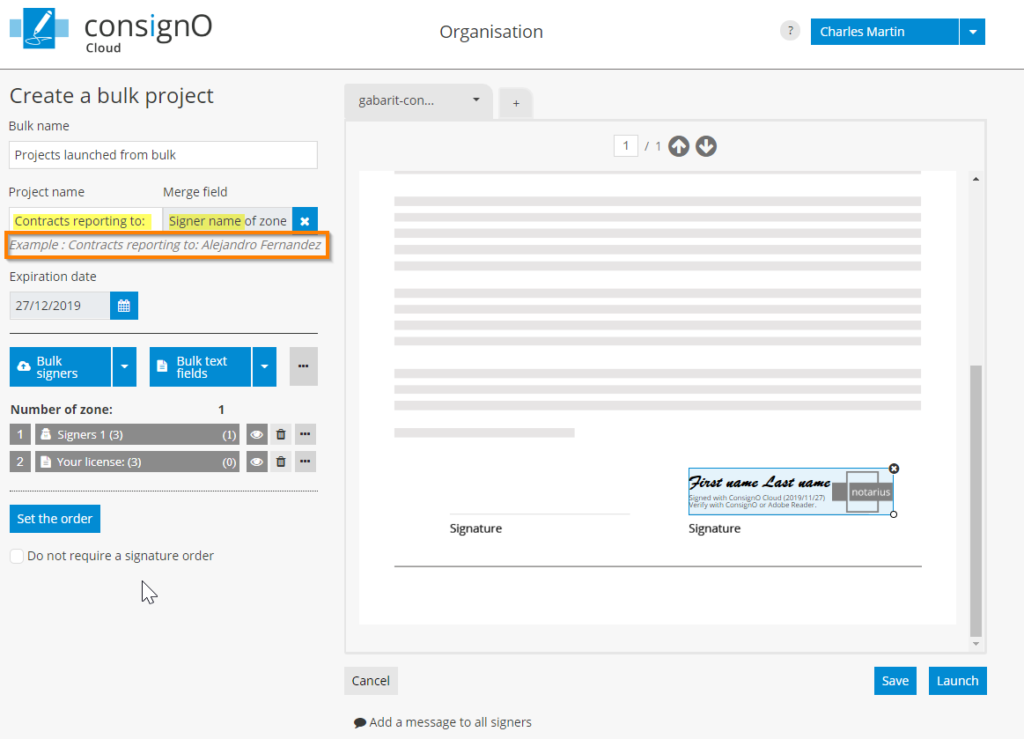
Option: Customize the name of signature projects
Once your signers lists and text fields lists are imported, you can also customize the title of your individual projects by adding the name of participants. The first and last names of the participants in a given list will appear concatenated in the subject lines of the emails sent-out and in all the individual projects. Simply click on the “Merge field” button and select your participants list from which the names should be extracted: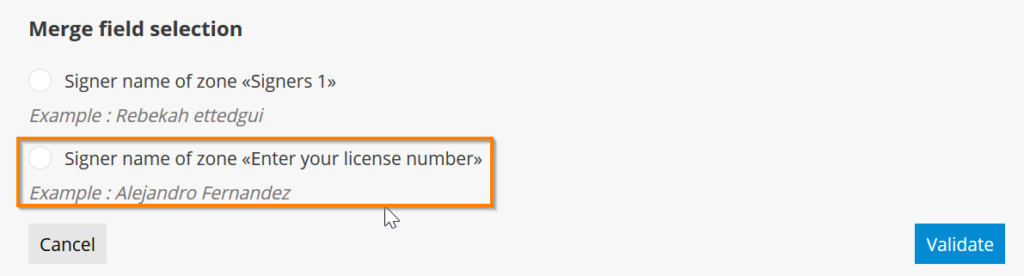
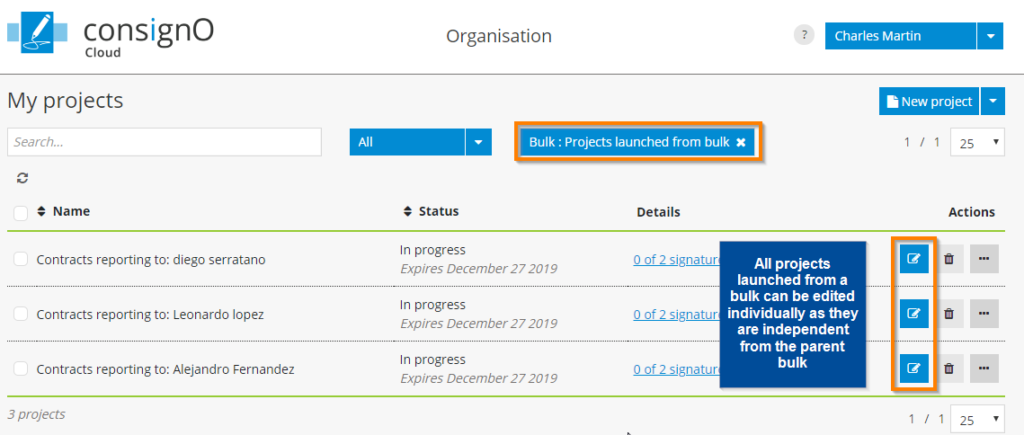
After launching, only one parent bulk project will appear on the My bulks page and each individual project resulting from this bulk will be available on My projects page. You can manage/edit them individually without any restrictions or dependencies on their parent project:
Re-assignment of project
The reassignment function makes it possible to transfer the responsibility for managing a signature project from one instrument to another. Thus, the instrument who initiated a signature project which is reassigned will no longer be the supervisor and will no longer be able to access it.
The signature project reassignment feature is enabled by default for Administrators and Managers of an organization. They can thus reassign signature projects that they have initiated or any other to which they have access under the organization’s dashboard.
As this function is not activated by default for the other instrumentors of the organization, the Administrators and Managers can authorize this special permission via the user management page.
- When accessing the user edit option, the window presents the role options as well as the special permissions section. It is under the latter that it is possible to authorize the reassignment function for a given instrument.
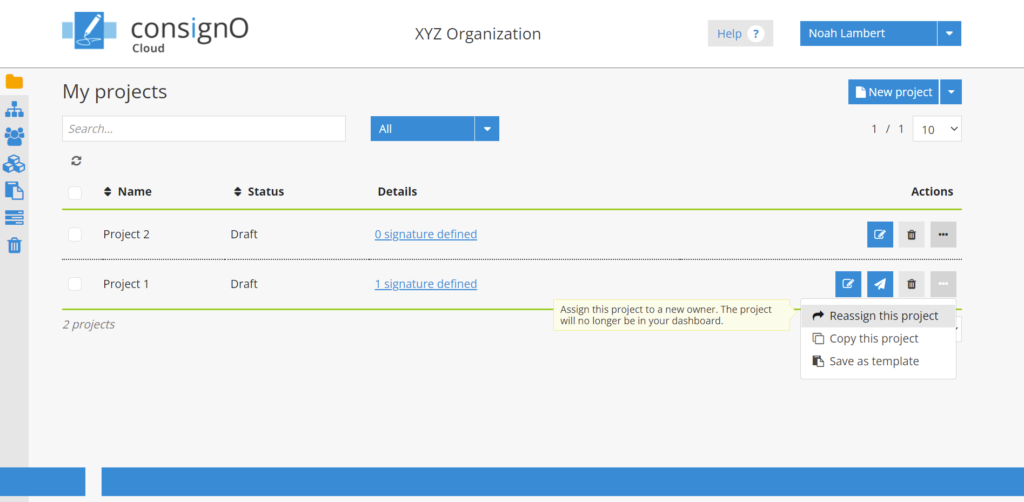
When the project reassignment permissions are active for an instrument, the latter can access it via two options:
- Via the contextual options menu for each signature project:
- Or, via the multiple selection option:
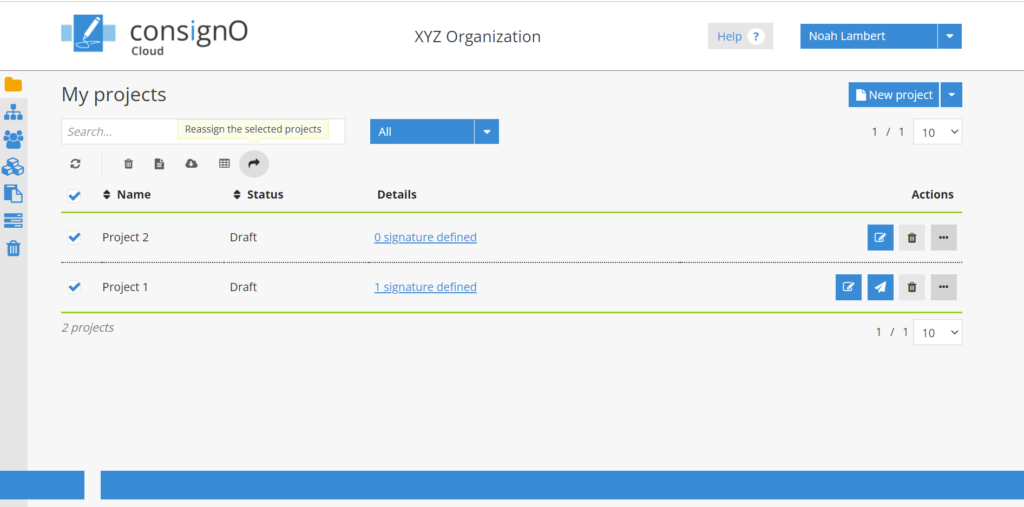
When selecting the option, a reassignment window for the project(s) is presented and allows you to enter the email address of another person in the organization.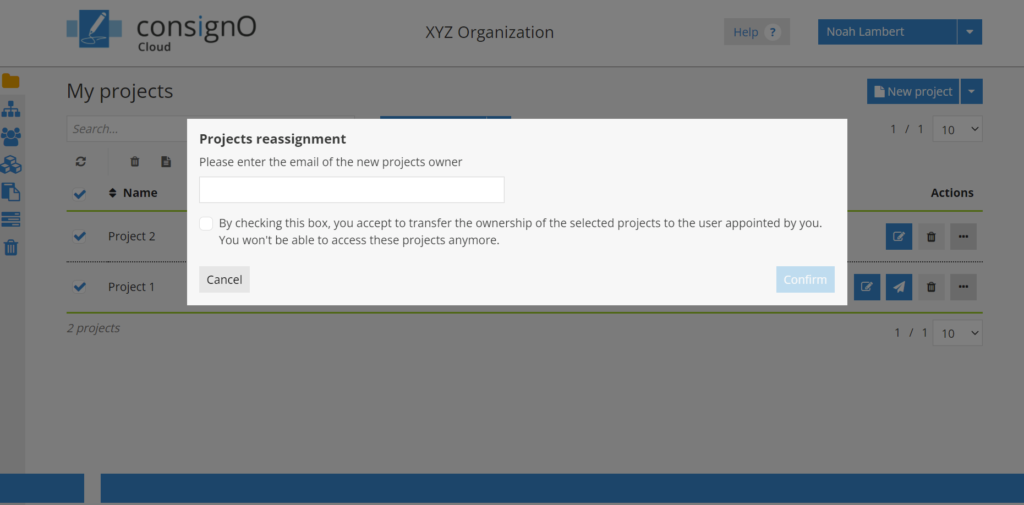
Once the email address is entered, please check the box advising of the transfer of ownership of the signature project and press Confirm to complete the reassignment.
Generate usage reports
Only users who are designated as an Administrator or Manager under the Business or Enterprise plan have access to generate usage reports.
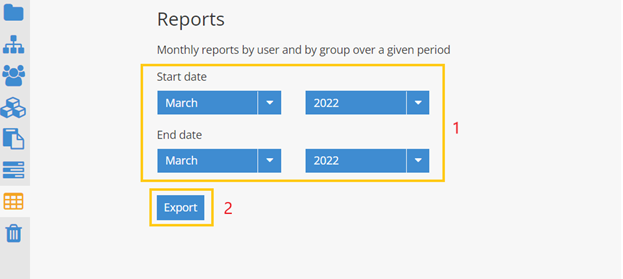
- You can access the usage “Reports” page by clicking on the Reports icon located in the sidebar on the left-hand side of the screen.
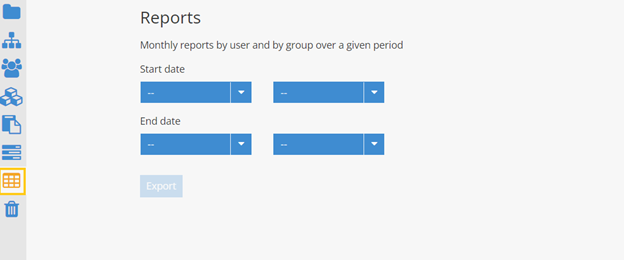
- On the « Reports » page: Select the start date and end date using the drop-down menus to specify the month and year Note: The selection must be made over the past months, no report will be produced for the current month. Click on Export
- Retrieve the downloaded zip file from your browser and view the generated reports in an explorer window

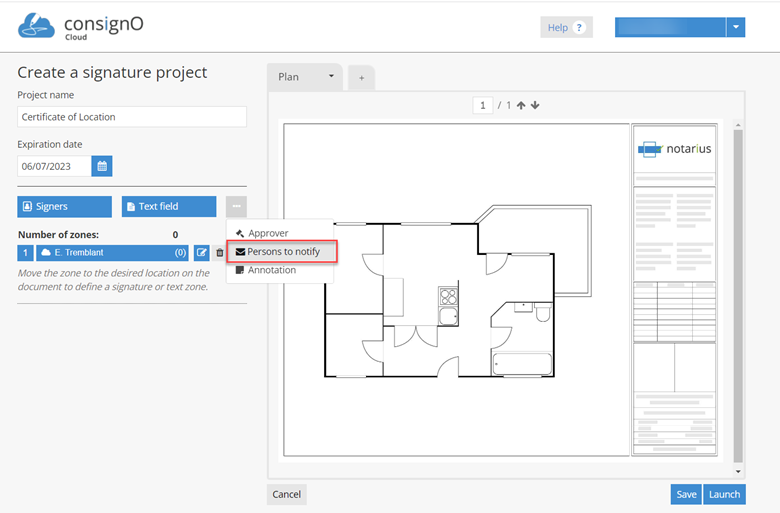
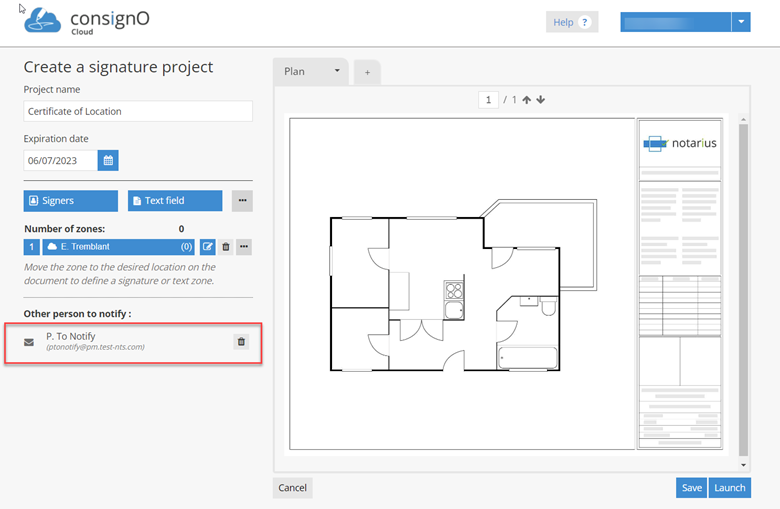
Person to notify
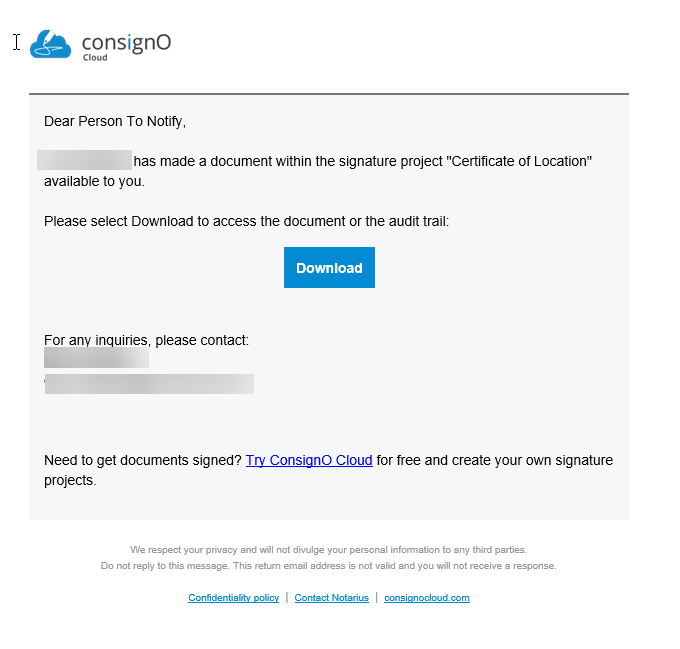
The “Person to Notify” function automatically notifies a defined person so that they can access the documents of the completed signature project. This person then receives an email allowing him to download the completed signature project, once the latter has been authenticated.
One or more people to notify can be defined in a signature project. On the other hand, once a signature project is completed, it is not possible to add people to notify, you must then use the “Transfer” function from the dashboard.
- Add a person to notify and designate them from the address book or by creating a new contact.
- The “Other person to notify” section appears with the information of the person to notify
- When the project is completed, the person to be notified receives an email and can download the completed project
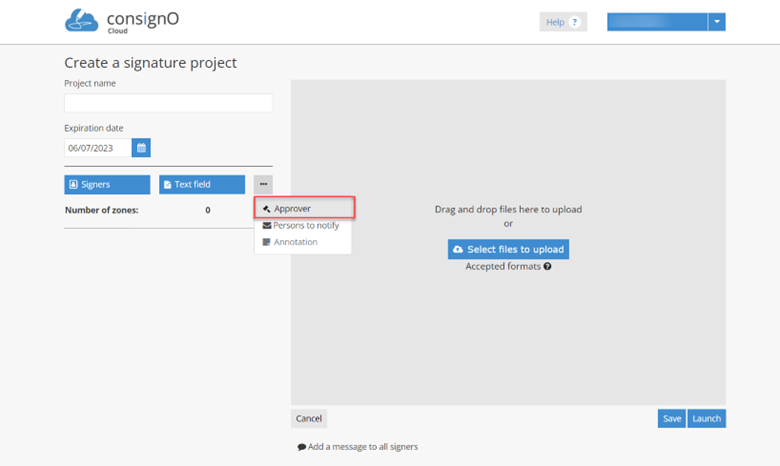
Approver
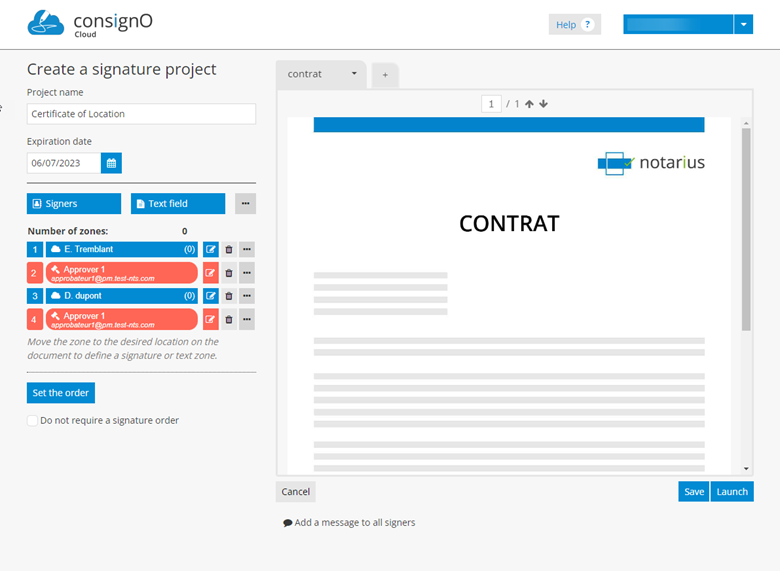
The Approver function allows you to define a person who will be responsible for approving the signature project or ending it by refusing it. The approver can be added at any position in the signing sequence and will be notified by email when it is their turn to approve. He will have to authenticate to access the signature project and then approve to allow the signature flow to continue or to end it by refusing.
A signature project can have one or more approvers.
Another particularity of the approver is that unlike a signer, the approval action leaves no trace on the signed document, only the audit log will have a trace of the approval.
- Add an approver and designate him from the address book or by creating a new contact.
- Place the approver at any stage of the project or between each signatory as in the example below.
- The approver receives a notification email when it is his turn to take action. Once authenticated, he has the choice between “Approve” or “Refuse” the submitted project.
- By approving, he allows the continuation of the signature project and the next participant defined in the signature project is notified. If the approver was placed at the last stage, his approval allows the finalization of the signature project.
- By refusing, he ends the signature flow, and the signature project is cancelled. This state is final, and it will not be possible to restart this same signature project.
Signature Delegation
1- Signatory experience: Delegating signing
Signature delegation allows a signatory to transfer the signature of one or more project documents to another person.
Note: The signature can be transferred multiple times. This action will create a delegation chain including the names of the people authorized to sign the document at any time.
In the signature room, click on the options menu to the right of the “Approve and sign” button and select the “Delegate to another person” option.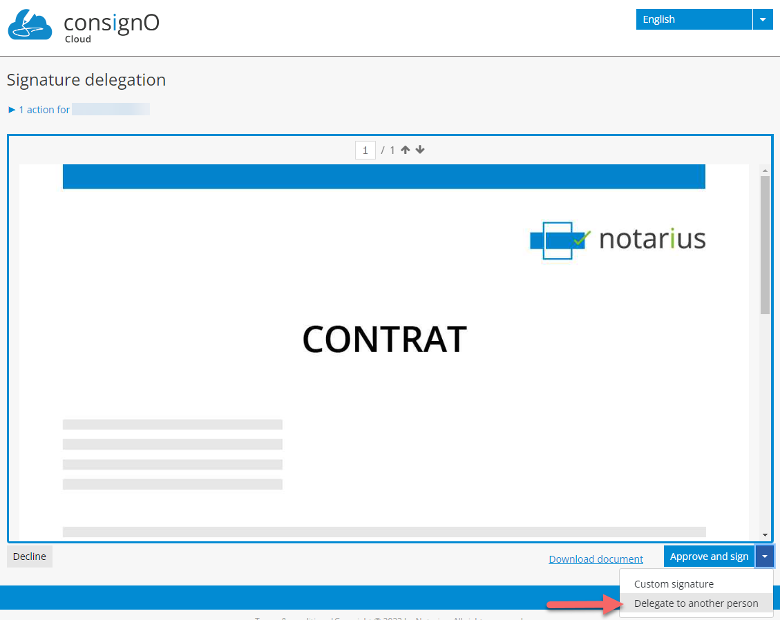
Then indicate the information required from the new signatory.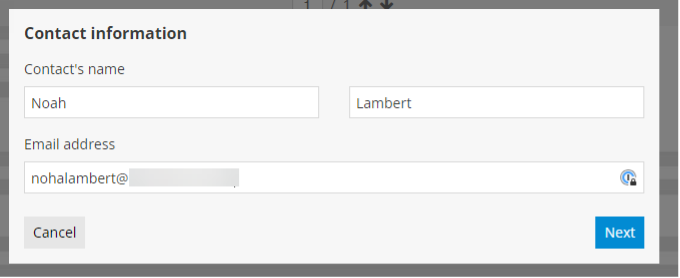
Then fill in the authentication information for that person.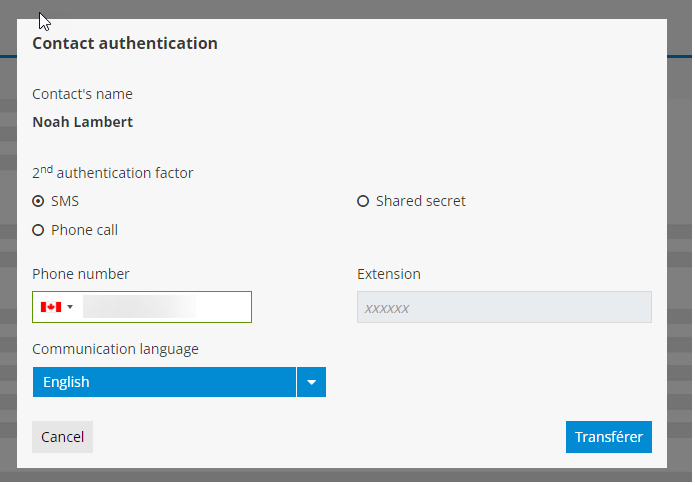
A confirmation message is displayed and you can close the window.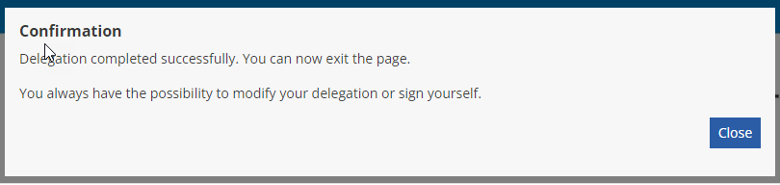
The delegation of signature is carried out to another person. The new signatory will receive an email informing them that their signature is required in the signature project. You can always sign the project or edit or delete the delegation. You can leave the page.
2- Editing and deleting signature delegation
Once delegation has been activated, a delegating signatory can return to the signing room (by clicking on the link received in the initial email informing them that they had to sign a signature project) to edit or delete the delegation. Once in the signing room, click on the options menu to the right of the “Approve and sign” button and the editing and deletion options are displayed.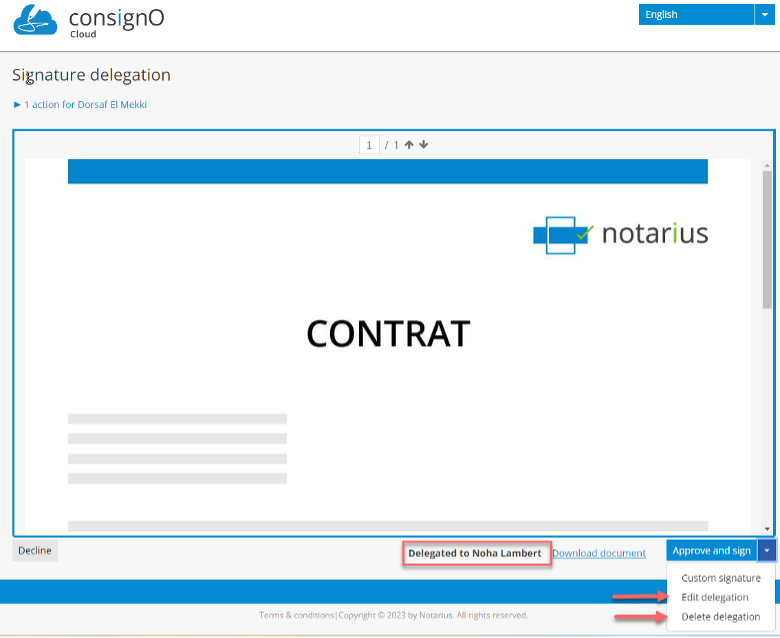
Recipients Group
A recipients group allows a project initiator to assign a signature to multiple people, but only one person’s signature is required.
On the project creation page, click on the “…” options button to display the Recipients group function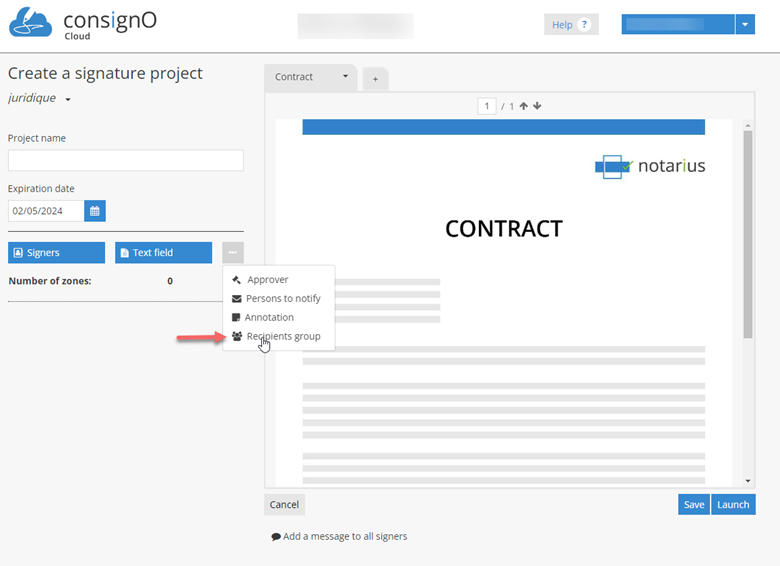
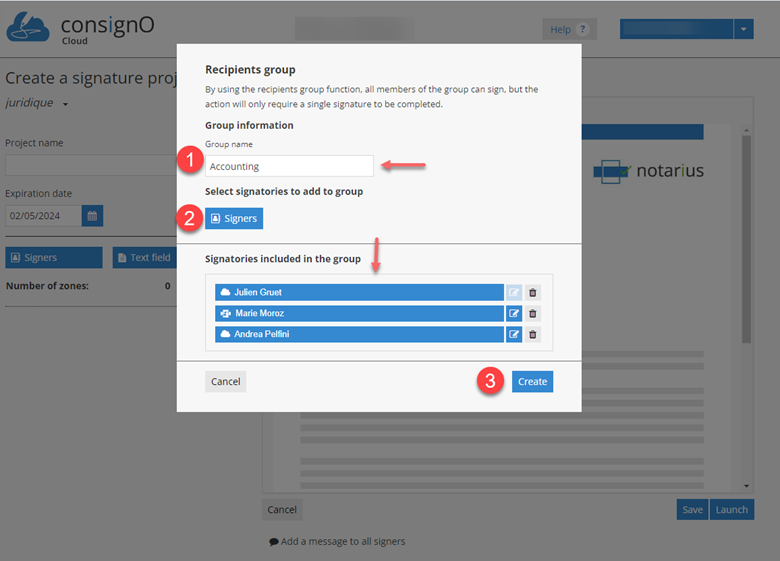
Then, please indicate:
- the name of the group,
- select the signatories to add from the address book or create a new signatory and
- click on “Create”
The group is created and you can place the zone on the document to sign
The recipients group behaves like all the signatories; it can be edited, deleted, replaced, assigned to a text field, etc.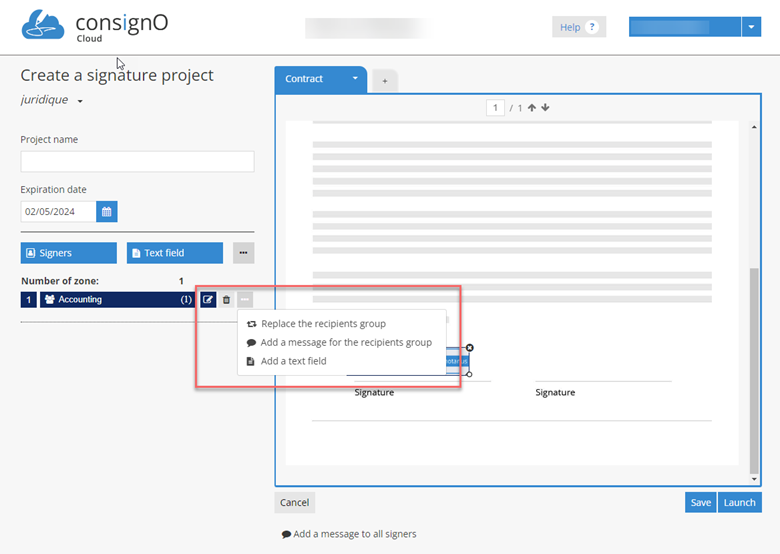
Once the project is launched, each member of the group receives an email asking them to sign a signature project.
As we are in a group of recipients, the signature of only one member of the group is required to complete the project.
The first person in the group to access and sign the signature project will be considered as a signatory in the project.
Tip: Currently, the recipients group is not saved in the Address Book for easy reuse without having to recreate it. You can avoid this step by duplicating this project directly from the dashboard and thus reuse the recipient group.
In-Person Signing
Hardware Configuration and Considerations
• For the best signing experience, it is recommended to use a touchscreen with a stylus during in-person signing sessions, as using a mouse or touchpad is less pleasant.
• Furthermore, in order to protect the data displayed on the project initiator’s station, it is recommended to use a secondary screen in extended mode, and to move the signature session tab to this screen, thus avoiding access to the data displayed on the project initiator screen once the signature is completed.
• Also see our FAQ.
In person signing allows a project initiator to require that the signature be executed in person in a signature project.
1. Creation of a contact with in-person signing
When creating or editing a contact, it is possible to indicate that the signature will be performed in person.
In the “Contact Information” window, by checking the “Signature will be completed in person” box, it is required that the signer participate in the project in person.
Note: It is important to note that the signer’s email address is not required to create a signature project with in person signing. However, if you want to share the final document of the project once signed, you will need to edit the contact in the address book to add an email address.
2. The project initiator step with in-person signing
A. Create a project with one or more signatories in person and launch the project
Note: In-person signers are colored purple to distinguish them from other types of signers.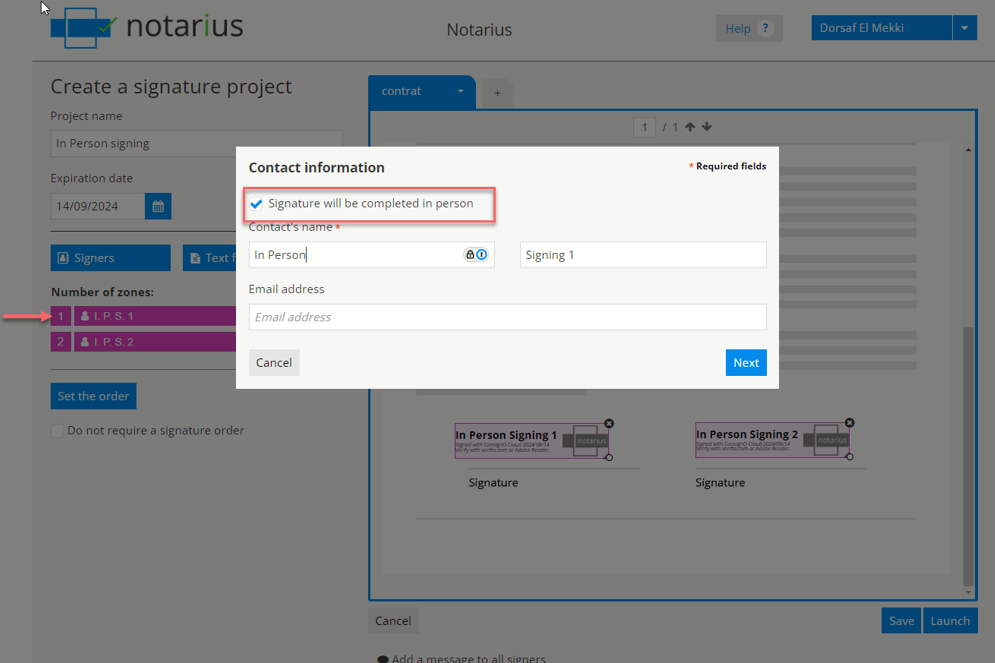
B. Start the in-person signing session
Go to the project initiator dashboard and click on the “Sign this project in person” button.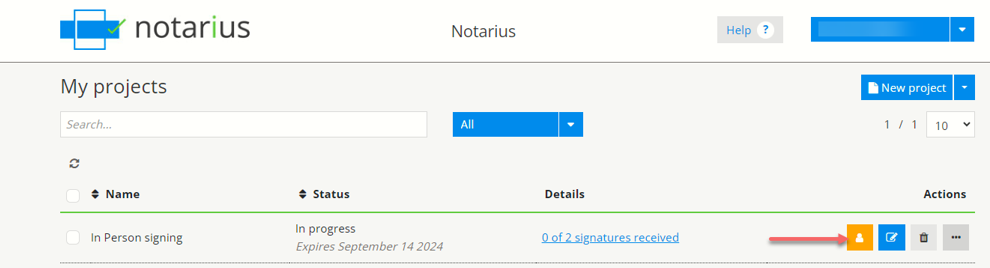
C. Confirmation of the start of the session in person signing and selection of the person to whom control of the session will be given – the signatory
A message confirms the start of the signing session and the choice of the signer.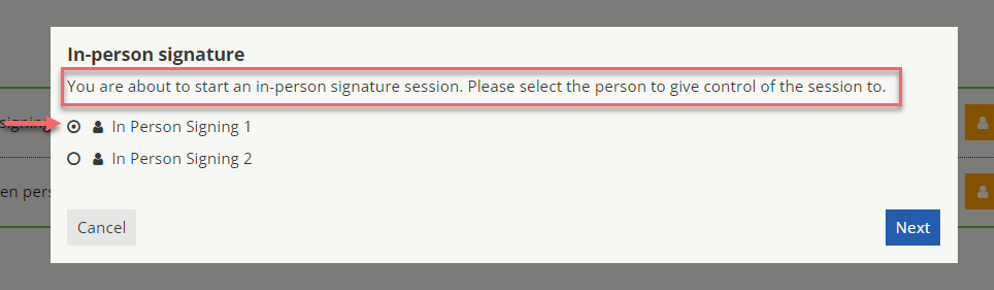
A new window is then opened: the project initiator can now give control of the session to the signatory.
3. Steps on the signatory side
A. Confirmation of identity
First, the signatory must validate the information presented to him.
B. Receiving an authentication factor in order to access the signing room
In the example below, we have the receipt of an SMS code as an authentication factor.
Note: This step depends on your organization’s configuration, if no authentication factor is required to enter the signing room, this step will not apply.
C. Signing the document
The signer must click “Approve and Sign” to sign the document.
D. End of signing session
The signature ends the in-person signing session and the signer must return control of the session to the project initiator.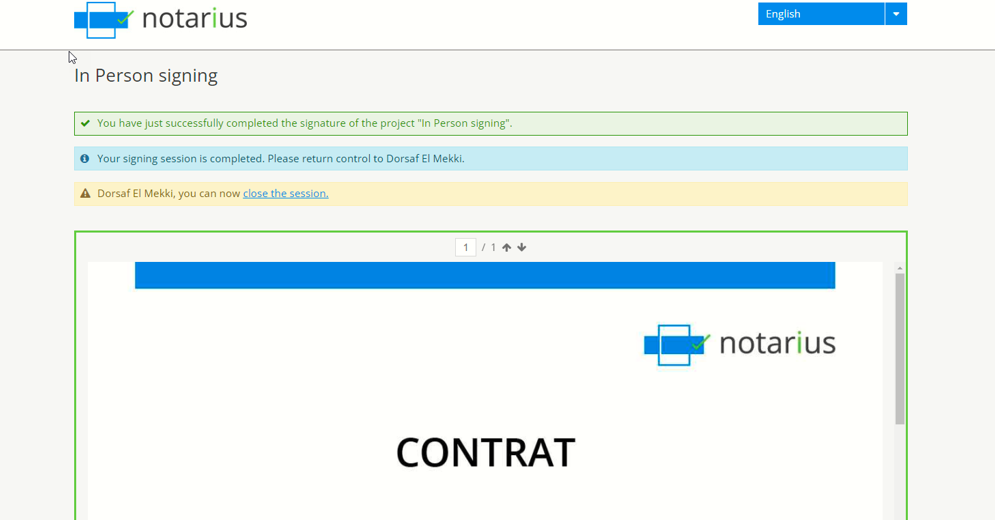
Documents Sharing
The document sharing function allows a project initiator to securely transmit one or more documents to one or more recipients of their choice.
Warnings: All shared documents are converted to PDF format within the app. Therefore, the recipient will download the shared document(s) in .pdf format. A document sharing is considered a project and will therefore be deducted from the total number of projects available in your plan.
Access to document sharing
To access the function please click on the icon ![]() in the left menu bar.
in the left menu bar.
a) Dashboard
Once on your shared documents dashboard, you can initiate document sharing by clicking on the “Share documents” button.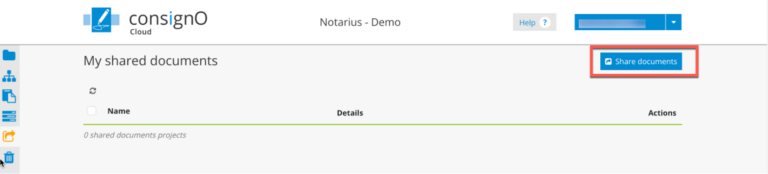
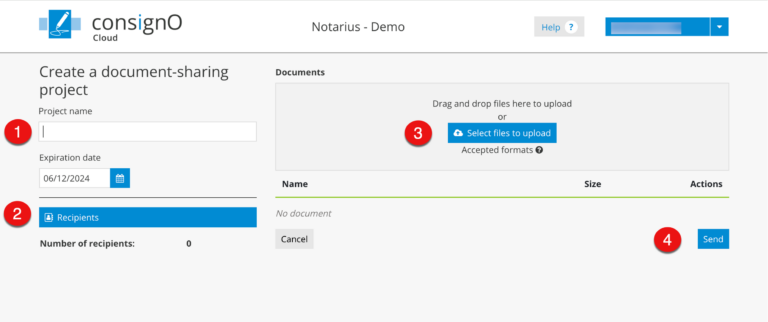
b) Document sharing creation page
On the document sharing creation page, please:
- Fill in the fields:
- Project Name
- Select an “Expiry Date”
- Assign one or more recipients:
- From the address book or:
- Create a new recipient
- Upload one or more documents to the Documents area:
- The documents are displayed in sequence
- Click on the Send button
Receiving a shared document
a) Email
When you click on the Send button, an email is sent to the recipient(s). Here is an example: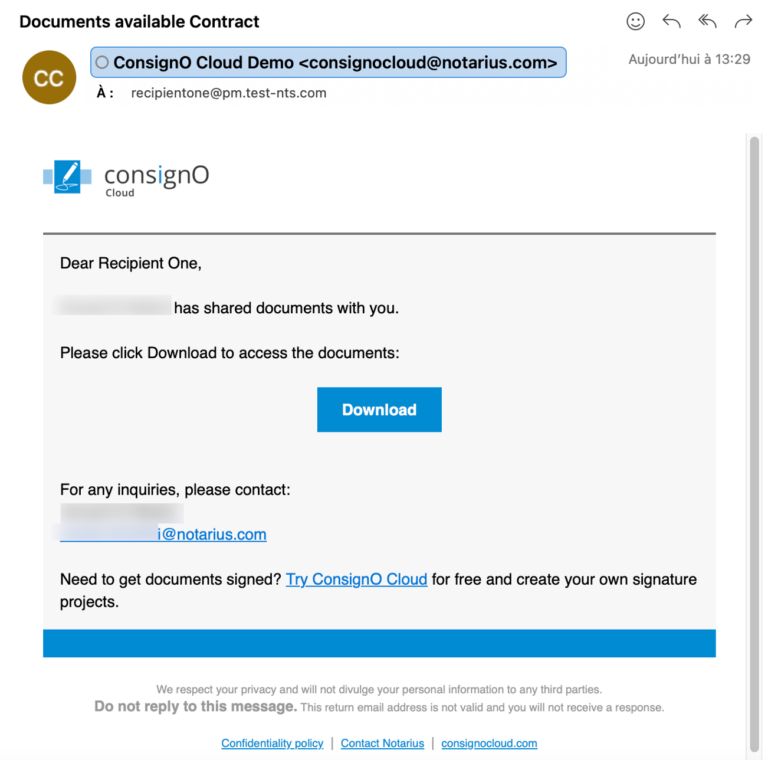
b) Downloading
By clicking on the download button, the recipient is redirected to a ConsignO Cloud page where they must confirm their identity using a second authentication factor. This can be a code received by SMS or call, or the answer to a secret question. In the example below: we have a code received by SMS: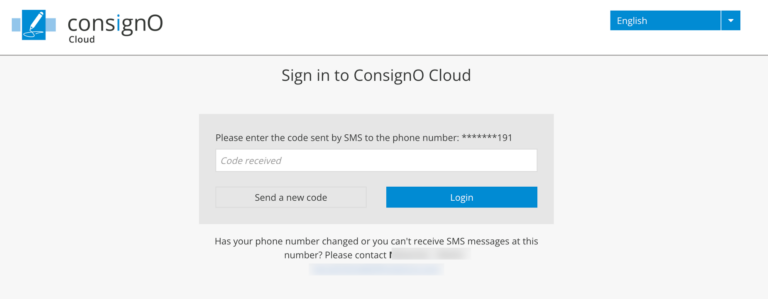
Once the second authentication factor has been validated, the download of the documents begins, and a confirmation page is displayed. Please note that a link is available on this page if the download did not start automatically.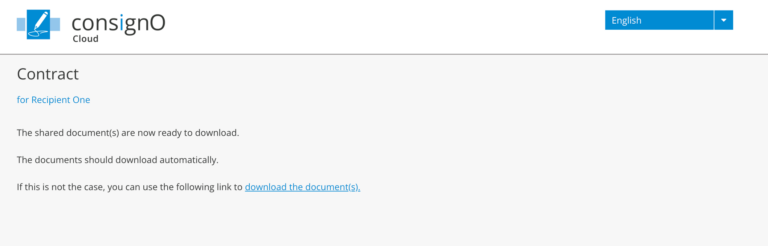
Monitoring document sharing from the instrument dashboard
When documents are shared, the project initiator can track downloads via the Document Sharing dashboard, in the “Details” column.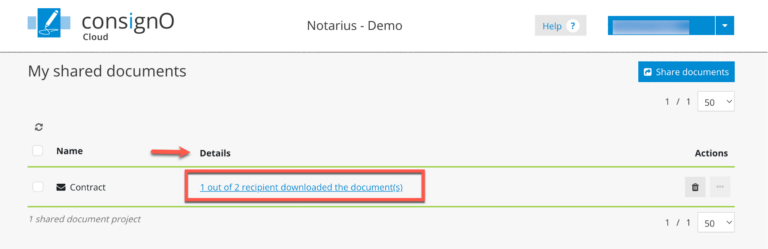
By clicking on the link, the project initiator can see when the recipients were notified (1) and when they downloaded the documents (2).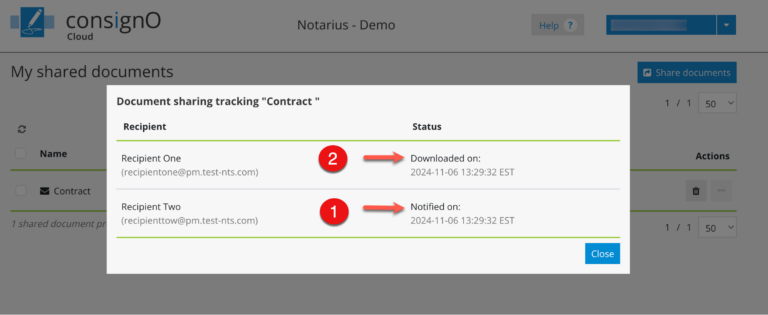
Advanced features - Enterprise plan
API Access
To access the API, the platform must authenticate itself using an authentication key and a secret code. If you hold the role of Administrator or Manager, you can access the My organization option from the main menu to obtain a secret key combination.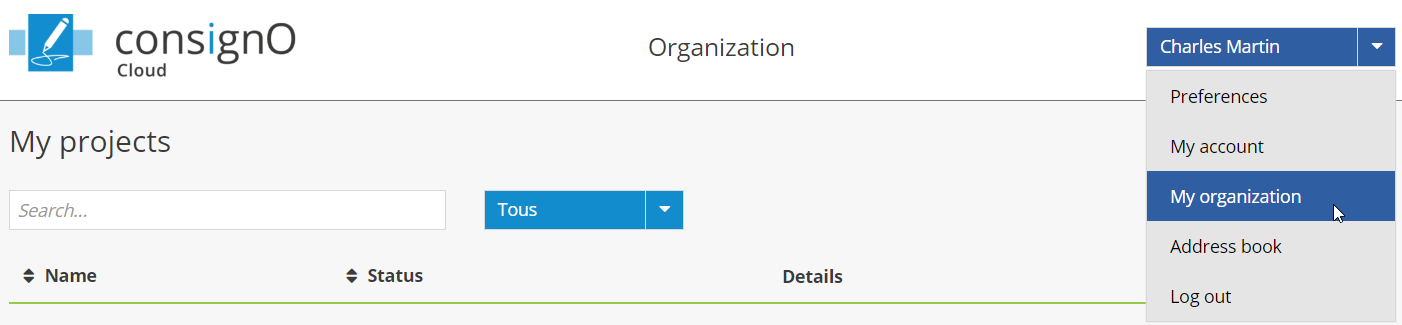
At the bottom of the My Organization page, you will find an API section where you can generate the secret key combination. To obtain this combination, click on Generate an API key.
Next click on the name of the platform that will be using the API, as well as the email address that will be used to communicate with signers, then click on Generate.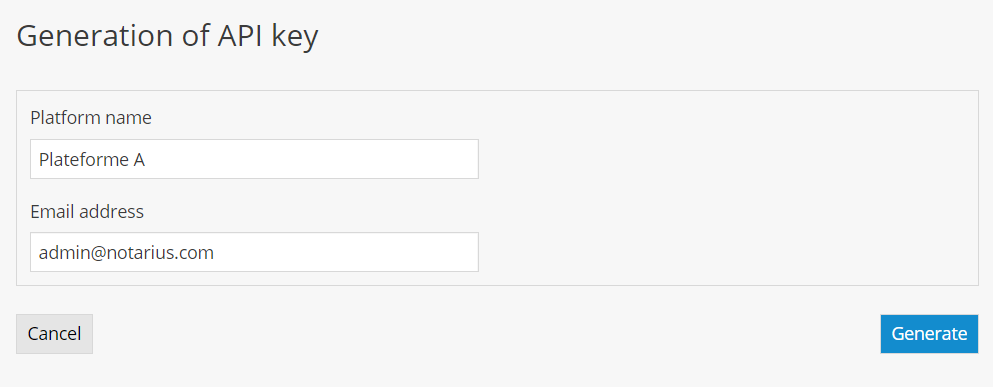
A secret key combination will then be displayed. Ensure that you copy the secret key at this step so that you can authenticate the platform. Once the secret has been saved, it will no longer be possible to view it.
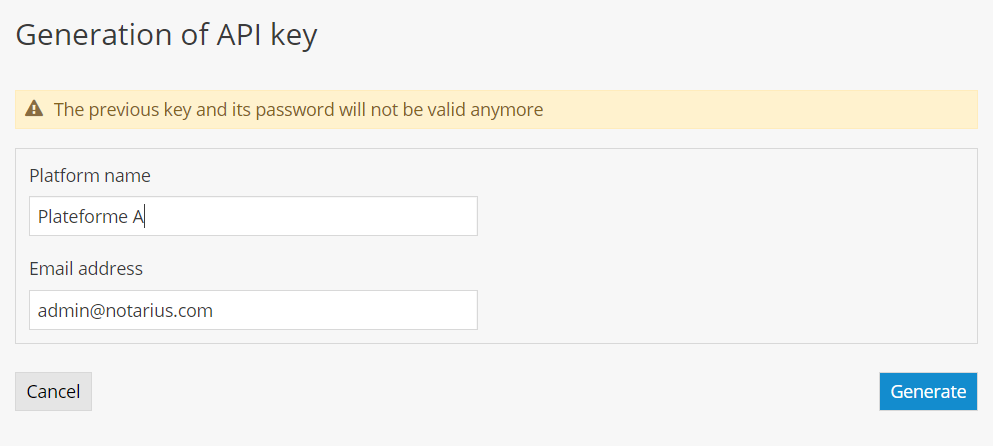
You will nevertheless still be able to modify the name of the platform and the associated email address by clicking on the crayon icon.
To generate a new secret key combination, simply click on the key icon and then on Generate. A new combination will be provided to you, but the previous key will no longer be valid.
For more information on ConsignO Cloud’s API, visit the following page:
The Certified Copy
The certified copy allows the distribution of a document to the general public without sharing the information on the identity of the signatories included in the digital signatures : email and telephone number.
The certified copy will allow you to delete digital signatures while keeping their appearance. The document will then be “stamped” according to the original and will be used in particular for distribution to the general public.
To get started, go to the My projects or Organization projects dashboard by selecting it from the left sidebar mentioned in the image below.
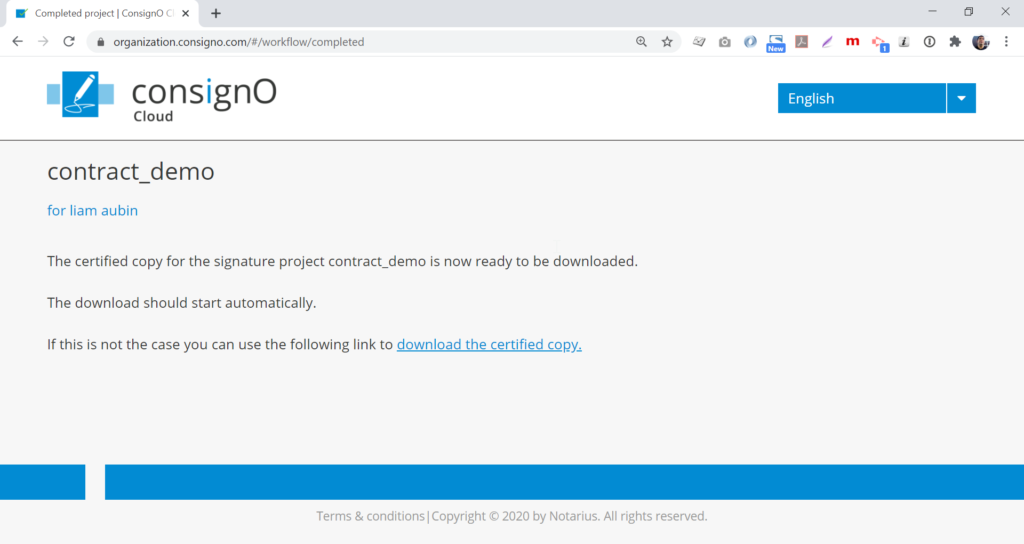
Download a certified copy
From the initiator or organization dashboard click on the Options button then the Download a certified copy option of the completed signature project.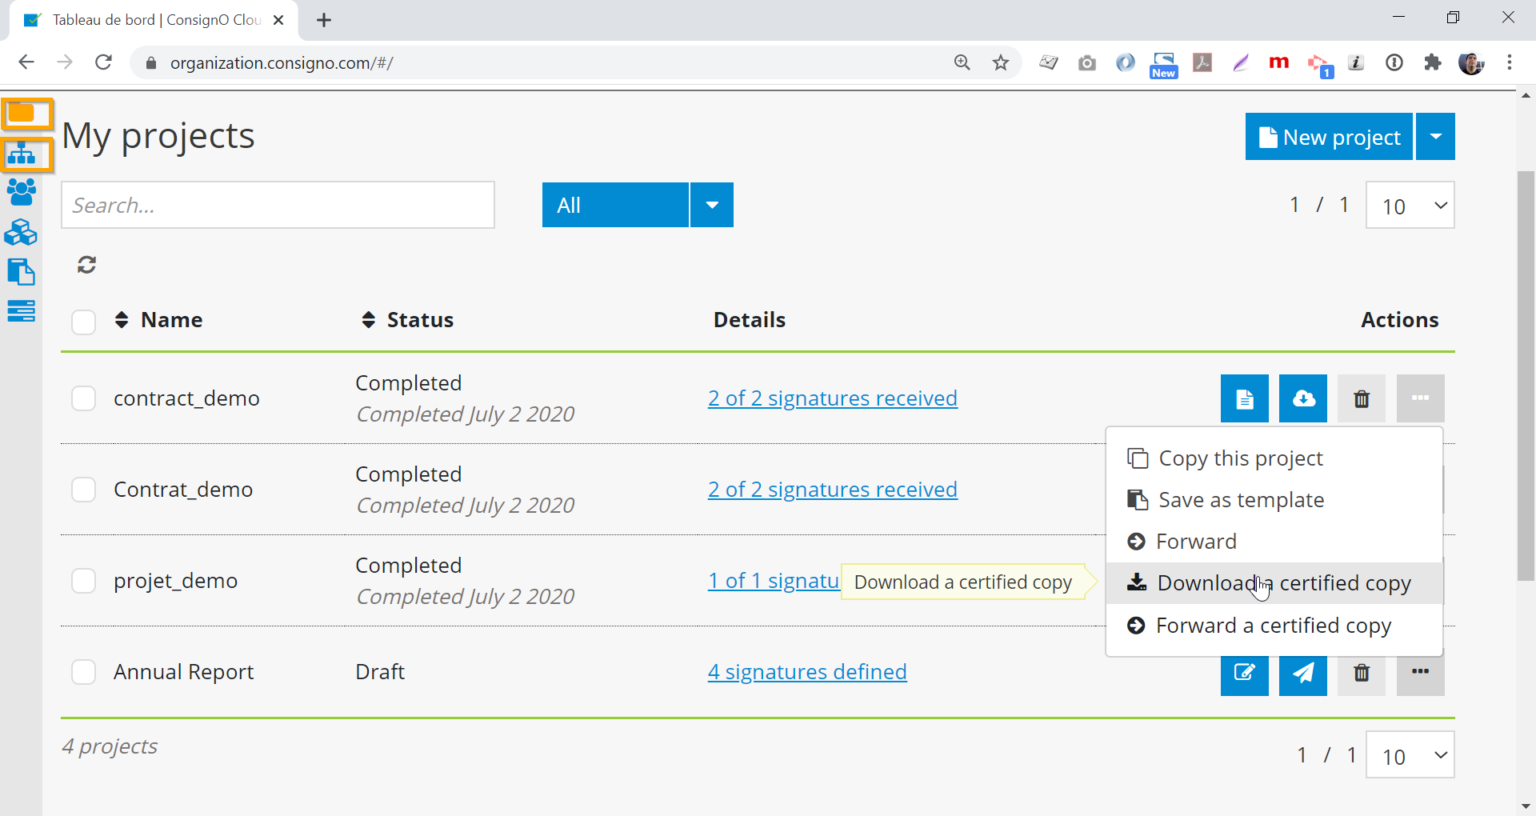
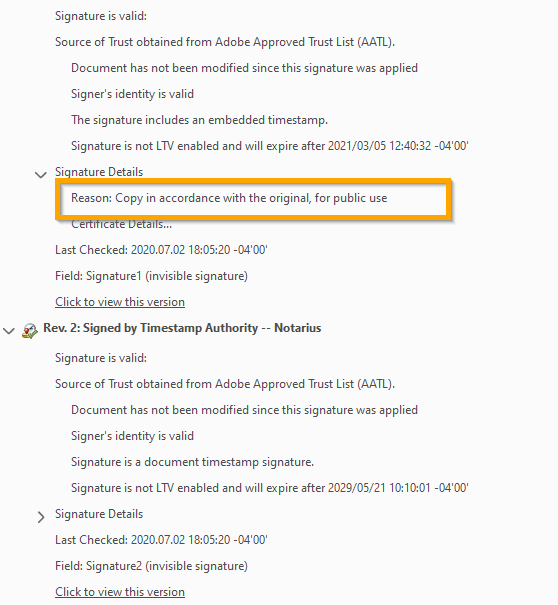
A certified copy will be downloaded; this copy displays the signature appearances without the original digital signature. However, an invisible digital signature is added to guarantee the integrity of the certified copy. The detail of this digital signature will indicate the certified copy to the original, for use by the public (see below). A document timestamp will also be present.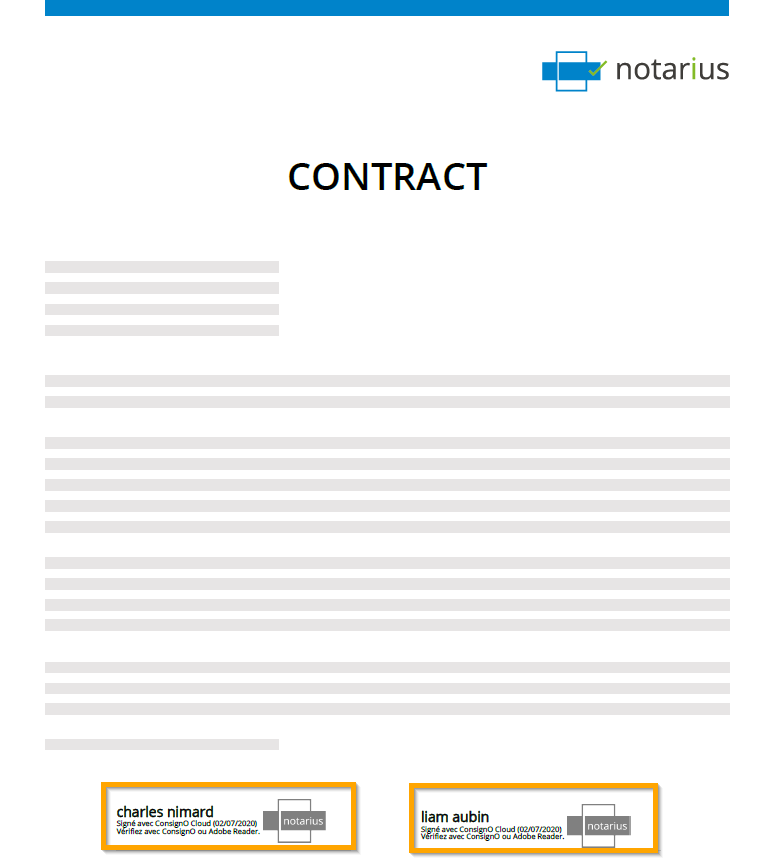
Forward a certified copy
From the initiator or organization dashboard, click on the Options button and then the Forward a certified copy option of the completed signature project.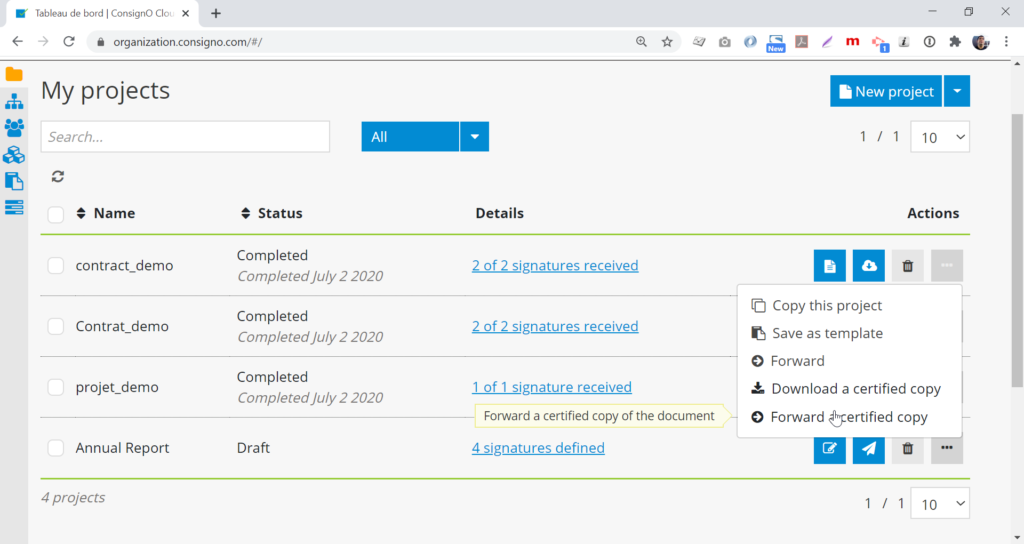
Select the recipient(s) in the address book to whom we would like to send the certified copy of the completed signature project, then click on the Forward button.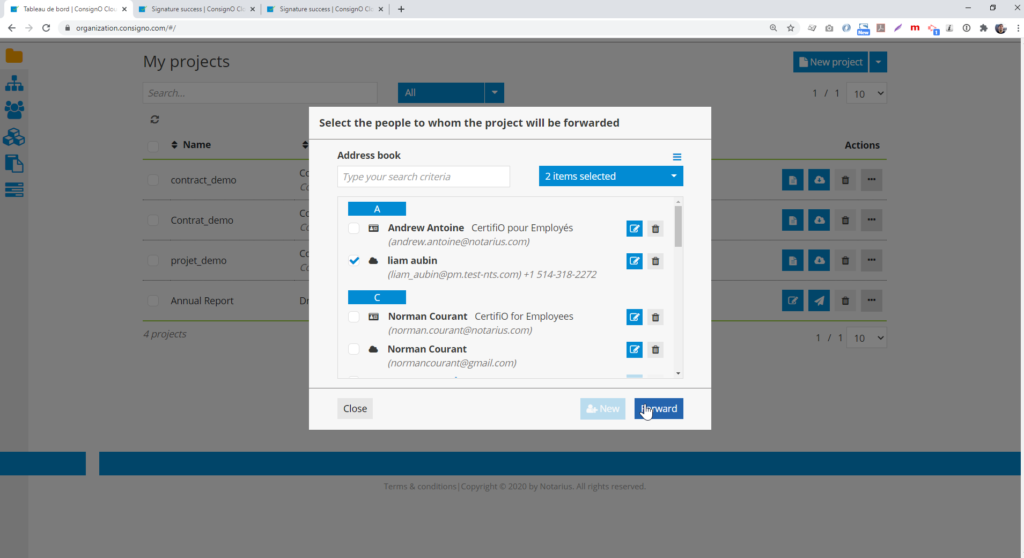
A message confirming the sending of the certified copy will be displayed in the dashboard.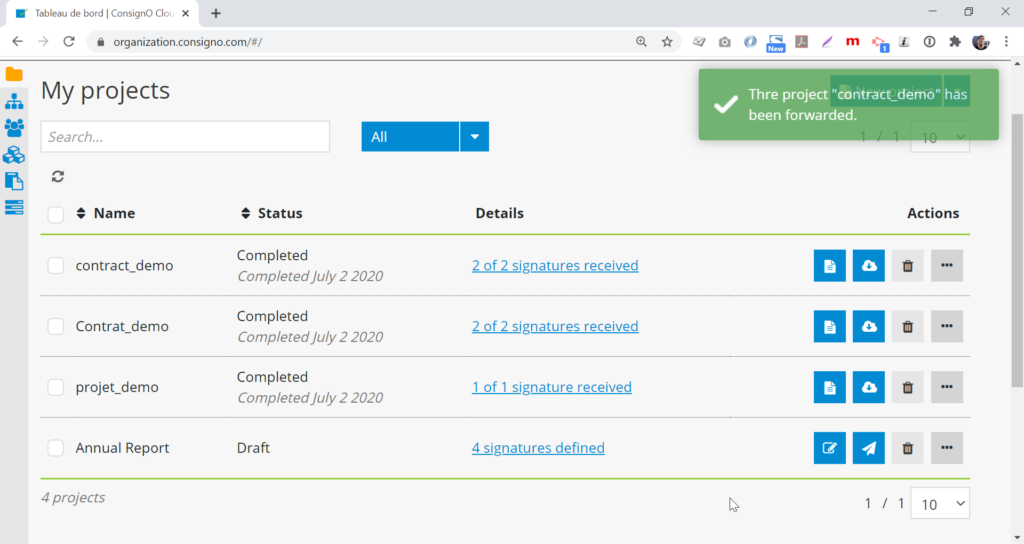
The recipient(s) to whom the certified copy was sent will receive an email indicating the name of the project with a Download button.
The click on the Download button will take you to a ConsignO Cloud login page where the recipient will have to enter his second authentication factor before being able to access the certified copy.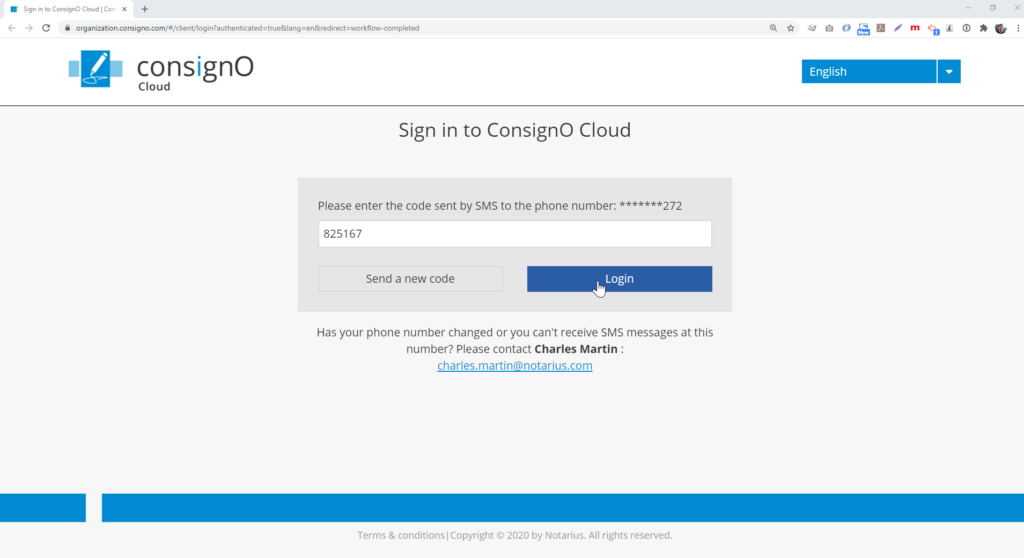
Entering the second factor gives access to the automatic download of the certified copy as well as to the download link.